For Aero Select, Laser Select, Santina Select and Solaris Select:
Ozone Generator Installation Instructions
Your "ozone-ready" spa is designed for easy field conversion to an ozone generator system. You will need:
A. H319000 Complete Ozone Conversion Kit
or
B. H318000 Plumbing Kit plus an ozone generator of your choice.
Contents of Plumbing Kit:
• Two (2) hose clamps
• Two (2) screws, #10 x 3/4"
• One (1) ozone generator mounting board
• Two (2) screws, #6 x 1-1/4"
• Tie wrap straps
• One (1) ozone injector
Instructions:
1. Turn OFF electrical power and drain the spa.
2. Temporarily remove the equipment access skirt panel and other skirt panels as required for access to the
plumbing.
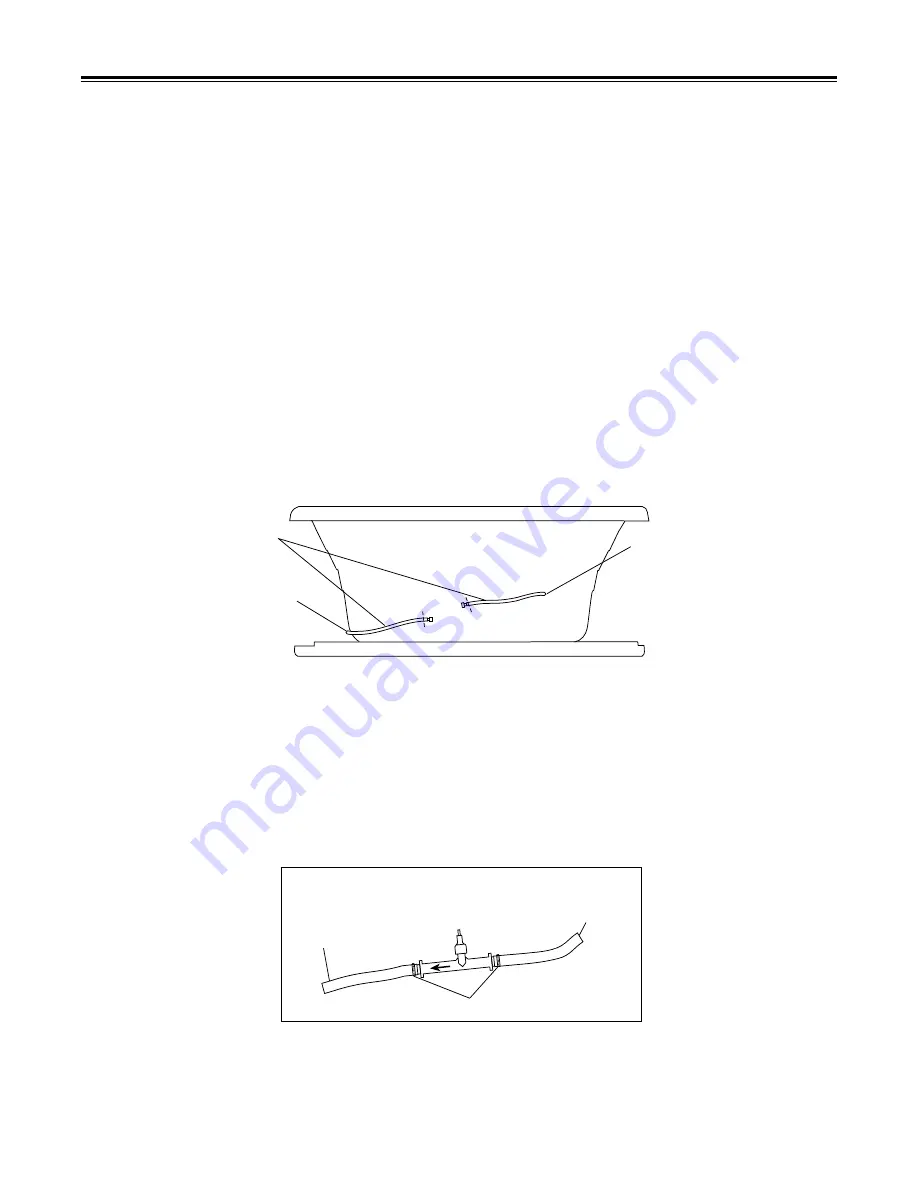
3. Cut off and discard the PVC caps at the end of each length of flexible vinyl tubing as shown in Figure 1.
4. Insert Injector fitting into flexible vinyl tubing and secure with hose clamps (2). Do NOT change the length of
the flexible vinyl tubing downstream of the red ozone injector. Observe the "proper orientation" of the red
ozone injector; make sure the molded-in arrow symbol points downstream to the footwell fitting. See Figure 2.
(Some items not shown for clarity)
FIGURE 1 - "OZONE-READY" SPA BEFORE CONVERSION (SKIRTS REMOVED)
3/4" VINYL TUBING
WITH CAPPED END
(CUT OFF CAP)
FROM DISCHARGE
MANIFOLD OR
PUMP DISCHARGE
TO FOOTWELL FITTING
FIGURE 2 - OZONE INJECTOR LINE CONVERSION
FROM
DISCHARGE
(NOTE: Flow arrow on injector points downstream to footwell.)
TO
FOOTWELL
FITTING
IN-LINE DETAILS
HOSE CLAMPS
INSTALLATION
10


