1
2
GN9350e
GN9330e
GN9330e USB
4.6 Switching a call from desk telephone handset to headset
It’s possible to switch a call in progress from the telephone’s handset to the headset:
1. Remove the headset from base, or if already out, press the headset’s talk button.
This establishes a link.
–> The headset’s link indicator will start flashing and the call will be switched to the headset.
Note:
Do not place handset before the call is over, as this will end the call.
GN9350e
GN9330e
GN9330e USB
4.7 New master headset pairing to base
You may designate a new master headset for your base.
Important:
Before designating a new master headset, ensure that the original headset’s link to the base unit is
closed by pressing its talk button. The telephone or USB indicator should not flash.
To designate a new master headset:
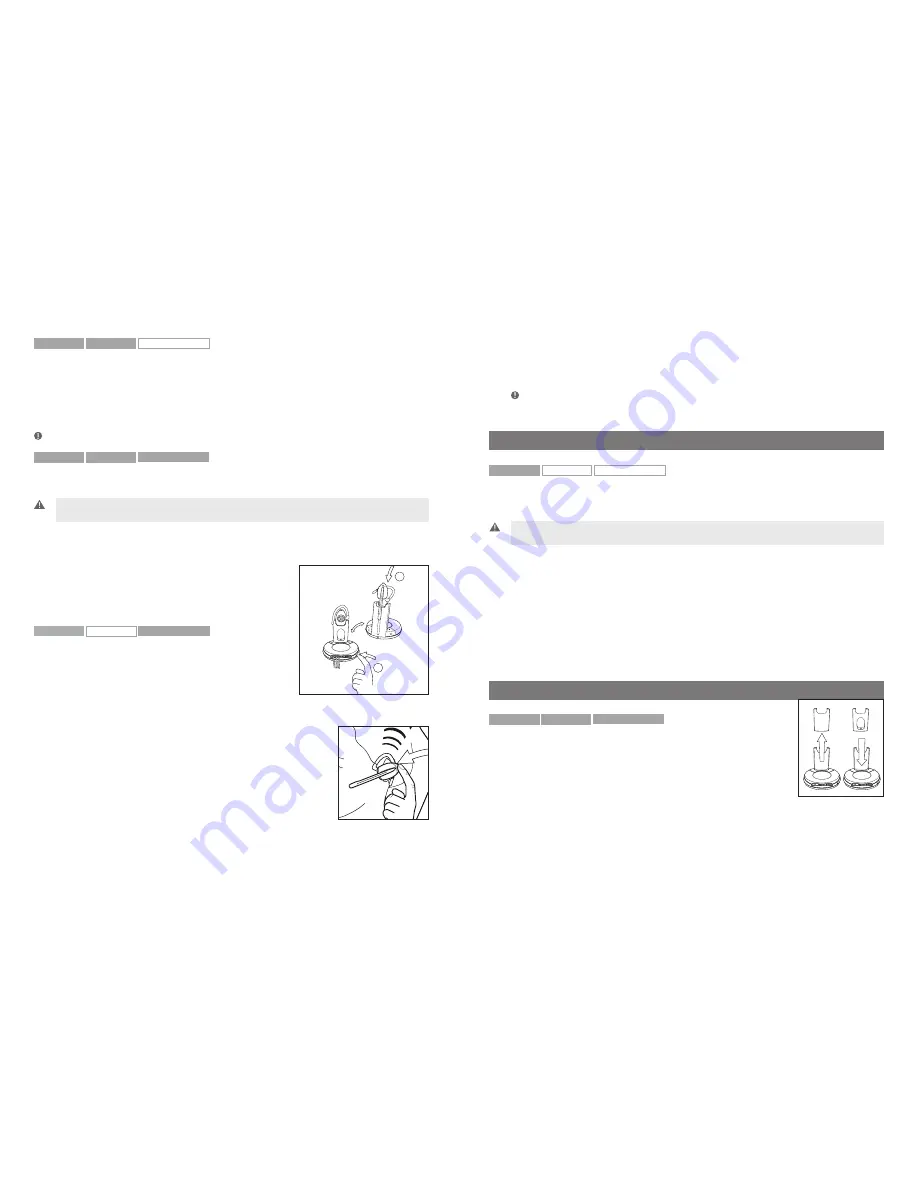
1. Place the new master headset into the charging cradle of the base.
2. Press the base’s pairing button.
–> Both the telephone and USB mode buttons on the
base, and the headset’s link indicator, will light for
2 seconds. This indicates successful pairing of the new
master headset.
GN9350e
GN9330e
GN9330e USB
4.8 Establishing a Clean Audio Mode link
In the PC phone (VoIP) use case many Unified
Communication applications (e.g. Cisco IP Communicator
or Microsoft® Lync™ 2010) deliver voice mails in the inbox
of the e-mail application (e.g. Outlook).
Further, many users have a separate application for conference
calls (with or without video). In these use case it is also very relevant to use your headset.
In situations where other applications than the PC phone application
wants to use the headset (as just described), you need to establish
a Clean Audio Mode link without triggering the soft phone hook-off
command.
The Clean Audio Mode functionality is implemented as a double-tap
on the headset’s talk button.
For example, if you want to participate in a conference call or listen to a voice-mail delivered by
email, simply activate the Clean Audio Mode by double-tapping the headset’s talk button on
the headset. When ending the conference call just single tap the headset’s talk button to close
the Clean Audio Mode.
Note:
that you have to set the Audio Preference in the Windows operation system to the GN9330e or GN9350e.
Also, in the conference call application (e.g. Windows Live Meeting), you have to set the Audio preferences to the
GN9330e or GN9350e.
5. Use with DECT cordless telephones
GN9350e
GN9330e
GN9330e USB
Your headset can also be used with DECT cordless telephones (Digital Enhanced Cordless
Telecommunication), which are GAP-compatible (Generic Access Profile). You must first pair the
headset to the base unit of the cordless telephone.
Important:
Your headset’s authentication code is 0000, which is the same code as for most DECT
cordless telephones. Your headset will only work with cordless telephones with the 0000 code.
To pair your headset to your DECT cordless telephone:
1. Press and hold down the headset’s talk button and mute button (at tip of volume control)
for 5 seconds.
–> The headset’s link indicator will flash rapidly.
2. Activate the cordless telephone’s GAP mode. Consult your cordless telephone’s manual GAP
compatibility/pairing instructions.
–> The headset’s link indicator will light for 2 seconds to indicate successful pairing. Your
headset is now ready to use with your cordless telephone. Consult your cordless telephone’s
user manual for using your headset with your cordless telephone.
3. Note that the headset must be re-paired to the GN9350 base to resume normal operation.
6. Replacing the battery pack (GN accessory)
GN9350e
GN9330e
GN9330e USB
6.1 Adding extra battery charging facility
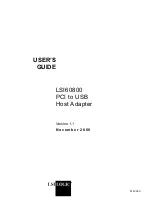
An extra battery charging facility is available as an accessory. This can
be attached to your base to allow you to charge an extra battery.
To add the extra battery charging facility cover:
1. Remove the blind cover from the base by sliding it upward until
removed.
2. Slide the extra battery charger into the base charge tower until it clicks in place.
The extra battery can be charged in its receptor on the back of the charge tower. An indicator
above the receptor will light when the battery is placed correctly and is charging. The indicator
will turn off when battery is fully charged.
16
17


