background image


9

REMOTE CONTROL BATTERY


REMOTE CONTROL BATTERY   


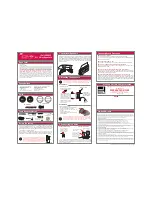
The remote control requires one “button-type” 3-volt lithium battery, included. To 

extend the life of the original battery we have inserted a small clear plastic spacer 

tab between the lithium battery and the battery terminal. You must remove this   

battery spacer tab before you can use the remote control. To remove the tab, pull 

it in the direction of the arrow in the illustration as shown.   


When the operation of the remote control becomes intermittent or unsatisfactory, 

replace the original battery with a new 3-volt lithium battery.   

1.) Slide out the battery holder from the remote control case. 

2.) Place one 3V CR2025 battery in the battery holder, observing the positive (+) 

direction. If the battery is placed incorrectly the remote control will not work.   

CAUTION

:  Danger of explosion if the battery is placed incorrectly.  Replace  


only with the same or equivalent type. 

3.) Insert the battery holder into the battery slot.   


Notes:


Use a well-known brand of cell battery for longest life and best   


performance. When the remote operation becomes intermittent,   

   replace 

the 

battery. 


Summary of Contents for TIMEDOCK

Page 1: ......

Page 2: ...quired when the apparatus has been damaged in any way such as power supply cord or plug is damaged liquid has been spilled or objects have fallen into the apparatus the apparatus has been exposed to rain or moisture does not operate normally or has been dropped 14 This appliance shall not be exposed to dripping or splashing water and no object filled with l liquids such as vases shall be placed on...

Page 3: ...g On the power make certain that power cord is properly installed When moving the set be sure to first disconnect the power cord PREPARATION FOR USE UNPACKING AND SET UP Carefully remove all the components from the display carton and verify that you have all the necessary components before you dispose of the display carton Remove all packing materials from the individual components Remove any desc...

Page 4: ...ould expose you to electric shock PROTECT YOUR FURNITURE This model is equipped with non skid rubber feet to prevent the product from moving when you operate the controls These feet are made from non migrating rubber material specially formulated to avoid leaving any marks or stains on your furniture However certain types of oil based furniture polishes wood preservatives or cleaning sprays may ca...

Page 5: ...5 LOCATION OF CONTROLS AND INDICATORS TOP PANEL FRONT PANEL ...

Page 6: ...6 BACK PANEL BOTTOM Display ...

Page 7: ...Pod Connector 6 SNOOZE Button 7 SLEEP Button 8 TIME Button 9 HOUR Button 10 MINUTE Button 11 ALARM Button 12 WAKE BY Switch 13 DISPLAY 14 DIMMER Switch 15 VIDEO Output 16 AUX Input 17 SUBWOOFER Output 18 AC Power Input 19 Battery Compartment 20 PM Indicator 21 Alarm Indicator ...

Page 8: ...tton 3 SKIP TUNE Button 4 ENTER Button 5 SKIP TUNE Button 6 MENU Button 7 IPOD DOWN Button 8 iPod AUX Button 9 TREBLE Button 10 TREBLE Button 11 BASS Button 12 BASS Button 13 MUTE Button 14 VOLUME Button 15 VOLUME Button Remote Control ...

Page 9: ...n of the remote control becomes intermittent or unsatisfactory replace the original battery with a new 3 volt lithium battery 1 Slide out the battery holder from the remote control case 2 Place one 3V CR2025 battery in the battery holder observing the positive direction If the battery is placed incorrectly the remote control will not work CAUTION Danger of explosion if the battery is placed incorr...

Page 10: ...y 3 Press the TIME button again to confirm and the clock begin to run 4 The time is defaulted in 12 hour format The PM indicator will light up when it is afternoon SLEEP FUNCTION This system includes a programmable sleep timer that allows you to set the unit to turn off between the 5 minutes to 2 hours 1 Sleep function can only be operated under OFF and AUTO mode 2 Slide the FUNCTION switch to eit...

Page 11: ...n 12 HOUR format The PM indicator will light up when it is afternoon 5 The alarm wake up source can be set by using the WAKE BY switch Select MUSIC means the alarm will activate by the following sequence i If iPod is docked the alarm is defaulted to Wake by iPod ii If No iPod is docked the alarm will set to Wake by Buzzer Select BUZZ means the alarm will activate by buzzer 6 Press the ALARM button...

Page 12: ... In order to prevent unwanted distortion during iPod playback it is recommended that you set the EQ in your iPod to the Off position Go to the Main Menu in your iPod and then select the Settings Menu select the EQ Setting and make sure that the EQ function is set to Off Main Menu Settings Menu EQ Setting Select Off Note We have also included one flat adaptor with no opening at all This serves as a...

Page 13: ...splay will show the range of b 03 to b 3 7 Press TREBLE TREBLE on the remote control to adjust the BASS level it will enhance reduce the TREBLE effect and the display will show the range of t 03 to t 3 8 When iPod video is plugged into this unit the video can be viewed from other display by connecting the VIDEO OUT jack to the desired video display video connection cable is not included Remarks Pl...

Page 14: ...iary source On and operate it as usual The sound from the auxiliary source will be heard through the speakers of this system 5 Adjust the VOLUME level controls of this system as desired SUBWOOFER OUT Connect the Audio Output jacks of your active subwoofer to the SUBWOOFER OUT jack on the back panel of the unit Then the unit will become a 2 1 system and the bass would be able to sound from the exte...

Page 15: ...sed for an extended period of time CARE AND MAINTENANCE CARE OF THE CABINET If the cabinet becomes dusty wipe it with a soft dry dust cloth Do not use any wax polish sprays or abrasive cleaners on the cabinet CAUTION Never allow any water or other liquids to get inside the unit while cleaning TECHNICAL INFORMATION AC Power AC 120V 60HZ DC Backup 9V 1 X 9V BATTERIES Unit Output Power 2X2 5 Watts RM...

Reviews: