


EN - 8
TruVision NVR 20 Quick Start Guide
For detailed configuration instructions and setting of NTP
time synchronization, please refer to the full User
Manual.
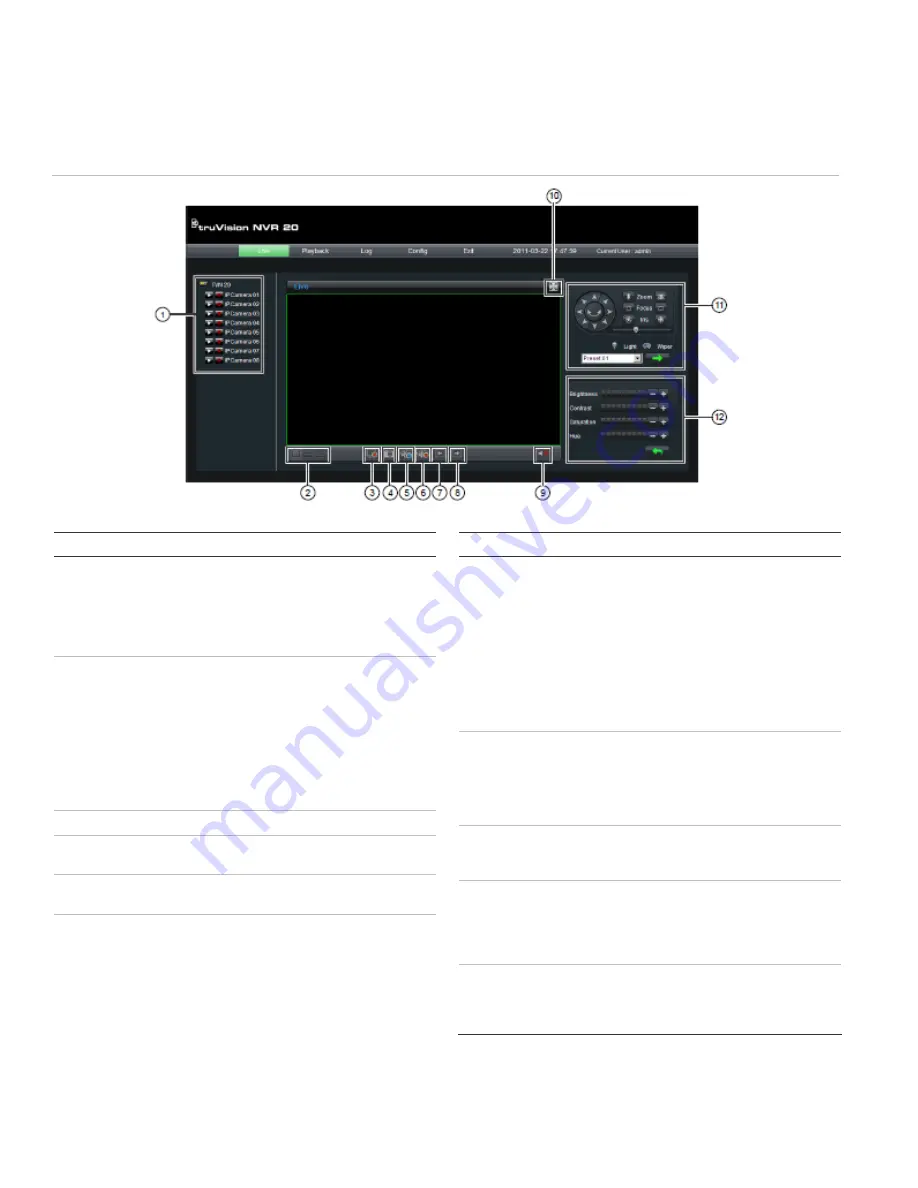
Live View (Preview)
When you first log into the TVN 20, the default page is
on the Live view tab. The various buttons are explained
in Figure 6 below.
Figure 6: Front panel
Item Name
Description
1
Connection Tree
The left hand panel shows the configured IP
cameras on the TVN 20. Clicking on an
individual camera’s arrow icon will load it into the
current display window. Depending on the
image size and mega pixel rating of the camera,
loading the camera may take several moments.
2 Live
Display
modes
The user can display cameras live in a 1-Up, 4-
Up and 9-Up View. In a multi-screen mode, the
user can simply click the TVN 20 device icon at
the top of the camera list to automatically load
as many cameras in the display (4 in 4-Up, and
9 in 9-Up).
To load a camera into a specific tile of a multi-up
display, the user just highlights the tile and then
clicks the desired camera in the list.
3
Stop Streaming
Stops all streaming
4
Capture
Takes a snapshot of the currently highlight
camera and saves it to the local browser PC.
5
Start Recording
Allows local PC recording of all cameras active
in the display.
6
Stops Recording
Stops manual recording of the displayed
streams.
Item Name
Description
7
8
Previous Page
Next Page
Allows the user to sequence through the
available cameras. If the display is in 1-Up mode
the cameras are sequenced in order with each
click of Next and Previous Page elements. If the
first camera loaded was Camera 5, pressing the
Next Page button will advance back to Camera 1
and then each successive Next Page button
click will advance to Camera 2, 3, 4 etc. If the
display is in a multi-up display, pressing next will
sequence through numerical groupings (in 4-Up,
Cameras 1-4, 5-8 etc.)
9
Audio
If the camera is capable of supporting audio and
audio is enabled for that camera on the TVN 20,
the user can turn on audio.
Clicking the arrow key brings up the audio
volume control
10
Full-screen
The display can be expanded to screen by
pressing the Expand button in the upper right
hand corner of the display.
11
PTZ Controls
The current version of the TVN 20 does not
support PTZ control. This will become available
in a subsequent firmware release. Please check
with your Interlogix representative or business
partner for the latest firmware capabilities.
12
Picture Controls
These camera controls are only available for
select IP Cameras, Please see the IP
Compatibility Chart for the listing of cameras that
support this feature.


