


EN - 4
TruVision NVR 20 Quick Start Guide
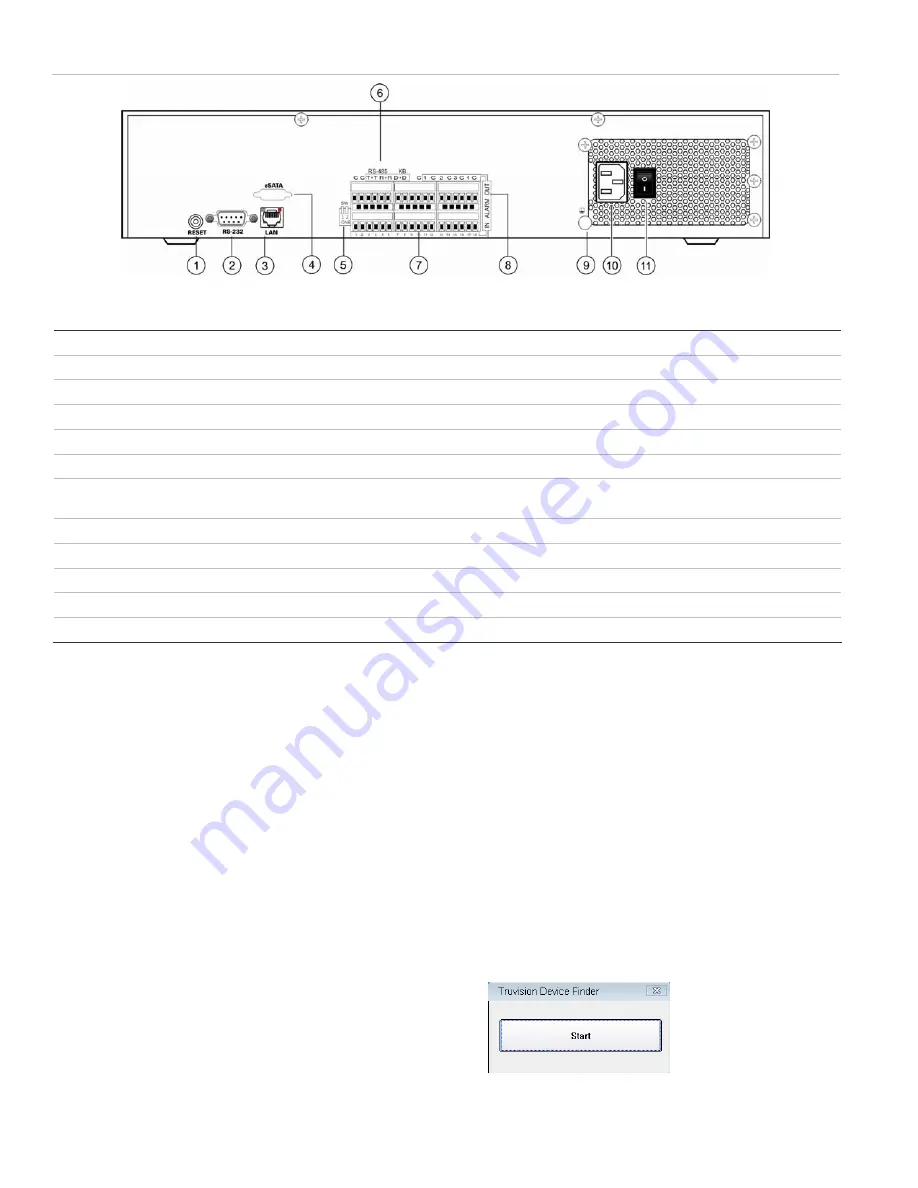
Figure 5: TVN 20 back panel
Table 2: Back panel elements
No. Element
Description
1
Reset
Resets unit to factory defaults
2
RS-232
Used for connecting PC for troubleshooting
3 LAN
10/100/1000Mbps
UTP Ethernet interface
4
eSATA
For future use
5
RS-485 Switch
For future use
6 RS-485
Connectors
For future use
7
Alarm In
16 alarm inputs (NO/NC)
8
Alarm Out
4 relay outputs
9 GND
Grounding
point
10
POWER Plug
Connection for power cord
11
Power Switch
Power On/Off (use the Power Button on front of unit to turn power off to the unit.)
TruVision Device Finder - IP
addressing
The default IP address of the TVN 20 is 192.168.1.82.
However, the TruVision Device Finder Tool is a faster
and simpler way to discover the TVN 20 and to quickly
change the IP address of the unit to match your network
needs.
This tool automatically identifies TruVision devices that
support “auto-discovery” anywhere on the network even
different subnets. The User can view and modify the IP
address of any discovered devices. The Device Finder
only detects devices on the same LAN and does not
detect devices across a VLAN. If you device is not
discovered you can configure the devices manually.
1. Insert
the
TVN 20 Product Documentation CD
included with your unit into a PC that will view video
from the TVN 20 unit.
2. Browse to the folder
IP Discovery Tool
and double
click on the
Setup
icon in the folder.
3. Click Ok to all of the prompts and the default
settings. At the end of the quick install process the
application will install a TruVision Device Finder
shortcut on the desktop.
4. Double click the shortcut.
5. From the TruVision Device Finder start page, Press
Start
.
The detection process will take only a few moments
to discover all supported TruVision devices (TVN 20,
New TruVision 1.3 and 2.0 MpX cameras as well as
TVR 10 and TVR 60).


