Interlogix TruVision NVR 20 Quick Start Manual Download Page 11


TruVision NVR 20 Quick Start Guide


11  -   EN   

1.  Insert a USB device into either one of the two USB 

ports on the front of the TVN 20. 

2.  Via the TVN 20 Browser go to the Playback tab. 

3.  Select the desired 

Date

 from the calendar of the 

video you wish to archive. 

4. Press 

the 

Search

 button to narrow the video search 

for the backup. 

5.  Pause or Stop the Playback.  

6. Select 

the 

BackUp

 button 

7.  Select the check boxes corresponding to the dates 

and times for the video you wish to download.  If the 
video you are seeking is not displayed press the 
Previous/Next page indicators at the bottom of the 
page to locate the page with the desired video. 

8. The 

Choose Disk

 drop-down will show the USB 

device you inserted into the USB port of the TVN 20 
if it was properly recognized.  Select this device. 

9.  If you want to copy the mini-player along with the 

video files select the 

Backup Player 

checkbox. 

10. Press the 

Backup

 button at the top of the window to 

begin the download.  The window will be display an 
active status bar at the top showing the progress of 
the download. 

11. The 

ARCHIVE

 LED will begin flashing blue on the 

front panel of the TVN 20 to let you know the archive 
off function is proceeding 

12.  When the device is full the 

ARCHIVE 

LED stops 

flashing the archive is completed and the device can 
be removed safely from the device. 

***** Please do not remove the USB device while the 

ARCHIVE LED is flashing******


13.  A Download is complete message box will appear 

when the process is completed.


The troubleshooting tips are the same whether the local 
COPY button is pressed or the Remote browser 
download is engaged. 
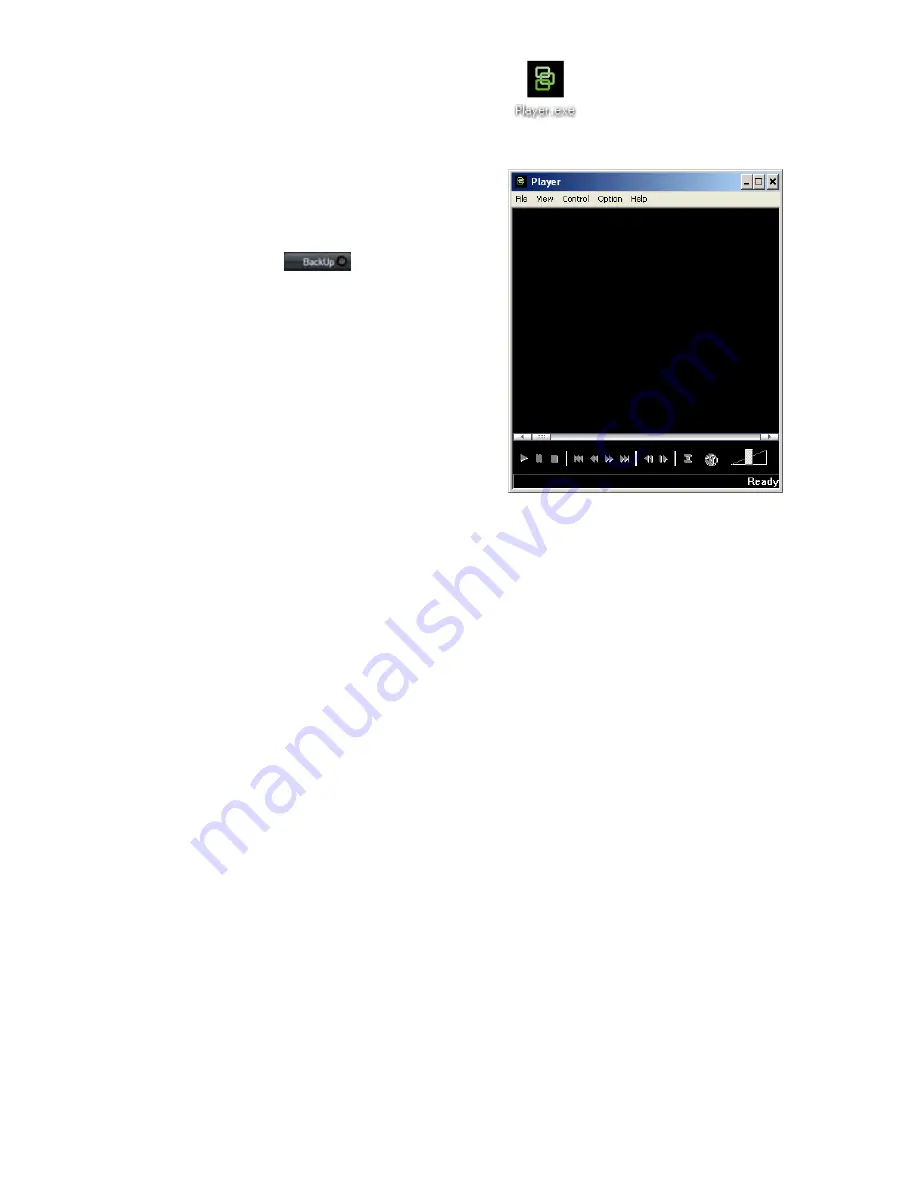
Player software 

The video on the USB device can be played using the 
Player software found on the TVN 20 Product 
Documentation CD or copied with files during the archive 
process. 

1.  Copy the software to your Desktop or Laptop PC. It 

is very small at less than 600Kb. 


2.  Double click the Icon to launch the Player. 


3.  To play video simply select 

File>Open

 and browse 

to where you video clips are located and select a file 
to play and click Open.  Alternatively, you can simply 
drag-and-drop the file onto the video window to 
immediately begin playing. 

The Player as has a set of playback controls, image 
size selections as well as the ability to save the file 
as an AVI file.  

Turning off the TVN 20 

To avoiding potentially damaging the TVN 20, use the 
proper shutdown method.  From the front panel of the 
TVN 20 press and hold the Power button for 3-5 
seconds to initiate a controlled shutdown of the unit. 


Summary of Contents for TruVision NVR 20

Page 1: ...rews TruVision NVR 20 Quick Start Guide TruVision NVR 20 User Manual IP Camera Compatibility document WEE Compliance Declaration Battery Declaration The TruVision NVR 20 product documentation CD which...

Page 2: ...software 6 All hard drives are pre configured into a single recording group and allow all connected cameras to record the same duration of video across all cameras i e all cameras will record for the...

Page 3: ...ve to USB operation A buzzer alarm will sound if an incompatible USB device is detected Blue Archiving 7 Channel LEDs Shows the connected status of IP cameras to the TVN 20 also provides indication of...

Page 4: ...k needs This tool automatically identifies TruVision devices that support auto discovery anywhere on the network even different subnets The User can view and modify the IP address of any discovered de...

Page 5: ...ew in 9 Up with 4CIF VGA Camera OR Live view in 4 Up with up to 2 0 MpX Camera Intel E6550 Dual Core class Processor at 2 33 Ghz 4MB Cache 1GB RAM HD Video Card with 256 MB POWER USER OPERATION Live v...

Page 6: ...se cameras not discovered Quick Add 1 Login in to the TVN 20 using the default User Name and Password 2 The TVN 20 Browser will display the default Live Preview page 3 Click on the Config tab at the t...

Page 7: ...used by the IP camera 7 Enter the IP Camera s User Name and Password 8 Channel No should be selected as 1 9 Click Modify to add the camera The camera will appear in the display if the parameters enter...

Page 8: ...s local PC recording of all cameras active in the display 6 Stops Recording Stops manual recording of the displayed streams Item Name Description 7 8 Previous Page Next Page Allows the user to sequenc...

Page 9: ...l slider if audio is available 7 Expand Screen The display can be expanded to screen by pressing the Expand button in the upper right hand corner of the display 8 Recording Mode LEDs Recording Mode LE...

Page 10: ...ime stamp of the video The archive function simply copies the selected video to the USB device There are two methods available to archive video from the TVN 20 using a USB memory stick plugged into th...

Page 11: ...the archive off function is proceeding 12 When the device is full the ARCHIVE LED stops flashing the archive is completed and the device can be removed safely from the device Please do not remove the...

Page 12: ...EN 12 TruVision NVR 20 Quick Start Guide...

Reviews: