


EN - 2
TruVision NVR 20 Quick Start Guide
3. Mount the unit in 19” Rack by connecting the
supplied rack ears to the unit.
4. Install the unit hard drives. See Figure 1 on page 2.
5. Connect all the devices required to the back panel of
the TVN 20 (Network Cable, Power Cord and any
alarm input devices). See Figure 2 on page 2.
6. Turn on the unit using the power switch on the back
panel.
7. All remaining setup functions will be performed used
a separate PC connecting via Internet Explorer and
the TVN 20 Browser page.
Configuring the TVN 20 summary
The TVN 20’s initial configuration should be completed
using the NVR 20 Browser. This manual will show you
the steps necessary to quickly configure a fully
operational recording solution.
Configuring a TVN 20 system requires:
1. Giving the TVN 20 an appropriate IP address with
the
TruVision Device Finder
tool.
2. Adding IP Cameras to the unit.
3. Configure the IP cameras.
4. Define the recording schedule and the recording
type for the IP Cameras (Scheduled, Continuous,
Motion/Event).
5. Define any alarm output behaviors, local unit audible
alerts, local-unit relay outputs as well as notifications
to Interlogix’s TruVision Navigator video software.
6. All hard drives are pre-configured into a single
recording group and allow all connected cameras to
record the same duration of video across all
cameras (i.e., all cameras will record for the same
number of days)
Configuration of the TVN 20 is optimized for out of the
box operation. All IP cameras added are defaulted to
record continuously. All system events HDD failure,
video loss etc. are set to report to the TruVision
Navigator software once the address of the TruVision
Navigator server is configured.
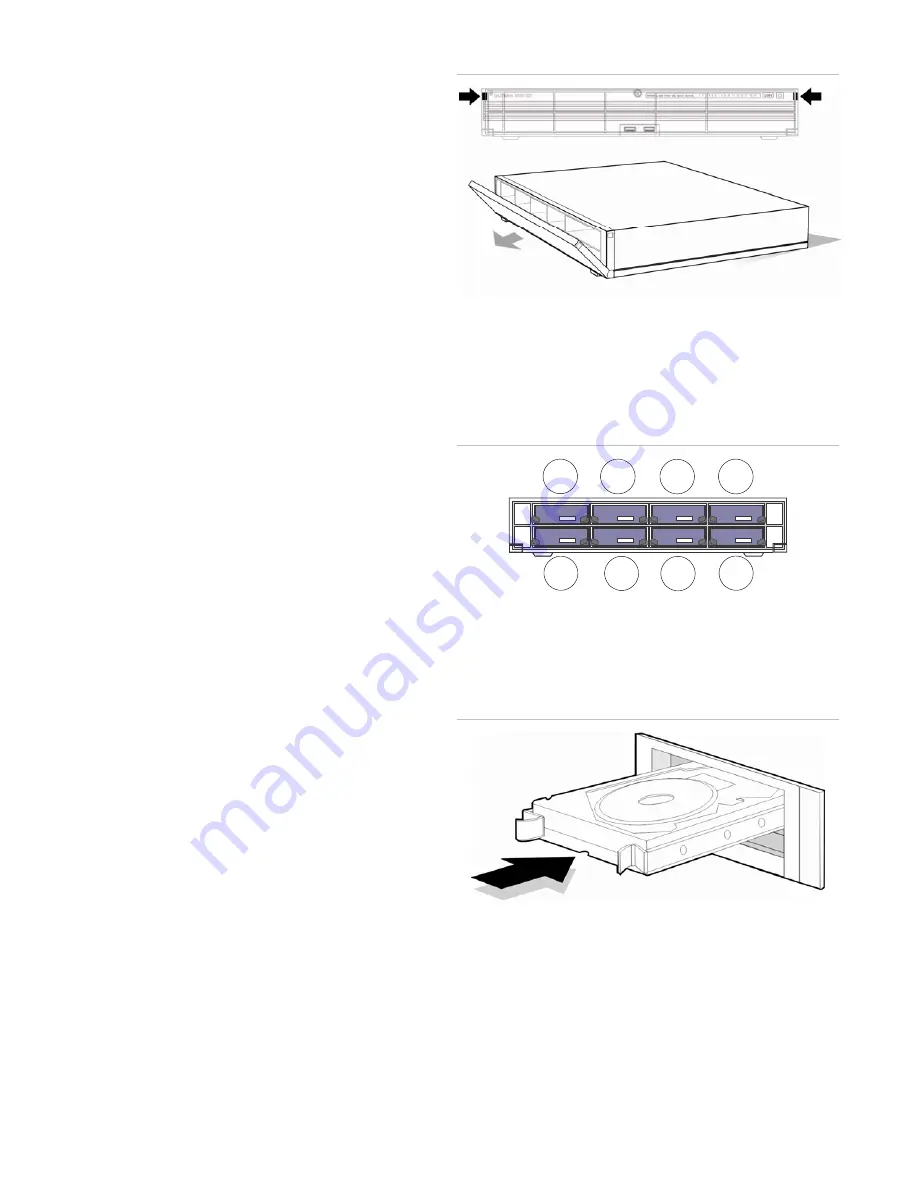
Installing hard drives in the TVN 20
1. Use the key provided in the accessories box to
unlock the front panel.
2. Press the latches on both sides of the front panel to
open it.
Figure 1: Opening the TVN 20
3. Install the hard drives as shown in figure 2. The first
drive in position number 1, the second drive in
position number 2, etc. Continue to install all the
hard drives in numerical order.
Figure 2: Hard Drive locations
1
2
3
5
6
7
8
4
4. Insert a hard drive into one of the hard drive bays
until it has fully seated into position. Repeat with the
rest of the hard drives.
Figure 3: Insert the hard drive
5. Close and re-lock the front panel.
Note:
The hard drives must be installed BEFORE powering on
the unit. The drives are defaulted to a single HDD group that is
automatically ready to record once IP cameras are added and
configured with recording schedules.


