background image

INSTEON-compatible RemoteLinc User’s Guide 

Page 10 of 18 

HOW TO USE REMOTELINC 

Using RemoteLinc’s Buttons 

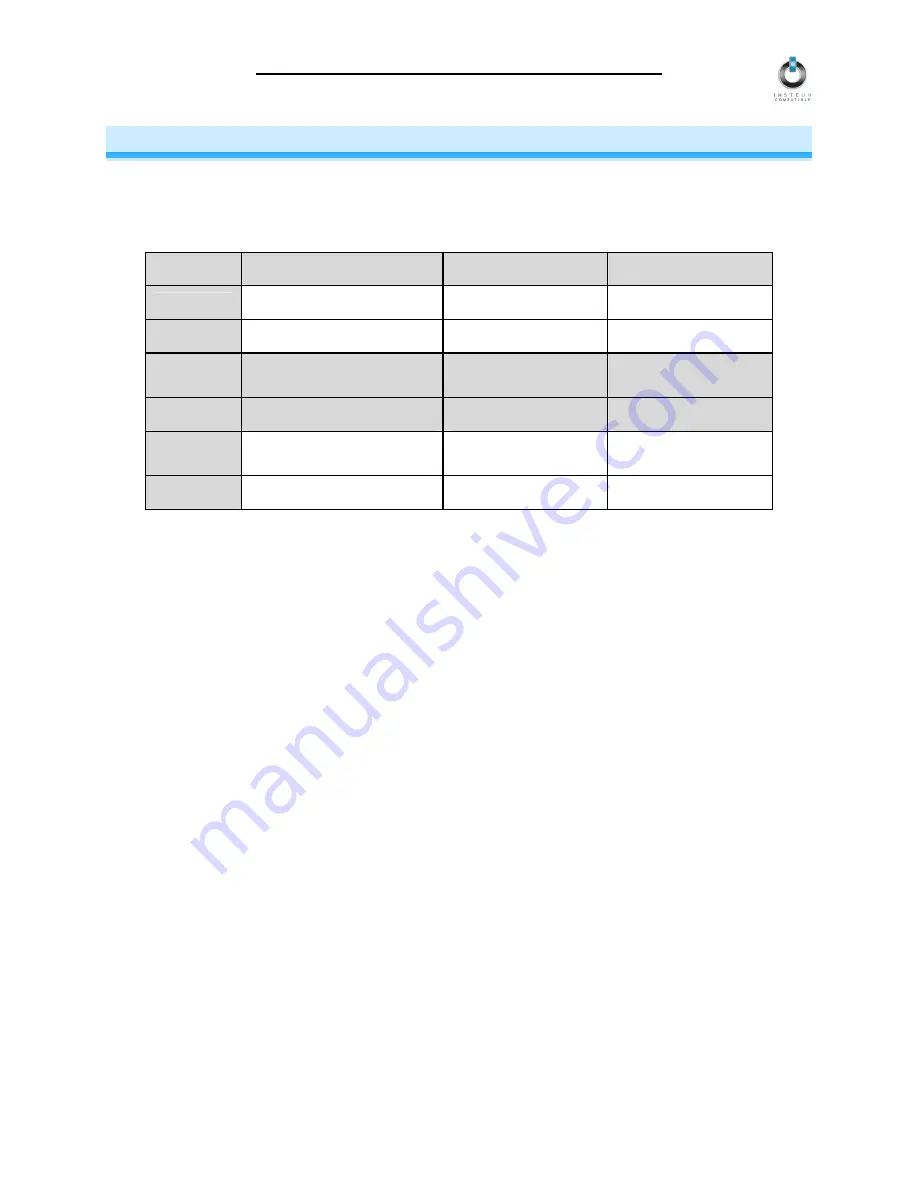
The following table gives an overview, and the sections thereafter give the details, on how to use 
RemoteLinc’s buttons. 

Button 

Applies To 

Tap 

Press and Hold 

ON 

Devices Linked to Button 

Ramp to On-Level 

Brighten 

OFF 

Devices Linked to Button 

Ramp to OFF 

Dim 

ALL ON 

All Linked Devices 

Instant on up to On-

Level 

Brighten Until 

Released 

ALL OFF 

All Linked Devices 

Instant OFF 

Dim Until Released 

BRIGHT 

Last Button Pushed 

Brighten a Little 

Brighten Until 

Released 

DIM 

Last Button Pushed 

Dim a Little 

Dim Until Released 

Using the ON and OFF Buttons 

The ON and OFF Buttons have a dual purpose.  If you tap them briefly, they turn INSTEON Devices 
linked to them on or off.  If you hold them down, the ON Button will brighten and the OFF Button will dim 
any dimming modules linked to them.  Holding down will not affect any non-dimmable (switchable) 
modules.  So, if you just want to turn things on or off, 

tap

 the appropriate button – don’t hold it down. 

  To turn ON only those INSTEON Devices linked to an ON/OFF Button, 

tap

 the ON 

side of the Button.  

RemoteLinc will beep and its Status LED will blink off twice.  Dimmable modules will go to whatever 
On-Level they were set up for, at whatever Fade Rate they were set up for.  Switchable modules will 
immediately go full on. 

  To turn OFF only those INSTEON Devices linked to an ON/OFF Button, 

tap

 the OFF 

side of the


Button.  RemoteLinc will beep and its Status LED will blink off twice.  Dimmable modules will go full 
off at whatever Fade Rate they were set up for.  Switchable modules will immediately go full off. 

  To brighten only those dimmable INSTEON Devices linked to an ON/OFF Button, 

press and hold


the ON 

side of the Button.  RemoteLinc will beep and its Status LED will blink off once.  Dimmable 

modules will begin to brighten, unless they are already fully bright.  Switchable modules will not be 
affected.  When you release the button, dimmable modules will stop going brighter and RemoteLinc’s 
Status LED will blink off again. 

  To dim only those dimmable INSTEON Devices linked to an ON/OFF Button, 

press and hold

 the 

OFF 

side of the Button.  RemoteLinc will beep and its Status LED will blink off once.  Dimmable 

modules will begin to dim, unless they are already fully off.  Switchable modules will not be affected.  
When you release the button, dimmable modules will stop dimming and RemoteLinc’s Status LED will 
blink off again. 

Summary of Contents for RemoteLinc

Page 1: ...INSTEON RemoteLinc INSTEON compatible Wireless Handheld Controller For models 2440 RemoteLinc Handheld Controller...

Page 2: ...s 7 Resetting RemoteLinc to Its Factory Default Settings 7 Turning the Audio Beeper On and Off 8 Turning the Status LED On and Off 8 Stuck Button Feature 8 SETUP SUMMARY 9 HOW TO USE REMOTELINC 10 Usi...

Page 3: ...An INSTEON home grows in value with every INSTEON device you add making life more convenient safe and fun Key RemoteLinc Features Six individual on off buttons plus dedicated DIM BRIGHT ALL ON and AL...

Page 4: ...s and install four AAA batteies accordingly Replace battery compartment door Use alkaline batteries or high quality rechargeable batteries A fully charged set of alkaline batteries will provide approx...

Page 5: ...step before RemoteLinc s Linking Mode times out automatically A LampLinc V2 Dimmer Press and hold the SET Button on the side of LampLinc V2 Dimmer for 3 seconds then release To confirm linking LampLin...

Page 6: ...multiple INSTEON Devices to multiple of INSTEON Controllers To add an additional INSTEON Device to a scene controlled by an ON OFF Button on RemoteLinc simply follow the same procedure as above in Li...

Page 7: ...Status LED will blink as you reinsert the battery then its Status LED will illuminate brightly 3 After reinserting the battery continue to hold down the BRIGHT Button for 10 seconds RemoteLinc will be...

Page 8: ...eep function Turning the Status LED On and Off This procedure toggles the white Status LED OFF or ON The factory default is ON 1 Simultaneously press and hold the DIM and BRIGHT Buttons for 10 seconds...

Page 9: ...r another 10 seconds then release Desired ON Button Hold 10 Seconds Enter Multi Link Mode Same ON Button Tap Exit Linking Mode Any ON or OFF Button Tap Reset ON OFF Button OFF Button Remove one batter...

Page 10: ...the Button RemoteLinc will beep and its Status LED will blink off twice Dimmable modules will go to whatever On Level they were set up for at whatever Fade Rate they were set up for Switchable modules...

Page 11: ...eLinc will beep and its Status LED will blink off once Dimmable modules will begin to brighten unless they are already fully bright Switchable modules will not be affected When you release the button...

Page 12: ...inuously dim only those INSTEON Devices linked to the last ON OFF Button you used press and hold the DIM Button RemoteLinc will beep and its Status LED will blink off once Dimmable modules will begin...

Page 13: ...st way to overcome signals getting weaker is to increase the coverage of the mesh network by introducing more INSTEON devices It is possible that some audio video products computers power strips or ot...

Page 14: ...as INSTEON Network repeaters An INSTEON device is not linking or responding to RemoteLinc The INSTEON signal may be too weak Make sure you are not experiencing interference with older X10 BoosterLinc...

Page 15: ...ol INSTEON devices already linked to RemoteLinc Link INSTEON Devices you want to respond to ALL ON and ALL OFF to RemoteLinc All of my INSTEON Devices do not respond to RemoteLinc s BRIGHT or DIM Butt...

Page 16: ...Status LED White can be disabled Setup Memory Non volatile EEPROM INSTEON Features INSTEON Addresses 1 hard coded out of 16 777 216 possible INSTEON Links 417 out of 16 777 216 possible INSTEON Messag...

Page 17: ...igital device pursuant to Part 15 of the FCC Rules These limits are designed to provide reasonable protection against harmful interference in residential installations This equipment generates uses an...

Page 18: ...outside of the package and send the product along with all other required materials to SmartLabs Inc ATTN Receiving Dept 16542 Millikan Ave Irvine CA 92606 5027 Limitations The above warranty is in l...

Reviews: