


19
5.2.4 Configuring the Meter
A list of Product Types can be generated by entering the Meter menu
and selecting
CONFIGURE PRODUCT LIST
. The Product Types
entered will automatically be saved and redisplayed when the
software is re-opened. Only the Product Types which have been
selected with a check mark will be sent to the meter. The user can
then scroll through the transferred Product Types while using the
meter in the field to select the one desired before a reading is taken.
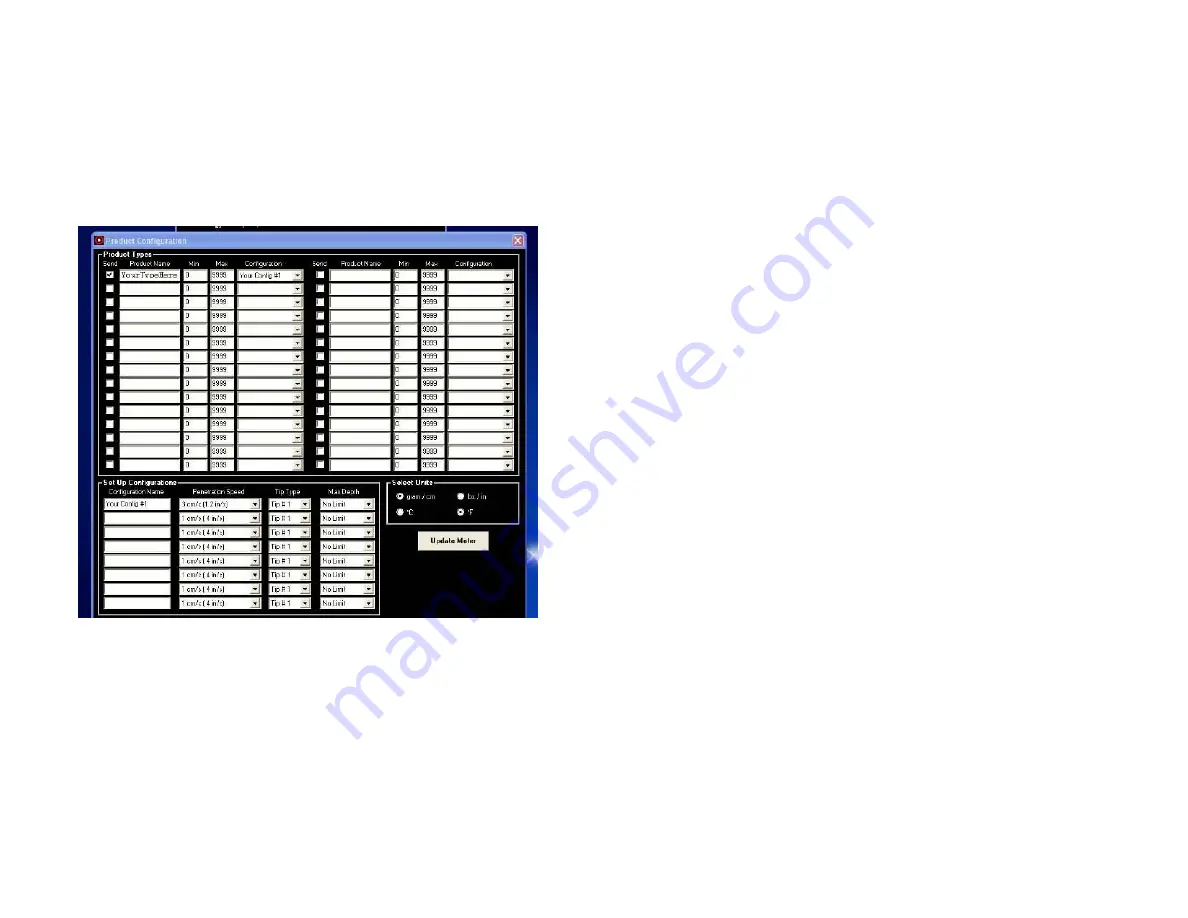
Product Types -
Send
Check Box – If this box is checked then its associated
product type will be sent to the meter. By checking or un-
checking this box the number of product types to scroll through
on the meter is limited while still allowing all data to be store in
the PC file. All the data is stored in the file: SpotOn Settings.cfg.
This file can be copied to other computers to eliminate the need
to re-enter all the settings for each computer if desired.
Product Name –
Enter up to 12 characters or numbers to create
a unique name that will display on the LCD of the meter once
uploaded.
20
Min –
The value entered here will show on the meter’s LCD to
remind the user what the minimum acceptable value is. Set min
to 0 and max to 9999 if no min/max is desired to show on the
meter. Valid ranges are 25 to 9998 grams or 0 to 22.00 lbs.
Max –
The value entered here will show on the meter’s LCD to
remind the user what the maximum acceptable value is. Set min
to 0 and max to 9999 if no min/max is desired to show on the
meter. Valid ranges are 25 to 9998 grams or 0 to 22.00 lbs.
Configuration –
This is a pull down menu that allows the user to
select one of the custom named “configurations” as defined in the
Set Up Configuration section. A configuration MUST be selected
for each product type.
Set Up Configuration -
Configuration Name –
This is a custom name the user can enter
up to 15 characters to describe the configuration (i.e.
“shortening”, “dough”, “icing”…). This name will show in the pull
down menu in the product types section above.
Penetration Speed –
Select the penetration speed the meter will
use. The default is 3 cm per second.
Tip Type –
This is a pull down menu that allows the user to select
from tip numbers 1 to 99. The tip number does not affect the
meter’s operation but is passed on to the data file for ease in
tracking the use of different tips. The default tip is Tip #1.
Max Depth –
This sets the maximum depth that will be used to
calculate a probing average on the meter. This setting allows all
data to be calculated to a given depth regardless of the users
actual penetration (provided penetration at least to the Max
Depth).
Select Units -
Units -
Select what measurement unit the meter and software will
function in. This setting is not changed on the meter until the
UPDATE METER button is pressed.
Update Meter Button -
Pressing the UPDATE METER button will send all the current
selected product types and units selections to the meter. All of
the settings showing on the screen will be saved to a PC data file
named “SpotOn Settings.cfg” when the software is closed.
Therefore any changes will show the next time the software is
opened.


