Note
If you do not reserve any space for snapshots, the snapshot tab will not be
displayed within the volume tab.
S p e c i f y d e s i r e d v o l u m e s i z e
After you’ve specified the above volume parameters, enter the desired volume size if you wish to
configure a smaller volume size than the maximum displayed. The resulting volume will be
approximately the size that is specified.
In our example above, we kept the maximum size that was calculated.
Click
Apply
and wait for instruction to reboot the system. It typically takes about a minute before
you are notified to reboot.
After rebooting, you will then be notified by email when the volume has been added. Use RAIDar
to reconnect to the NAS device.
►
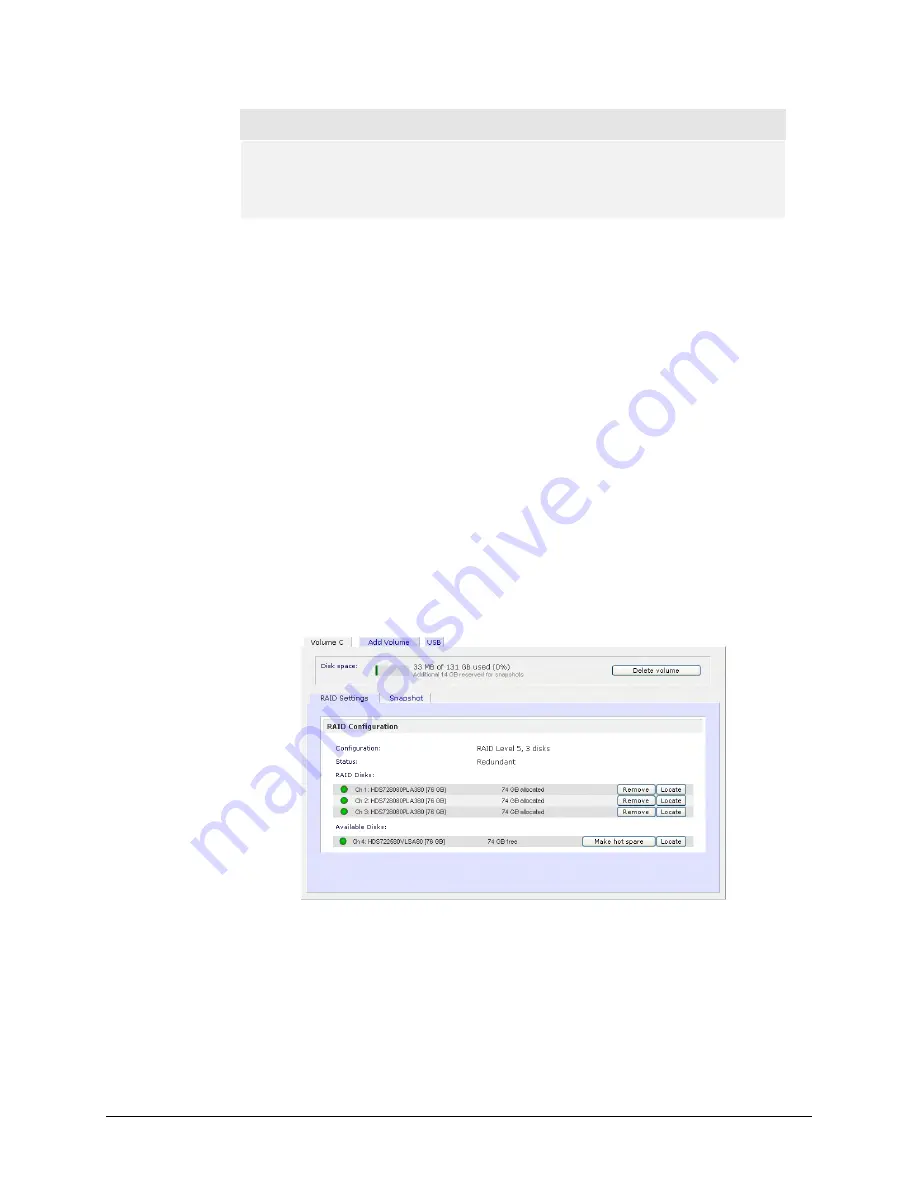
R A I D S E T T I N G S
After you have added a volume, you can revisit the Volume tab and click on the
RAID Settings
tab
to display the current RAID information and configuration options for the volume.
Notice the disk on channel 4 that we did not configure is listed in the Available Disks section. We
can add this disk as a hot spare by clicking on the
Make hot spare
button.
We can also remove a disk from the volume by clicking on the
Remove
button. The volume will
still be available but in a non-redundant state. An additional disk failure would render this volume
unusable.
35
Page 35


