EonNAS Pro Series Hardware Manual
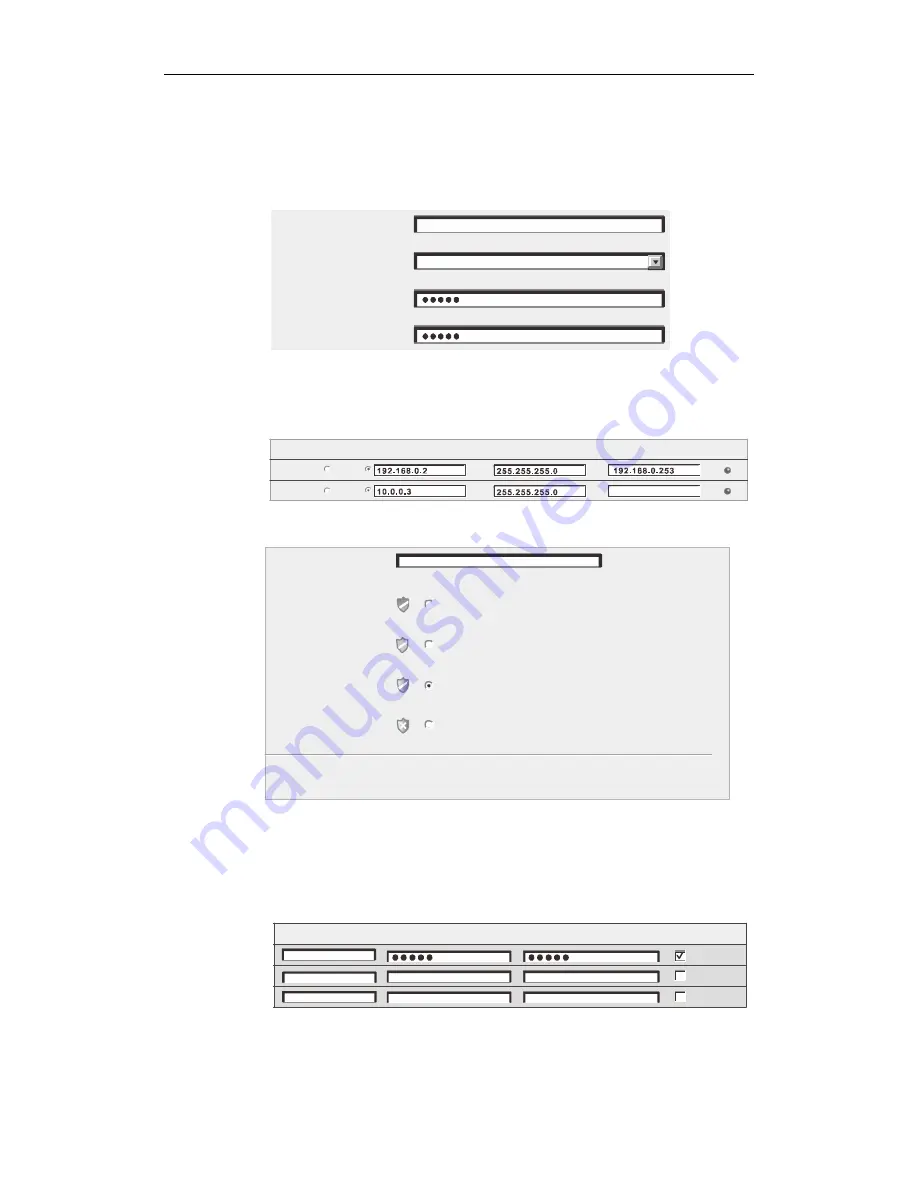
7. The following screen will appear. Fill in your system’s settings.
Host Name
: Enter a unique name for your EonNAS system.
Timezone
: Select your local time zone.
Password
: Enter a new password for the admin account. (default: admin)
H os t Na m e
Tim ez o ne
P as s wo rd
C on firm Pa s s wo rd
NAS_500
(GMT-08:00)America/Los_Angeles
Click the “
Next
” button.
8. Unless you want to change the IP address, leave the current settings and click
the Next button.
Interface
IP Address
Netmask
Gateway
Link
LAN2
DHCP
LAN1
DHCP
9. Enter a unique name, select the protection level, and click the Next button.
Pool Name:
Data Protection Level:
Best Protection
RAID 1: Provides best protection. Your data will be mirrored.
Better Protection
Good Protection [Recommended]
No Protection
RAID 6: Provides protection against two simultaneous drive failures.
RAID 5: Provides protection against one drive failure.
RAID 0: Provides no protection but offers maximum capacity.
Number of Drives: 4
Usable Capacity: 698.66 GB
Pool-1
Click the “
Next
” button.
10. Add at least one user account for accessing the new storage pool and click
the Next button. (The default user account is username: guest, password:
guest.)
Name
Password
Confirm Password
Home Directory
g ue st
Click the “
Next
” button.
11. You can change the default shared folder settings or add a new folder and
33


