background image

Chapter 2: The Basics

18

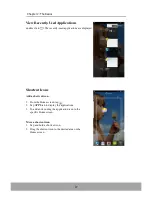
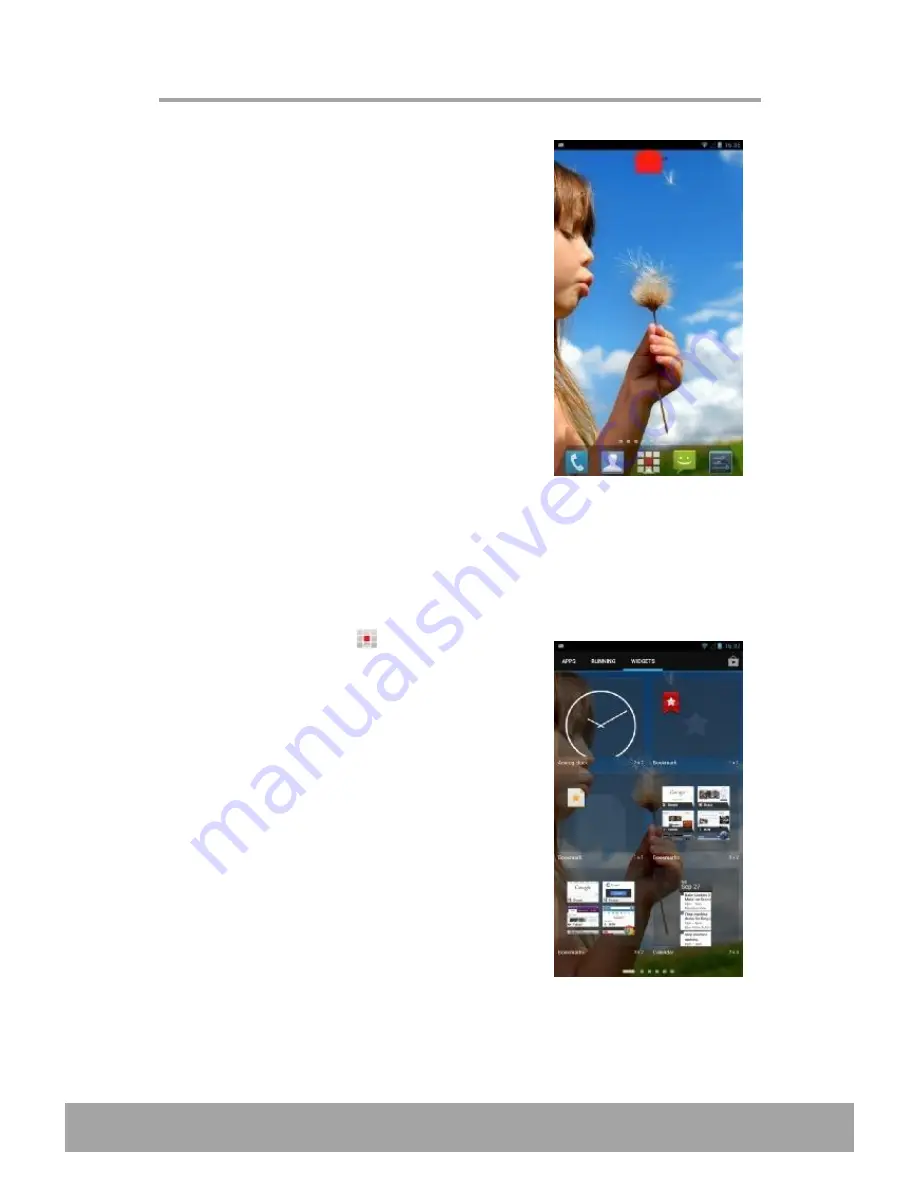
Remove a shortcut icon

1. Tap and hold a shortcut icon.

2. Drag the shortcut icon to

X Remove

to delete. The

application icon is removed from the Home screen.

Widgets

Live updates right on the Home screen and get all your personalized updates in one
place.

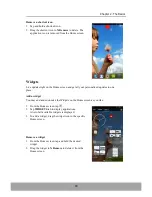
Add a widget

You may add and customize the Widgets on the Home screen as you like.

1. From the Home screen, tap

.

2. Tap

WIDGETS

tab to display applications.

A list of all available widgets is displayed.

3. To add a widget, drag the widget icon to the specific

Home screen.

Remove a widget

1. From the Home screen, tap and hold the desired

widget.

2. Drag the widget to

X Remove

to delete it from the

Home screen.

Summary of Contents for IN610

Page 1: ...User Guide IN610 ...

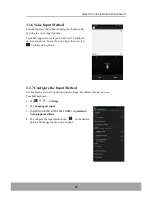
Page 2: ... Set Device to Sleep Mode 1 6 Locking and Unlocking the Screen 1 7 Creating a Google Account 1 8 Using the Headset 1 9 Adjusting the Volume Chapter 2 The Basics 2 1 Home Screen Extended Home screen Status Bar Notifications Panel Open Applications View Recently Used Applications Shortcut Icons Widgets Change Wallpaper 14 15 16 16 17 17 18 19 Chapter 3 Using On screen Keyboard 3 1 On Screen Keyboard...

Page 3: ...ll Options 5 5 Call Log Chapter 6 Email Messaging 6 1 Text Message Create and Send Text Messages Receive and Manage Messages 6 2 Multimedia Message Create and Send MMS Messages 6 3 Voice Message 6 4 Customizing Message Settings 6 5 Email Accounts Set Up Email Account Add More Email Accounts Select Email Accounts Delete Email Accounts 6 6 Using Email Compose and Send Emails Receive Emails Read and ...

Page 4: ...ring Files to Bluetooth Devices 8 3 Receiving Files to Bluetooth Devices Chapter 9 Connectivity 9 1 Connecting to Computer or Notebook List of Software Driver Installation 9 2 Factory Data Reset 9 3 OTA Software Update Chapter 10 Multimedia Applications 10 1 Capturing Photos and Videos Take Photos Record Videos Take Panorama Shots Configure Camera Settings Capture Screenshots 10 2 Viewing Photos V...

Page 5: ...plane Mode VPN Tethering Portable Hotspot Mobile Networks 13 2 Device Settings Call settings Sound Display Notification Storage Battery Power Saver Apps 13 3 Personal Settings Location Access Security Language Input Backup Reset 13 4 Accounts Settings 86 86 86 87 87 87 88 88 88 89 89 89 89 89 89 90 90 91 91 91 91 91 93 94 95 95 96 96 97 98 99 100 100 100 100 101 101 101 103 104 104 Dropbox Email G...

Page 6: ...Flash Rear camera Speaker Power button 1 Chapter 1 Getting Started 1 1 Your Device Front Back Chapter 1 Getting Started Headset jack Earpiece USB port Status LED Front camera Touch screen Volume button ...

Page 7: ...5 2 Hook your fingertip under the back cover and then try to open the back cover 2 1 2 Accessories Your package comes with the following items If any of them is missing please contact your retailer AC adapter Headset USB cable Battery Smartphone User Guide IN610 User Guide Chapter 1 Getting Started Install the memory card Insert the memory card with the gold contacts facing down ...

Page 8: ...nectors on the battery slot Remove the battery Use your fingertip to lift the battery and remove it from the slot Replace the back cover Secure the hooks on the back cover with the designated holes on the device and close the back cover Install the SIM card 1 Insert the SIM card as shown 2 Push the SIM card until it clicks into place ...

Page 9: ... on the the status bar When the battery is fully charged the status bar Warning Please use indoors and in dry places Overheat protection mechanism is activated the device will temporarily stop charging When the system temperature reaches the maximum operating temperature the device will automatically activate the overheat protection mechanism and temporarily stops battery charging When the system ...

Page 10: ... and hold the Power button for 5 seconds 2 On the options menu tap Restart Set Device to Airplane Mode 1 Press and hold the Power button for 5 seconds 2 On the options menu tap Airplane mode Set Device to Vibrate Mode 1 Press and hold the Power button for 5 seconds 2 On the options menu tap Set Device to Silent Mode 1 Press and hold the Power button for 5 seconds 2 On the options menu tap Set Devi...

Page 11: ...een locks after being idle for a period of time see Sleep on page 105 Lock the screen To manually lock the screen and turn off the display press the Power button Unlock the screen 1 If the display is turned off press the Power button 6 2 Drag the lock icon to unlock icon to unlock the screen Chapter 1 Getting Started ...

Page 12: ...7 Chapter 1 Getting Started NOTE To use the Email Phone or Messaging function directly drag the lock icon upwards then drag it to the respective icon ...

Page 13: ...1 7 Creating a Google Account 1 Tap or Settings 2 In ACCOUNTS tap Add account 3 Tap Google to create a google account 4 Tap New to create a new account 5 Enter your name and tap Chapter 1 Getting Started ...

Page 14: ...9 6 Enter the account name and tap The system will automatically check the availability of the account name 7 Create your password and tap Chapter 1 Getting Started ...

Page 15: ...e recovery information i e alternative email account and security question and tap 9 Tap Join Google if you want to join the Google or Not now if you want to skip this step 10 10 Read the agreement and tap to complete the account setup ...

Page 16: ...rted 11 11 Enter the authentication text as shown on the screen 12 Tap Set up credit card and enter your credit card information to enable purchases from Google Play Store and then tap Save Or tap Not Now to skip this step ...

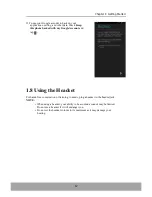
Page 17: ...d tap Chapter 1 Getting Started 12 1 8 Using the Headset For hands free conversation or listening to music plug a headset to the headset jack NOTE When using a headset your ability to hear outside sounds may be limited Do not use a headset if it will endanger you Do not set the headset volume to its maximum as it may damage your hearing ...

Page 18: ...usting the Volume There are two ways to adjust the volume Press the volume button repeatedly to adjust the volume Press the volume button once Drag the volume slider to adjust the volume Chapter 1 Getting Started ...

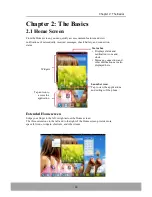
Page 19: ...sics 2 1 Home Screen From the Home screen you can quickly access common features and view notifications of missed calls received messages check battery and connection status Status bar Displays status and notification icons and clock Message connection and other notifications are also displayed here Launcher icon Tap to view the applications and settings of the phone Widgets Tap an icon to access ...

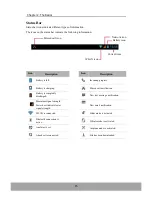
Page 20: ...ry is charging Battery is completely discharged Description Incoming progress Missed call notification New text message notification Maximum signal strength Fewer bars indicate lower signal strength WLAN is connected Bluetooth connection is active An alarm is set A headset is connected New email notification Silent mode is activated Vibrate mode is activated Airplane mode is activated File has bee...

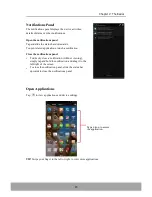
Page 21: ...se the notifications panel To directly close a notification without viewing simply tap and hold the notification and drag it to the left right of the screen To close the notification panel slide the status bar upwards to close the notifications panel Open Applications Tap to view applications and device settings Tap an icon to access the application TIP Swipe your finger to the left or right to vi...

Page 22: ...ns 3 To add an item drag the application icon to the specific Home screen Move a shortcut icon 1 Tap and hold a shortcut icon 2 Drag the shortcut icon to the desired area on the Home screen 17 Chapter 2 The Basics View Recently Used Applications double click The recently used applications are displayed ...

Page 23: ... your personalized updates in one place Add a widget You may add and customize the Widgets on the Home screen as you like 1 From the Home screen tap 2 Tap WIDGETS tab to display applications A list of all available widgets is displayed 3 To add a widget drag the widget icon to the specific Home screen Remove a widget 1 From the Home screen tap and hold the desired widget 2 Drag the widget to X Rem...

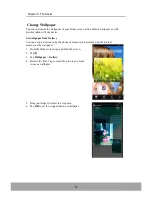
Page 24: ...ou can use pictures taken by the phone camera or pictures stored on the internal memory as the wallpaper 1 From the Home screen tap and hold the screen 2 Tap 3 Tap Wallpaper Gallery 4 Browse the files Tap to select the picture you want to use as wallpaper 5 Drag your finger to select the crop area 6 Tap OK to set the cropped photo as wallpaper Chapter 2 The Basics ...

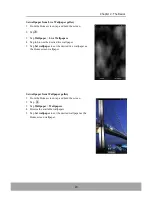
Page 25: ... Tap to browse the desired live wallpaper 5 Tap Set wallpaper to set the desired live wallpaper as the Home screen wallpaper Set wallpaper from Wallpaper gallery 1 From the Home screen tap and hold the screen 2 Tap 3 Tap Wallpaper Wallpapers 4 Browse the available wallpapers 5 Tap Set wallpaper to set the desired wallpaper as the Home screen wallpaper ...

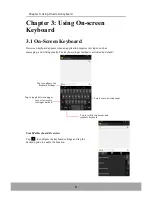
Page 26: ...p to configure the keyboard settings and tap the desired option to enable the function Chapter 3 Using On screen Keyboard 3 1 On Screen Keyboard On screen keyboard appears when an application requires text input such as messaging and writing emails The keyboard input method is activated by default Chapter 3 Using On screen Keyboard Tap to configure the keyboard settings ...

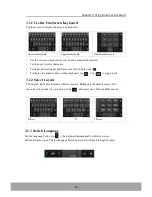
Page 27: ...toggle between upper and lower case letter display tap To display the numeric and symbols keyboard tap Tap to toggle back 3 1 2 Select Layout The English input provides three different layouts 26 Keys is the default layout You can select the one that you are used to Tap and select one of the available layout 3 1 3 Switch Language Tap the language button i e the keyboard automatically switches to u...

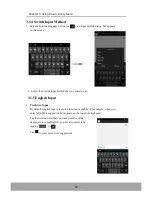
Page 28: ...esired word that you want to add or if the desired word is highlighted you can also select it by tapping or 23 3 1 4 Switch Input Method 1 Tap and hold the language button i e an input method dialog box appears on the screen Tap to view more word suggestions Chapter 3 Using On screen Keyboard 2 Select the desired input method that you want to use 3 1 5 English Input ...

Page 29: ...ish words without inputting the apostrophe or dash For example a Type im to get I m b Type ill to get I ll Note This feature is only available if the prediction function is turned on Spell check With this function the system can check spelling mistakes For example you want to enter Government but missed the letter r the input method can still predict Government To enable this function do one of th...

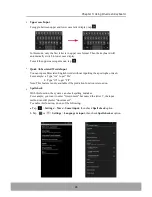
Page 30: ...typed to improve prediction quality For example if you have inputted hi then input me The next time you input hi me will appear as a word suggestion Settings More Smart input then check Advanced To enable this function Tap prediction option Fast Symbols Input You can press the desired key and slide to select the corresponding symbol ...

Page 31: ...ce input function tap on the main keyboard 26 1 Tap or Settings 2 Tap Language input 3 In KEYBOARD INPUT METHODS tap Default Set up input methods 4 To configure the input method tap on the desired option and change the necessary settings Chapter 3 Using On screen Keyboard 3 1 7 Configure the Input Method Use keyboard aids to set up various input settings By default this device uses TouchPal keyboa...

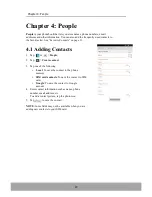
Page 32: ...ap or People 2 Tap Create contact 3 Tap one of the following Local To save the contact to the phone memory SIM card contacts To save the contact to SIM card Google To save the contact to Google account 4 Enter contact information such as name phone number email address etc To add a contact picture tap the photo icon 5 Tap to save the contact NOTE Some fields may not be available when you are addin...

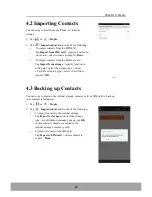
Page 33: ...tacts You can copy contacts from the Phone or internal storage 1 Tap or People 2 Tap Import export and do one of the following To import contacts from the SIM card Tap Import from SIM card specify location to store data select contacts to import Done To import contacts from the Memory card Tap Import from storage specify location to store data select the storage type select vCard file selection ty...

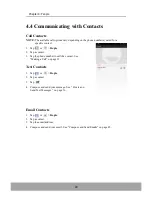
Page 34: ...p a contact 3 Tap the phone number to call the contact See Making a Call on page 33 Text Contacts 1 Tap or People 2 Tap a contact 3 Tap 4 Compose and send your message See Create and Send Text Messages on page 36 Email Contacts 1 Tap or People 2 Tap a contact 3 Tap the email address 4 Compose and send your email See Compose and Send Emails on page 45 Chapter 4 People ...

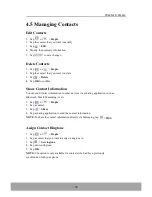
Page 35: ... Delete 4 Tap OK to confirm Share Contact Information You can send contact information to other devices via a sharing application such as Bluetooth Email Messaging or etc 1 Tap or People 2 Tap a contact 3 Tap Share 4 Tap a sharing application to send the contact information Chapter 4 People 4 5 Managing Contacts Edit Contacts 1 Tap or People 2 Tap the contact that you want to modify 3 Tap Edit 4 M...

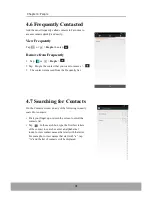
Page 36: ...The contact is removed from the Frequently list 4 7 Searching for Contacts On the Contacts screen do any of the following to easily search for contacts Flick your finger up or down the screen to scroll the contacts list Tap In the search box type the first few letters of the contact to search or enter an alphabetical index to view contact names that start with the letter For example to view names ...

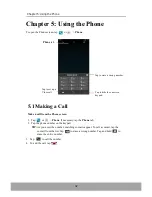
Page 37: ...g contacts appear To call a contact tap the contact from the list Tap to erase a wrong number Tap and hold to erase the entire number 32 Chapter 5 Using the Phone Chapter 5 Using the Phone To open the Phone screen tap or Phone 3 Tap to call the number 4 To end the call tap Phone tab Tap to set up a Video call Tap to hide the on screen keypad Tap to erase a wrong number ...

Page 38: ...1 Tap or Phone then tap the People tab 2 Tap the desired contact phone number to make a 3 To end the call tap Chapter 5 Using the Phone 33 Make a call from Contacts call ...

Page 39: ...ng call message If the caller is listed in your Contacts the contact s name appears You may also see the caller s phone number if available Accept or reject an incoming call To answer a call tap center and drag it to the down tap to compose your message 5 3 Ending a call To end a call tap 5 4 In Call Options To display the on screen keypad tap To activate or deactivate the Speakerphone tap To put ...

Page 40: ...5 5 5 Call Log The Call Log screen displays the most recent outgoing received or missed calls To view the Call Log screen tap or Phone then tap the Call Log tab To clear the call log tap Delete call log Done OK Tap to filter list according to type of call Chapter 5 Using the Phone Tap to find contacts Indicates type of call missed outgoing received ...

Page 41: ... the contact s Then tap Done 4 Compose your message 5 Tap to send your message NOTE If you close Messaging before sending your message the unsent message will be automatically saved as a draft You can also send text messages via People application See Text Contacts on page 29 6 1 2 Receive and Manage Messages When you send and receive messages from a contact these messages are grouped as a message...

Page 42: ...thread 1 Tap or Messaging 2 Tap a message thread to open it 3 Tap Delete messages select the message that you want to delete tap 4 Tap Delete to confirm Delete all message threads 1 Tap or Messaging 2 Tap Delete all threads 3 Tap Delete to confirm ...

Page 43: ...n audio file Record audio Record your voice to attach Contact vCard Attach a contact information Calendar Attach an event information Slideshow Attach a slideshow 38 Chapter 6 Email Messaging 6 2 Multimedia Message A multimedia message or MMS can contain letters images an audio or video file 6 2 1 Create and Send MMS Messages or Messaging 1 Tap 2 Tap 3 In the To field enter the recipient s phone n...

Page 44: ...essaging 2 Tap 3 Tap 4 Tap 5 Tap Record audio to record your message to stop recording 6 Tap Done to proceed or Discard to return to the compose message screen 7 Tap Done 8 Tap Play to listen to your recording 9 Enter the recipient s phone number in the To field 10 If necessary compose your message 11 Tap to send your message ...

Page 45: ...MULTIMEDIA MESSAGES MMS Use this setting to enable Delivery reports Read reports Send delivery report Auto retrieve and Roaming auto retrieve of MMS messages You can also set the maximum picture resolution and message size message validity priority level and MMS edit mode NOTIFICATIONS Use this setting to display new message notification on the status bar select a ringtone and enable the device to...

Page 46: ...d or webmail Exchange Select to keep the Incoming and Sent emails always available on multiple computers and or webmail mail is synced between mailserver and client 5 Follow the on screen instructions and enter all the server information Domain Username Password and other related information Tap Next to continue NOTE Your account settings may vary depending on the kind of email service for the acc...

Page 47: ...will automatically retrieve your emails 6 5 3 Select Email Accounts 42 6 Set the Inbox checking frequency settings and tap Next 7 Enter Name and Account display name NOTE The Account display name is the name shown on the Home screen and the Email screen 8 Tap Next Once the account setup is complete the device will automatically retrieve your emails 6 5 2 Add More Email Accounts 1 Tap 2 Tap Email 1...

Page 48: ...43 Chapter 6 Email Messaging 6 5 4 Delete Email Accounts 1 Tap 2 Tap Email Settings 3 Tap the account to delete 4 Scroll to the bottom of the page and tap Remove account 5 Tap OK to confirm ...

Page 49: ...d attachments to email messages 1 Before sending your message tap Attach file 2 Select the type of file then select the file you want to attach 6 6 2 Receive Emails Emails are automatically received in the Inbox folder when the device connects to a network Manually receive e mails 1 Tap Email then tap an email account 2 On the Inbox screen tap Indicates this email message has been added to the Sta...

Page 50: ...to open it 3 Tap the Attachments tab and do any of the following Tap LOAD to load the attachment Tap VIEW to view the attachment Tap SAVE to save the attachment NOTE Only supported file types can be opened on the device Reply or forward e mails 1 Open the message 2 Do any of the following Tap or tap Reply all to reply the email Tap Forward Then enter the recipient in the To field 3 Compose your me...

Page 51: ...ssaging list screen of one account and you want to view the list of another account tap the account selection box at the top left of the screen then tap the account that you want to view 46 Chapter 6 Email Messaging 6 6 4 Manage Email Folders Delete emails 1 Tap Email then tap an email account 2 On the Inbox screen open the message that you want to delete 3 Tap to delete the message ...

Page 52: ...can configure the settings of your email account such as account name email checking frequency default account notifications and server settings Set up your account name Settings then tap an Set up the email checking frequency Settings then tap an email account 2 Tap Inbox check frequency 3 Tap an option Settings then tap an email account 2 Tap Default account to send email from this account by de...

Page 53: ...1 Sign in to Gmail 1 Tap Gmail 2 Follow the on screen instructions to login or create your Gmail account 3 Once logged in you can begin reading and sending emails from your Gmail account 6 7 2 Refresh Gmail 48 1 Tap 2 Tap Gmail Chapter 6 Email Messaging Refresh ...

Page 54: ... Bcc tap Add Cc Bcc To attach files tap Attach picture To save as draft tap Save draft 7 Tap to send the email 6 7 4 Read and Reply to Emails 1 Tap Gmail 2 Tap an email to read 3 Do any of the following Tap Gmail Tap In the To field enter the recipient s email address Enter a Subject Compose your email If necessary do any of the following 49 Chapter 6 Email Messaging 6 7 3 Create and Send Emails 1...

Page 55: ...ect to make Reply all as the default for message replies Auto fit messages Select to shrink messages to fit the screen and allow zooming Auto advance Select which screen to show after you delete or archieve a conversation Message actions Select to always show message actions at the top of the screen Confirm before deleting Select to prompt for confirmation before deleting the conversations or mess...

Page 56: ...the list of available networks tap Scan 3 If you select an unsecured network the connection is automatically established Otherwise proceed to the next step 4 When connecting to a secured network you will be prompted for the password Enter the password then tap Connect 51 Chapter 7 Using Internet Chapter 7 Using Internet 7 1 Connecting to Internet The device connects to Internet via WLAN Cellular D...

Page 57: ...ction 1 Tap or Settings 2 Tap WLAN and set it to ON Chapter 7 Using Internet 52 Add WLAN network 1 Tap or Settings 2 Tap WLAN and set it to ON 3 In WLAN networks tap A new window is displayed 4 Follow the on screen instructions and enter the necessary information then tap Save to save the settings Connect to WLAN by WPS Button displayed 4 Press the WPS button on the WLAN router to connect your pho...

Page 58: ...n by entering the PIN displayed on your phone to a WLAN router to establish WLAN connection 1 Tap or Settings 2 Tap WLAN and set it to ON 3 In WLAN networks tap WPS Pin Entry A window appears with the PIN number 4 Enter this PIN number to the WLAN router to connect your phone 53 1 2 3 4 connect to 5 To rename your phone tap RENAME DEVICE Chapter 7 Using Internet Use WLAN Direct ...

Page 59: ...r network service provider Customize the mobile network settings 1 Tap or Settings 2 In WIRELESS NETWORKS tap More Mobile networks The following mobile network settings are available Data connection Check to enable data access over mobile network Data roaming Check to enable connection to data services when roaming Network Mode Use this setting to select the network mode Access Point Names Use thi...

Page 60: ...gers closer together at the location of the screen where you want to zoom out Manage Web Page While viewing a web page tap to change view settings or apply other functions The following table lists the setting options Depending on the function some options may be not be available Menu Refresh Forward Home Bookmarks History Description Reload the current web page Go to the next page Return to the h...

Page 61: ...uding cache history cookies form data location and password Accessibility Select to configure text size zoom and inverted screen rendering settings Advanced Select to set search engine open in background display pages in landscape screen orientation enable JavaScript allow multiple tabs per application enable plug ins advanced settings for individual website page content settings reset all setting...

Page 62: ...ch for items on the Internet right on your home screen TIP You can also use Google Search by tapping the Google Search bar on your home screen 1 Type the word you want to search on the text box Matching items are listed 2 Tap a matched item or continue typing and then tap Search ...

Page 63: ...p TIP An alternative way to launch Voice Search from your home screen tap Voice Search 2 Say what you want to search 3 When you are finished speaking Voice Search analyzes your speech and displays the results of your search 4 Tap a searched result 5 To make a new search tap ...

Page 64: ...pbox Dropbox lets you to store files in the Dropbox cloud server and synchronize your account with your phone You can then access and share files and folders across multiple computer and mobile devices 7 4 1 Create an Account 3 Tap I m new to Dropbox to create a new account ...

Page 65: ...apter 7 Using Internet 60 4 Enter your name e mail address and password Then tap Register for Dropbox to continue 5 Tap View Terms to read the agreement and then tap I Agree to complete the account setup ...

Page 66: ...camera uploading settings 7 Select the upload method 8 Check Upload existing photos and videos to upload the photos and videos on your phone to Dropbox 9 Tap Turn on to start uploading your existing photos and videos to Dropbox Or tap Skip to skip this step ...

Page 67: ...iles and Folders To share a file or folder tap Share then tap an application for sharing Delete Files or Folders To delete a file or folder tap Delete Tap Delete to confirm deletion Rename Files or Folders To rename a file tap Rename To rename a folder tap Rename Add Files to Favorites To add a file Favorites tap Favorite Tap to view synced photos and videos Tap to view your Dropbox account direct...

Page 68: ... can export files to the memory card of your phone or send it to another device via Bluetooth Email or Gmail 1 Tap Export 2 Then tap where you want to export the file Refresh Account 63 Chapter 7 Using Internet Tap Refresh 1 2 3 4 5 7 4 5 Customize Dropbox Settings 1 Tap 2 Tap Dropbox Settings 3 Under Dropbox Account settings you can configure the following settings Passcode lock Tap to enable pas...

Page 69: ... view traffic and direction information and find your friends location NOTE The Google Maps application is not available in every country or city Before starting Maps do the following 1 Tap or Settings Location access 2 Tap GPS satellites to enable the function 64 View Map 1 Tap Maps 1 While viewing a map tap 2 Enter the starting point and the ending point or tap the corresponding and select an op...

Page 70: ...ion Enter your destination with the on screen keyboard Contacts Select your destination from your contacts addresses Starred Places Select your destination from your starred places 7 7 Google Play Store Play Store allows you to purchase and download games and other applications to your phone When opening Play Store for the first time the Terms of Service is displayed on screen Tap Accept to accept...

Page 71: ...deos Tap All time and then select one of the available options Clear the Search History 1 Tap Settings 2 Tap Search Clear search history Share a video link 1 On the video playback screen tap 2 Choose how you want to share the video link from the available options Pair with YouTube TV With this feature you can pair your phone with an HDTV that supports media streaming such as Google TV and stream Y...

Page 72: ...alled a partnership You need to pair and create a partnership with a Bluetooth device to exchange information 67 1 Tap or Settings 2 In WIRELESS NETWORKS tap Bluetooth and set it to ON 3 To search for a new device tap SEARCH FOR DEVICES 4 Tap a detected device 5 To start pairing enter the PIN and tap OK NOTE The PIN of the device must be the same PIN on the other bluetooth device On some devices t...

Page 73: ... or a video between two smartphones do the following 2 Tap Gallery and browse the file that you want to transfer 3 Tap an image or a video to view in full screen 4 To send a file via via Bluetooth tap 5 Tap the desired destination device NOTE Be sure you have successfully paired with the device that you want to send the file to See Connecting to Bluetooth Devices on page 67 6 When the destination ...

Page 74: ... 3 Receiving Files to Bluetooth Devices When a new file is received from another device an Bluetooth share Incoming file message is displayed on the Notification panel To accept the file tap the notification bar and then tap Accept ...

Page 75: ...eeds to download necessary files first If the connection is successful the computer will recognize your phone and show that it is available to be accessed In the PC file manager there will be a folder named IN610 where you can access the data stored in your phone memory or the internal storage in your phone Then you can manage or transfer the files to your computer If everything above is checked a...

Page 76: ...upported Tablet Notsupported Chapter 9 Connectivity 71 List of Software v Note1 Only Windows Media Transfer Protocol MTP is supported for file transfer between mobile phones and PCs Windows Media Player 11 or above is needed to support MTP Windows Media Player is built in Windows Vista and Windows 7 OS However Windows XP 32 users must install it separately v Note2 To avoid problems when using the ...

Page 77: ... on your device and connect it to your computer using the USB cable 2 From the Windows desktop double click on My Computer and locate the CD drive 3 Browse and double click setup exe 4 Follow the on screen instructions to complete the driver installation ...

Page 78: ...may take about 3 minutes All data stored in the phone memory will be erased However OTA Over The Air software upgrade will not erase anything in the phone memory and internal storage No data will be lost NOTE The factory reset method will remove the data in the internal storage in your phone If you like to delete the data stored in the internal storage you can do it via the File Manager applicatio...

Page 79: ...le size 1 Tap or Settings 2 In SYSTEM tap About phone Software update 3 Tap WLAN only to only download updates when WLAN is connected 4 Check Auto update to enable the system to automatically check for updates automatically 5 Tap Update to manually start checking the latest software version 6 When the Software update message appears tap OK to continue ...

Page 80: ...ill take 4 minutes 15 seconds Please follow the on screen instructions to complete the procedures When OTA is complete the system normally will reboot itself It may take a few minutes to complete the reboot from the booting screen If the screen turns white green black or blue for more than 1 minute and the procedure stops please open the back cover and remove the battery then press the power key t...

Page 81: ...ring Photos and Videos This device is equipped with rear and front cameras to take photos and videos By default your device uses the rear camera to take photos or record videos Take Photos Side to show more shot mode Long press to show comment Tap to turn on the flash or off Tap to switch between back camera and front camera Tap to set the camera EV bracket shot mode Best shot mode Smile shot mode...

Page 82: ...a to enter video mode NOTE To switch between front and rear cameras tap 3 Aim the device at the subject to start recording to stop recording Tap to record video the latest recorded file Chapter 10 Multimedia Applications Record Videos Tap to switch between back camera and front camera ...

Page 83: ... shot 5 Move the device in one direction pan the device horizontally and follow the shooting direction shown on the screen Chapter 10 Multimedia Applications Take Panorama Shots Tap to take panorama shots 6 When the shooting guide reaches the end of the shooting point the shooting ends 2 Tap To take panorama shots ...

Page 84: ... Settings Tap to access the camera camcorder settings menu Tap the menu item icon to open the respective menu and select the desired setting 79 Camera menu options Video menu options Chapter 10 Multimedia Applications ...

Page 85: ...h Hue Low Medium High Saturation Low Medium High Brightness Low Medium High Contrast Low Medium High Anti flicker Auto Off 50Hz 60Hz Camera mode Face Detection ON Off Self timer Off 2 seconds 10 seconds Continuous shot 40 shots 99shots Picture size QVGA VGA 1M pixels 1 3M pixels 2M pixels 3M picxels 5M pixels 8M pixels Preview size Full screen Standard 4 3 ISO Auto 100 200 400 800 1600 Video mode ...

Page 86: ...n where the screenshot is captured and a message Saving screenshot appears on the status bar NOTE The captured screenshots are stored in the device memory Folder name Pictures Screenshots To directly view the screenshot do the following 1 Tap and slide the status bar downwards to open the notification panel 2 Tap Screenshot captured notification bar to view the captured screenshot ...

Page 87: ...t or right To play the video tap To delete the photo play the slideshow edit an image or show more options tap 10 2 Viewing Photos Videos 1 Tap Gallery 2 Tap a folder to view the recorded files in thumbnails 3 Tap an image or a video to view in full screen 4 Swipe your finger to the left right to view the previous next file 82 To share the photo tap then tap an Chapter 10 Multimedia Applications ...

Page 88: ... to your favorite songs on your phone Play Songs 1 Tap Music 2 Scroll to the SONGS tab to display all songs 3 Tap a song to play 83 Tap to pause the playback Tap to skip to the next track Tap to toggle repeat options Tap to play songs in shuffle order Chapter 11 Music ...

Page 89: ...ic Create Playlists 1 Tap Music 2 Select the song you want to add Then tap 3 Add to playlist 4 Select a playlist or tap New to create a new playlist NOTE If you create a new playlist enter the playlist name then tap OK ...

Page 90: ...85 Chapter 11 Music Delete Songs 1 Tap Music 2 Select the song you want to delete Then tap 3 Tap Delete 4 Tap OK to confirm deletion ...

Page 91: ... following pre installed programs 12 1 Browser Open the Browser to view web pages See connecting to Internet on page 51 12 2 Calculator With Calculator you can perform basic arithmetic functions on this device 86 Tap Calculator Chapter 12 Programs ...

Page 92: ... To vibrate when the alarm sounds check Vibrate 87 12 3 Camera Capture images with this device See Capturing Photos and Videos on page 76 12 4 Clock Set alarm clock with this device Clock 1 Tap 2 Tap 3 To add an alarm tap 12 5 Downloads Use Downloads to view or delete what you have downloaded in Browser Gmail or Email NOTE The downloaded files are stored in the Download folder in your memory card ...

Page 93: ...mat Tap Choose date format and select the date format from the list 4 Tap Select time zone to select the time zone from the list 5 Tap Set time to set the time To adjust the time Tap the desired field and then scroll up or down to set the time Tap Done to save the changes To use a 24 hour format tap Use 24 hour format 12 7 Email Use Email to connect to your remote mailbox to retrieve new e mail me...

Page 94: ...fice 12 11 Local Place is a location based application that helps you find the places and things around you Local information available includes restaurants cafes bars attractions and more This application also helps you get where you are going with maps and directions Tap Local 12 12 Messaging Use Messaging to send or receive text and MMS messages See Text Message on page 36 12 13 Weather Forecas...

Page 95: ...15 Phone Use Phone to make phone calls or manage contact list See Making a Call on page 32 12 16 Voice Note Use Voice Note to record a voice memo Record a voice note 1 Tap Voice Note The recording screen is displayed 2 Tap 3 Tap to record your message to stop recording 4 Tap OK to save the file ...

Page 96: ...tooth connections set device name and discoverability of the device See Connecting to Bluetooth Devices on page 67 Data usage Configure and view data usage used by the applications Configure mobile data limit You can set the data usage limitation for the device to warn you when you reach the maximum limit 1 Tap or Settings 2 In WIRELESS NETWORKS tap Data usage 3 Check Set mobile data limit to enab...

Page 97: ...Chapter 13 Managing Your Phone 92 4 A warning message appears on the screen Tap OK to continue 5 To set up the limit for warning tap the yellow line Scroll up or down to set the limit and tap Set ...

Page 98: ...a usage tap the red line Scroll up or down to set the limit and tap Set 7 Scroll down to view data usage used the applications Airplane Mode Disable all wireless connections To set the device to airplane mode do the following 1 Tap or Settings 2 Tap More Airplane mode 93 ...

Page 99: ...reen appears tap OK 4 Select a lock screen option and then follow the on screen instructions to set the screen lock 5 6 7 8 Tap to add a VPN profile Enter the VPN name Select the VPN type that you want to add Follow the instructions from your network administrator to configure each component of the VPN settings 9 Tap Save to save your settings Connect to a VPN You must set a lock screen pattern PI...

Page 100: ...t Share your phone s mobile data connection via USB Bluetooth or as a portable WLAN hotspot To set up your device mobile data network sharing settings do the following 1 Tap or Settings 2 Tap More Tethering portable hotspot then tap the setting to use or change ...

Page 101: ...Customize the mobile network settings on page 54 13 2 Device Settings Sound or Settings Sound To set the device sound tap Phone ringtone Set your default phone ringtone 1 2 3 4 Tap or Settings Tap Sound Phone ringtone Tap a ringtone Tap OK to save Vibrate when ringing Device vibrates during incoming calls Chapter 13 Managing Your Phone ...

Page 102: ...rate when ringing Device vibrates during incoming calls Default notification sound Set your default notification ringtone Dial pad touch tones Enable disable sound when touching keys on the dial pad Touch sounds Enable disable sound when selecting items on the screen Screen lock sound Play sounds when locking or unlocking the screen Vibrate on touch Enable disable vibration when selecting items on...

Page 103: ...utomatically switch the screen orientation when rotating the device LED Notification The LED indicator lights up flashes when you have missed calls messages or Notifications 98 Display or Settings Display To set the device display settings tap Brightness Adjust the brightness of the screen 1 2 3 4 5 Tap or Settings In DEVICE tap Display Tap Brightness Drag the Brightness slider to adjust brightnes...

Page 104: ...tap Display Tap Sleep Select the desired length of time Your setting is automatically saved Daydream Configure the screensaver function Font size Set the font size WLAN Display Set the WLAN Display G sensor Calibration Set the G sensor calibration for your phone E Compass Calibration Set the E compass calibration for your phone ...

Page 105: ...d storage Unmount SD card Unmount the memory card for safe removal USB STORAGE Mount USB storage Battery View the battery usage on currently running applications and battery charging status To view the battery usage status tap or 100 Settings Battery Apps View and control downloaded and currently running services To view the applications status tap or Settings Apps NOTE Applications downloaded fro...

Page 106: ...ice security options To configure the settings tap or Settings Security Screen lock Set the lock screen by sliding the screen or with a pattern PIN or password None The device is not protected Slide Slide to lock icon to unlock the phone Face Unlock Use the face detection to unlock the phone Voice Unlock Use the voice detection to unlock the phone Pattern Trace the correct unlock pattern on the sc...

Page 107: ...ctivate device administrators Unknown sources Allow installation of apps from unknown sources Verify apps Disallow or warn before the installation of applications that may cause harm Trusted credentials Display trusted CA certificates Install from SD card Install encrypted certificates from the memory storage Clear credentials Clear credential storage of all contents and reset its password ...

Page 108: ...spell check function Personal dictionary Add or edit user preset words to the dictionary Default Set the default keyboard input method Google keyboard AOSP Configure Google keyboard settings Google voice typing Configure Google voice typing settings TouchPal keyboard Configure TouchPal TouchPal keyboard settings Voice Search Configure Voice Search settings Text to speech output Set the text to spe...

Page 109: ...n DRM reset Deletes all DRM license Factory data reset Delete all data on the phone and restore to factory default settings See Factory Data Reset on page 73 13 4 Accounts Settings Dropbox Tap an email account to configure synchronization and tap Account Settings to change the camera upload passcode and other related general settings Email Tap an email account to configure synchronization and tap ...

Page 110: ...on page 88 Automatic date time Select to automatically use network provided time Automatic time zone Check to use network provided time zone Set date Set the date Set time Set the time Select time zone Select the time zone of your current location Use 24 hour format Set the clock to 24 hour format Choose date format Set the preferred date format 105 ...

Page 111: ...tically when rotating the device Speak passwords Read aloud passwords as you type Accessibility shortcut Enable Disable the shortcut to enable the accessibility features If the function is enabled do the following to activate the accessibility features 1 Press and hold the Power button until you hear a sound or feel a vibration 2 Touch and hold two fingers until you hear audio confirmation Text to...

Page 112: ...re update Configure the software update settings and view the last check status Status View the status of battery network and other information Legal information View Open source licenses and Google legal information Model number View the device model number Android version View Android version Baseband version View Baseband version Kernel version View Kernel version Build number View Build number...

Page 113: ...nch HD 1280x720 IPS Multi touch Capacitor Panel Memory 8GB ROM 1GB RAM Micro SD slot Camera Back 8MP BSI Photoflash Front 1 3MP BSI WLAN 802 11a b g n Bluetooth 4 0 GPS GPS Sensors AmbientLight Proximitysensor G sensor E compass Gyro Interface MicroUSBBtype Battery 4050mAh Dimensions 161 5mm L x84 5mm W x9 3mm T Chapter 14 Specifications 108 Chapter 14 Specifications ...

Page 114: ...is problem by using the force shutdown method or you can send your phone to the service center Note Remove the factory protective film before you start using the phone If you plan to replace a new protective film on the display screen to avoid scratch please make sure the light proximity sensor works properly I cannot make or receive calls My phone cannot connect to the Internet Check the network ...

Page 115: ...r 15 Troubleshooting My phone cannot pair with Bluetooth device You have entered the wrong PIN number Check if another Bluetooth enabled device has accepted your device bluetooth pairing request Problem Solutions ...

Page 116: ...a burn Refer to the rating label on the device and be sure that the power adapter complies with the rating Only use accessories specified by the manufacturer Disconnect the device from an electrical outlet and power off before cleaning the device NEVER attempt to connect or disconnect the power adapter with wet hands Clean the touch screen with a soft cloth If needed dampen the cloth slightly befo...

Page 117: ...explode Do not attempt to open or service the battery yourself Do not dispose battery in fire or water Recycle or dispose used batteries according to the local regulations Road And Environmental Safety Turn off the phone in areas with a potentially explosive atmosphere or where flammable objects exist such as gas stations fuel depots and chemical plants among others Sparks from these areas could c...

Page 118: ...mended by international guidelines These guidelines were developed by the independent scientific organization ICNIRP and include safety margins designed to assure the protection of all persons regardless of age and health The exposure guidelines for mobile devices employ a unit of measurement known as the Specific Absorption Rate or SAR The SAR limit stated in the ICNIRP guidelines is 2 0 W kg ave...

Page 119: ...sure of the general public to electromagnetic fields 0 300 GHz This equipment meets the following conformance Standards EN50360 EN62209 1 2 EN62311 EN62479 EN60950 1 EN50332 1 2 EN301489 1 EN301489 1 3 7 17 24 EN55022 EN55024 EN61000 3 2 3 3 EN301511 EN301908 1 2 EN300328 EN300440 1 2 EN55013 EN55020 EN50581 For the device which tests accordance to EN60950 1 2006 it is mandatory to perform audio t...

Page 120: ...ents It is important that you use compliant peripheral devices and shielded cables between system components to reduce the possibility of causing interference to radios televisions and other electronic devices We hereby declare that this cellular Bluetooth radio is in compliance with the essential requirements and other relevant provisions of Directive 1999 5 EC This device is restricted to indoor...

Reviews: