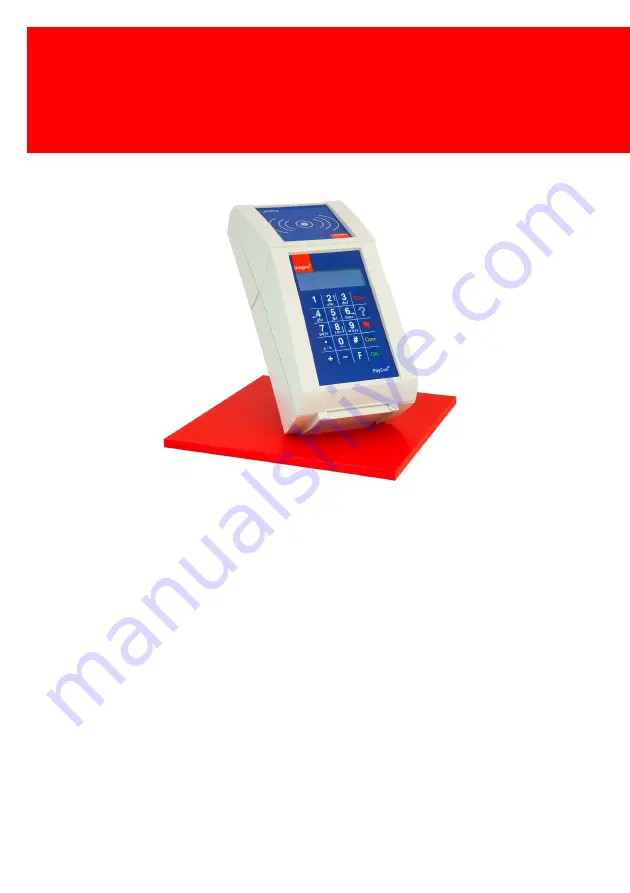
background image

PayCon II

Congratulations on your selection of the PayCon. We are certain you will be pleased
with your purchase of one of the finest payment solutions of the market.

We want to help you to get the best result from your PayCon and show you how to
operate it. This manual contains information on how to do that; please read it
carefully. Due to continuous product improvements this manual is subject to changes
without notice.

Your Inepro business partner is dedicated to your satisfaction and will be pleased to
answer your questions and your concerns.

Best wishes,
Inepro BV.

The most versatile payment solution

Summary of Contents for PayCon II

Page 1: ...2019 Inepro B V All rights reserved Technical Manual PayCon II PayCon II...

Page 2: ...esult from your PayCon and show you how to operate it This manual contains information on how to do that please read it carefully Due to continuous product improvements this manual is subject to chang...

Page 3: ...ent the publisher and the author assume no responsibility for errors or omissions or for damages resulting from the use of information contained in this document or from the use of programs and source...

Page 4: ...3 Setting up the PayCon 16 T esting the PayCon Menu Structure 18 19 A ccess and activation 20 Navigation 22 Changing settings 26 Most important items Submenu s 33 34 Control A ctions 34 Products 35 Co...

Page 5: ...al 67 View the serial number 67 Change the language 68 Cards 68 Create a user card 69 Delete a user card 69 Reload a user card 71 Edit view a user card 72 Unlock a user card 73 Change the maximum bala...

Page 6: ...4 Adjust the contrast backlight 86 ECOS 86 Add ECOS modules Troubleshooting 91 94 Browse T ool 95 Update T ool Appendixes 96 97 A ppendix I 112 A ppendix II 115 A ppendix III 119 A ppendix IV 126 A pp...

Page 7: ...roducts Your new dev ice contains materials which can be recy cled and then reused A t the end of life specialized companies can dismantle the dev ice to materials which can be reused in order to recy...

Page 8: ...I Introduction Part...

Page 9: ...or revalue money on the user s card This manual will guide you trough the menu structure of the PayCon and inform you of all the possibilities and options We have tried to cover every aspect of the P...

Page 10: ...ill be added to the menu name Contact If you in spite of this manual still have a question or problem you want to address about the PayCon or PayMatic don t hesitate to contact your dealer When you ca...

Page 11: ...ith multiple PayCons you can configure your PayCons that all cards Service and User Cards can be used on all PayCon systems During installation you need to make sure that all PayCons are programmed wi...

Page 12: ...e intended for normal users in their day to day business These cards can be used as ID cards cards with an online account or with one or more e purses on the card These cards do not have any access to...

Page 13: ...l system administrator of your PayCon solution With an administrator card it is possible to modify system settings like prices IP settings currency settings product names etc An Administrator card is...

Page 14: ...II Quick Start Part...

Page 15: ...a Pillar b Wall vending bracket c Hardware bracket 3 Connect a Power cord b Network cable c Copier 4 Set Up a Local time zone b Card Purses Terminal Accounts Server Accounts c Currency d Copier e Netw...

Page 16: ...s damage please contact your dealer Mounting the PayCon 1 Use the instructions with the pillar if you ordered a pillar otherwise go to 2 to construct the pillar 2 Use the instructions with the bracket...

Page 17: ...t DC connection f or use with the adaptor Alternating Current AC connection f or use with in a v ending machine 1 Check if the cable is connected to the PayCon 2 Connect the other end to the power out...

Page 18: ...g it in the RJ 45 or JST connector 2 Connect the other end to a network outlet The JST and RJ 45 connectors can not be used at the same time When you use the PayCon switch it is connected to the JST p...

Page 19: ...onnector to COPY_IN 2 Connect the 4 pin connector to COPY_OUT If your cables do not match or fit or if you have any doubts if the copier you are connecting uses the same connection as described in thi...

Page 20: ...al time zone by picking a time zone from the list 3 Leave the menu by pressing Stop several times until you see the Welcome Payment please message on your display b Card Purses Terminal Accounts Serve...

Page 21: ...Purse Selection you can choose if you would like the application to decide which purse type to use all purses the application will decide which purse to use prefer PurseType use specific purse if it...

Page 22: ...yCon 3 If you are not converting one currency to another the old currency should be set to the accepted currency and the conversion rate to 1 00 d Copier 1 Check if your copier setting are set correct...

Page 23: ...e IP address in server address in the submenu server in the PayCon Or else set the network name 2 If you are using the print job client with this PayCon enable it g Products 1 Define a list of the pro...

Page 24: ...ul the connection is OK c Connection with a Back Office Suite Like Equitrack or Inepro Back Office Suite 1 Use the manager of your suite to find your PayCon you may need to refresh 2 If the PayCon can...

Page 25: ...III Menu Structure Part...

Page 26: ...programming card normally remains in the possession of the person who is in charge of the system and is not made available to users To activate the programming menu insert one of the programming cards...

Page 27: ...l display the texts are displayed in an optimal format 3 lines are visible as standard After inserting the programming card the first line will display main menu Menu security timer When no action is...

Page 28: ...can also scroll up and down though the menu items You are in the main menu you can t go backa level however you can enter a sub menu and scroll up and down You are in a sub menu and can t go down any...

Page 29: ...ou through it An example of an exe function is creating user cards List List settings can have a number of pre defined values that can be selected by scrolling the menu To leave the scroll list press...

Page 30: ...ot saved When the OK button is pressed the edited value is saved When a 123 setting is selected with read only rights this function is than read only No changes can be made 1 2 1 2 settings are also n...

Page 31: ...ch mode is selected In the tables below you find which button has which function Button abc ABC 123 1 1 1 1 2 a b c 2 A B C 2 2 3 d e f 3 D E F 3 3 4 g h i 4 G H I 4 4 5 j k l 5 J K L 5 5 6 m n o 6 M...

Page 32: ...ith decimals IP All key s except IP address Key in manually IP addresses abc All key s except and Alphanumerical Key in manually alphanumerical characters a d OK 6 g Add and delete possibilities Add a...

Page 33: ...here are the most used setting from the PayCon menu For a complete overview of the PayCon menu please refer to Appendix I PayCon Menu In this table you will find the rights you have with each service...

Page 34: ...The Name option has to be selected Address The Address option has to be selected TRX LOG The transaction must be enabled Canon The Canon copy interf ace has to be selected Mif are A COM port has to be...

Page 35: ...Menu Structure 28 If an item is collapsed then you can assume that the structure of the item will be an exact copy of first previous structure on the same level that is completely visible...

Page 36: ...Most important items 29 PayCon II...

Page 37: ...Menu Structure 30...

Page 38: ...Most important items 31 PayCon II...

Page 39: ...Menu Structure 32...

Page 40: ...IV Submenu s Part...

Page 41: ...led open a lock EFT Terminal In this menu you can log the connected EFT terminal on and off The EFT terminal is a external pay terminal that accepts various Dutch bank card types Products In the produ...

Page 42: ...Via the terminal menu a large number of generic terminal settings can be made Some of the most important functions that can be set via the terminal menu are Read out the serial number Read out the sof...

Page 43: ...al or company in the menu varying from setting a fixed purse using a preferred purse or letting the user select himself which kind of purse he wishes to use ID The Server Accounts menu can only be use...

Page 44: ...system cards if you have one use a Service or Administrator card to access the menu ECOS SAM In the ECOS SAM menu you can check the credits on a ECOS SAM chip This SAM module enables you to create a...

Page 45: ...und to download the transaction data from all the PayCons It is recommended to this at a regular interval for reporting purposes 3 The USB stick is then placed in a PC on which PayConService is opened...

Page 46: ...nvironment online or offline When transaction log is enabled the PayCon generates a log of transaction data for the Back Office Suite database In case transaction log is enabled there must be connecti...

Page 47: ...be used in an online environment Via this menu option you enable your PayCon terminal to communicate with a PayConService service These services are used in combination with the Inepro Back Office Sui...

Page 48: ...ed in this menu Copier Interface Configuration At the time of this release the PayCon supports approx 1 500 different photocopiers For most of these photocopiers the PayCon can use a small set of pred...

Page 49: ...yCon as a Chip Knip terminal This is the Dutch open purse solution Transaction Printer In this menu you can activate a transaction printer You can set up when the receipt will be printed To use a tran...

Page 50: ...Do only enable card readers that are connected and vice versa Disabling connected card readers and enabling card readers which are not available can have great consequences The external card reader is...

Page 51: ...set to not available Some devices need the RS232 COM port COM port 1 2 and 3 on the PayCon if you want to connect it to another COM port you will need a signal converter contact your dealer for furth...

Page 52: ...ould be only activated when the Mifare card reader is mounted on a PayCompact ACM30 In this menu you can set up the connected ACM30 card reader by selected the appropriate COM port The ACM30 card read...

Page 53: ...n LED The port the LED is powered f rom Magstripe In this menu you can set up the connected Magstripe card reader by selected the appropriate COM port Magstripe is magnetic card solution that requires...

Page 54: ...selector accepts more then 6 coins 2 coins on 1 channel you can set up so called extra items they will be shown in the PayCon display together with the coin values If you don t set the name and posit...

Page 55: ...et up the COM port the printer type and how the paper should be cut Notice that a printer needs a RS232 COM port If you want to connect to a printer which is connected to another PayCon in a LAN print...

Page 56: ...les are currently active Enter the menu as described in the first chapter of this manual with your Administrator or Service card Look at the menu structure above to go to the different ECOS modules On...

Page 57: ...Submenu s 50 Only reset to the default setting in extreme emergencies and at the instruction of Inepro certified personnel...

Page 58: ...V PayCon Browse Tool Part...

Page 59: ...n s and a valid service card Service card or administrator card How does the Browse Tool work The Browse Tool is based upon 2 components the Browse Tool application communicates with the PayCon to ens...

Page 60: ...VI PayCon Update Tool Part...

Page 61: ...he version service pack of your operating system on your PC The PayCon firmware version is comparable with the version service packs of for example your Acrobat Reader To know the firmware version of...

Page 62: ...ays find the latest versions of the Tool and the bundles On the download page of the Update Tool there is also a manual which describes how to perform the update Updating a PayCon with PayCon firmware...

Page 63: ...ting your PayCon 2 system is an easy operating we do recommend not updating your PayCon unless you have a specific need which is available in the newer firmware release Inepro can never be held respon...

Page 64: ...update the firmware of your PayCon terminal The Update Tool is windows based and can update 1 or more PayCon systems at sequentially How does the Update Tool work The Update Tool uses firmware bundle...

Page 65: ...the steps below to get access to a PayCon via the Browse Tool Step 1 start Browse Tool Start the PayCon Browse Tool The following screen will be shown Step 2 enter subnet mask Enter the subnet mask wh...

Page 66: ...How to use the Browse Tool 59 PayCon II Step 3 search for PayCons Press the Scan button Now all PayCons in your requested subnet should appear in the browser window...

Page 67: ...ith your mouse on the PayCon which is the nearest to you this is not necessarily the PayCon you which to configure You will get the following pop up window When you click OK you will notice that you s...

Page 68: ...Control Actions menu and press 8 i until you reach the menu Now press OK to enter this submenu The display will show Press OK again and you will be able to enter the IP address of the PC on which the...

Page 69: ...rface just as you would configure it on the terminal itself The information shown in your browser may be different from the picture due to different option modules loaded and the service level of your...

Page 70: ...VII How To Part...

Page 71: ...o update the firmware of a PayCon via the Update Tool Step 1 select firmware bundle Start the PayCon Update Tool The following screen will be shown Select the Browse button to open an explorer window...

Page 72: ...sired firmware bundle and select the Open button to load this firmware Step 2 enter subnet mask Enter the subnet mask where the Update Tool should search for available PayCons then press Scan A comple...

Page 73: ...view You can click on the column headers to sort the PayCons in the view by this column The column init rev is the initial revision which was burnt into the PayCon upon first shipment The column rev c...

Page 74: ...ur display How to change the language It is possible to set up three different languages one default language and two additional languages Additional languages can be selected with the Flag button if...

Page 75: ...as described in the Introduction chapter of this manual with your Administrator or Service card Take the following steps to create a user card 1 Insert a brand new card this can be a disposable or rel...

Page 76: ...e Welcome Payment please message on your display It is not possible to create cards in a PayCon which support also Dutch public banking cards the Chipknip Delete a user card Since the introduction of...

Page 77: ...eload another user card repeat above mentioned steps Via the PayCon menu Enter the menu as described the Introduction chapter of this manual with your Administrator or Service card Take the following...

Page 78: ...should not be allowed to remov e it him herself set this option to y es otherwise set it to no 6 The user group number y ou can edit or v iew it if no user groups are used leav e it 0 7 Is the use of...

Page 79: ...way to unlock a card is to insert the card back in the PayCon where the card was used the last time Now the card balance will be recovered automatically In case it is not possible to unlock the card...

Page 80: ...ce Now enter the new maximum balance that is allowed on user cards entering 0 means there is no maximum balance It is strongly recommended that all PayCons in the same project have the same maximum ba...

Page 81: ...iv ated the conf iguration must be done manually 3 IP address this address is only used when DHCP is not activated 4 Net mask this net mask is only used when DHCP is not activated 5 Def ault gateway t...

Page 82: ...y card 2 Insert a brand new card this can be a chip card or a contact less Mif are card optional 3 Enter an ID this is not strictly necessary 4 Enter a PIN code or leav e it blank in case no PIN code...

Page 83: ...ter of this manual with your Service card Take the following steps to create an administrator card No Description 1 Insert a brand new card this can be a chip card or a contact less Mif are card 2 The...

Page 84: ...b w 2 A4 colour 3 A3 colour 4 A4 b w duplex 5 A3 b w duplex 6 A4 colour duplex 7 A3 colour duplex PRINT PRODUCTS Number Product 1000 A4 b w 1001 A3 b w 1002 A4 colour 1003 A3 colour 1004 A4 b w duplex...

Page 85: ...are and printed on receipts both optional 4 The product price 5 The product s VAT this is not required 6 The content v alue is used f or products like Time in which case y ou could buy 5 min The conte...

Page 86: ...Products 79 PayCon II How to edit the product properties...

Page 87: ...l 4 The price 5 The VAT 6 The content v alue is used f or products like Time in which case y ou could buy 5 min The content v alue will then be 5 By def ault it is 1 because by def ault 1 product is s...

Page 88: ...with your Administrator or Service card Go to the menu Total Received in Terminal Counters to read out the total amount of money received from the complete terminal Go to the menu Period Received in...

Page 89: ...start a new period History print gives a turnover overview of the last 4 periods excluding the current one Enter the menu as described in the Introduction chapter of this manual with your Administrato...

Page 90: ...nu as described in the Introduction chapter of this manual with your Administrator or Service card Take the following steps to clear the period counters Leave the menu by pressing Stop several times u...

Page 91: ...u Create the appropriate settings this depends on the type of copier Please refer to the partner zone of the Inepro web site for the most actual information regarding copier settings In Appendix IV we...

Page 92: ...PayCon II Standard PayCon display Optional used with PayCon register Optional used with PayCompact Leave the menu by pressing Stop several times until you see the Welcome Payment please message on yo...

Page 93: ...PayCon displays Welcome Payment please or Out of order Now insert the ECOS card into the PayCon The PayCon will be fully automatically upgraded Upon completion the PayCon displays activated and the Pa...

Page 94: ...software Currently supported solutions are Inepro DocuPRO software Inepro CashPRO software Inepro AccesPRO software Inepro Gateway for PCounter PRO Inepro Gateway for Equitrack Added menu items Card...

Page 95: ...only indicates that this ECOS module is loaded Please ref er to y our Pay Con technical manual f or a detailed description of the use of the v arious f unctions Disposable cards Purpose When you inst...

Page 96: ...d unload the personal purse on a chip card Added menu items The following menu items are added to your PayCon menu structure Menu Item Description Card ID reload This menu item is used to reload add v...

Page 97: ...hen you install this ECOS module the PayCon will be able to maintain a detailed local tracking of which user performed which transactions within a certain period The transactions are being tracked on...

Page 98: ...VIII Troubleshooting Part...

Page 99: ...ear when browsing for them first check whether you have a firewall blocking this kind of communication When the PayCons still do not appear in the view type the PayCon s IP address in the broadcast fi...

Page 100: ...ed too soon 8 All user cards blocked by casher 9 Card not claimed by any module The card has not been recognised by any of the card readers in this Pay Con Please try again If the problem continues e...

Page 101: ...t this setting Then restart the Browse Tool and give the Browse Tool the necessary credentials via a PayCon in the network Now the browser window should open I have made an error and can not see anyth...

Page 102: ...ar in the Update Tool When the PayCons do not appear when browsing for them first check whether you have a firewall blocking this kind of communication When the PayCons still do not appear in the view...

Page 103: ...IX Appendixes Part...

Page 104: ...odules The PayCon Menu This appendix will show you the complete menu tree top structure with a table next to it with extra information on each item In this table you will find the rights you have with...

Page 105: ...as to be selected R Intv The Rev alue Interv al option has to be selected Name The Name option has to be selected Address The Address option has to be selected TRX LOG The transaction must be enabled...

Page 106: ...ion of the item s type and the type of requirement that is needed to show the item in the menu structure If an item is collapsed then you can assume that the structure of the item will be an exact cop...

Page 107: ...Appendixes 100...

Page 108: ...Appendix I 101 PayCon II...

Page 109: ...Appendixes 102...

Page 110: ...Appendix I 103 PayCon II...

Page 111: ...Appendixes 104...

Page 112: ...Appendix I 105 PayCon II...

Page 113: ...Appendixes 106...

Page 114: ...Appendix I 107 PayCon II...

Page 115: ...Appendixes 108...

Page 116: ...Appendix I 109 PayCon II...

Page 117: ...Appendixes 110...

Page 118: ...Appendix I 111 PayCon II...

Page 119: ...Appendixes 112 Appendix II Main Board Connections Overview...

Page 120: ...Appendix II 113 PayCon II...

Page 121: ...nput signals Digital output signals RJ45 network port Opto insulated serial port Power connector Coin selector USB connector SAM security socket JST network port Please refer to your cable documentati...

Page 122: ...e MOLEX Pin layout 14 pins connector Print connector Colour of the lead Polarity Signal name Observ ations 1 J18 1 White ready input Opto coupler input 2 J18 2 Brown 3 J18 3 Green size0 input Opto cou...

Page 123: ...ection to the PayCon 4 pins COPY OUT connector 10 pins COPY IN connector 1 Connect the large 10 pin connector to COPY_IN 2 Connect the 4 pin connector to COPY_OUT Connection sheet for positive and neg...

Page 124: ...mum 5V DC and maximum 30V DC The inputs are separated by of galvanization by means of an opto coupler in order to avoid any risk of damage to the electronics of the copier Releasing enable contact not...

Page 125: ...larity Signal name Observations 1 J16 1 Green output 0 Relay output Neutral 2 J16 2 Yellow 3 J18 1 White ready input Opto coupler input 4 J18 2 Brown Connection to the PayCon Just like above connect t...

Page 126: ...s the ready input has to generate a pulse By activating one or various size inputs price differences can be set In case no price line is activated the price set in product 0 will be settled Ready Siz...

Page 127: ...Appendixes 120 Counter pulse Connection A3 size 0 input Connection colour size 1 input Releasing copier output 0...

Page 128: ...e By activating various size inputs price differences can be set In case no price line is activated the price set in product 0 will be settled Ready Size 0 Size 1 Size 2 Size 3 Price Pulse 0 Pulse Act...

Page 129: ...Appendixes 122 Counter pulse ready input Connection A3 size 0 input Releasing copier output 0...

Page 130: ...per format To settle the prices the size inputs function in the same way as the ready input To settle a maximum of 5 prices each input has to be activated separately by a pulse Ready Size 0 Size 1 Siz...

Page 131: ...Appendixes 124 Counter pulse ready and size Releasing copier output 0...

Page 132: ...double counter pulse is to be set as a variable value Its value has to be set as accurate as possible Consult the menu item double click delay in Service copy for more details on the setting Calculat...

Page 133: ...t line which will block the coin selector from accepting all coins Secondly it is possible to block coins or groups of coins individually through 16 DIP blocking switches on the coin selector The DIP...

Page 134: ...nector f or external sorting f laps SCI MDB connector serial cctalk connector The label The label of the coin selector has all the necessary information required by the machine controller such as the...

Page 135: ...cifications are in the form of a table The columns have the following meaning Coin type Value and currency Teach mode channels are marked with TKn n number of blocking switch which has to be used to a...

Page 136: ...rk switch expands your PayCon with an unmanaged 3 port switch The 3 connections are typically Connection to company network Connection to PayCon Connection to printer or multi functional Back side Fro...

Page 137: ...are firmly connected Do not use the RJ 45 network port Either the JST connector or the RJ 45 connector can be used And the switch is already using the JST port USB connector Switch connectors connect...

Page 138: ...Appendix VI 131 PayCon II 5 Power on your PayCon...

Page 139: ...Grey Dimensions PayCon 105 x 77 x 228 W x H x D Dimensions PayMatic 180 x 282 x 164 W x H x D Outputs Relay Outputs 2 x Neutral maximum 30V DC 100 mA Opto coupler Outputs 4 x Opto coupler electronica...

Page 140: ...ypad 20 button f oil key board Display 32 x 122 dot matrix LCD with y ellow back light Card Reader Capacity At least 200 000 card transactions Environmental conditions Operating Temperature Metric 10...

Page 141: ...Appendixes 134 Appendix VIII CE Declaration of Conformity...

Page 142: ...Appendix VIII 135 PayCon II...

Page 143: ...Appendixes 136 Appendix IX Contact Details Inepro B V P O Box 92 2450 AB Leimuiden The Netherlands Noordeinde 72 2451 AH Leimuiden The Netherlands http www Inepro com...

Page 144: ......

Reviews: