


_____________________________________________________________________________________________________________________________________________________________
NetDVR User Manual
44 / 97
2)
Select the
Advanced
tab.
3)
Select the camera to be configured with video loss detection.
4)
Check the
Video Loss Detection
checkbox to enable this feature, as shown in Figure 9.15.
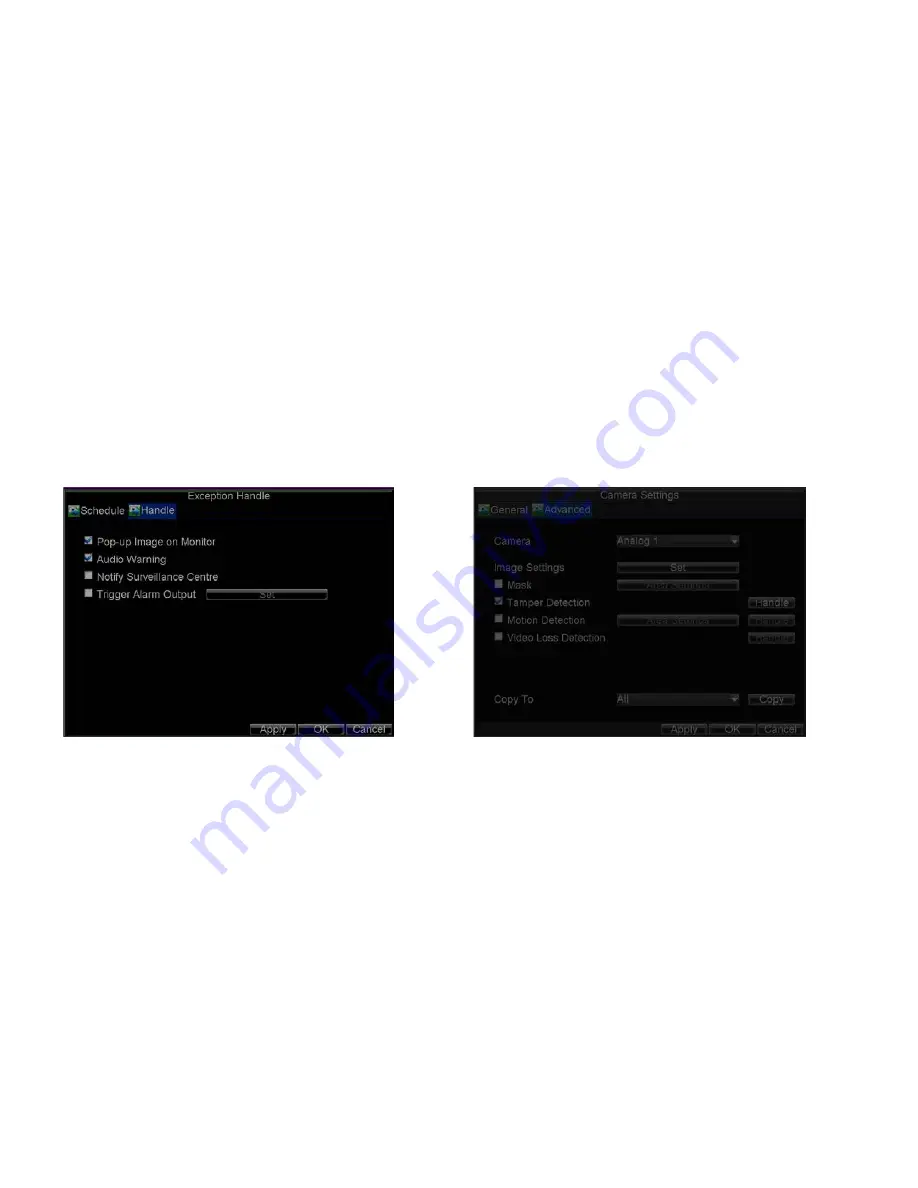
5)
Click the
Handle
button to enter the Exception Handle menu, shown in Figure 9.16.
6)
Select the
Schedule
tab. Set the schedule you want video loss detection to be enabled. Schedule can be set for all week or any day of the week with up to 8 time
periods per day.
7)
Select the
Handle
tab to configure exceptions handling. Exception trigger options will be described in the next section (See
Understanding Exception Trigger
Options
).
8)
Click
OK
to finish the settings.
9)
Repeat above steps to configure settings for other channels.
Note:
After having configured the schedule, the DVR must be restarted for the new settings to take effect.
Figure 9.17. Exception Handle Menu Figure 9.18. Camera Settings Menu
9.5 Video Tamper Detection
The video tampering detection area is in full-screen mode by default and cannot be configured. The video tampering can also be detected and set to trigger an action on your
DVR.
To set up video tempering detection:
1)
Click Menu > Settings > Camera to enter the Camera Settings menu, shown in Figure 9.1.


