Part 2 - Configuration
56
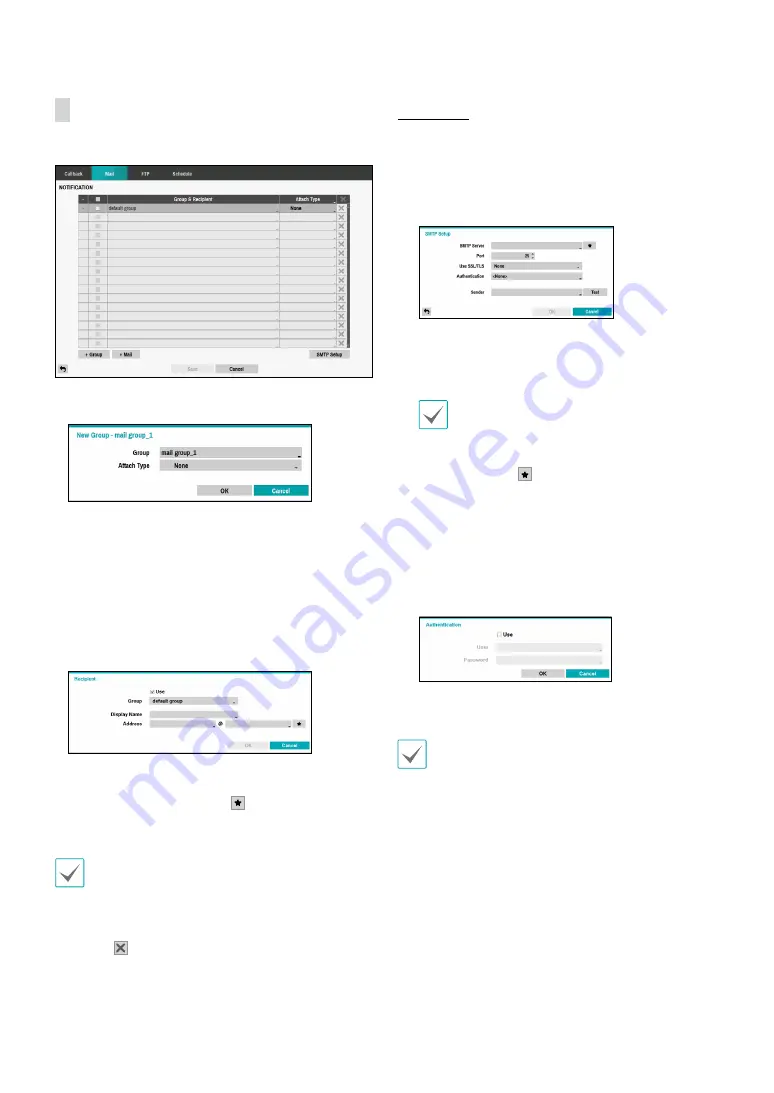
Configure Mail settings.
•
+Group:
Add a recipient group and select the image
file format attached to an email.
A virtual keyboard appears allowing you to enter the
Group name. You can select among CBF, JPG, and
MP4. When selecting CBF, the DVR will attach an event
detected video clip to an email. When selecting JPG,
the DVR will attach the event detected image file (JPEG
format) to an email. When selecting MP4, the DVR will
attach the event detected video clip (MP4 format) to an
email.
•
+Mail:
Add a mail recipient.
Assign the Recipient to a Group and enter the Recipient’s
Display Name. Enter the recipient’s e-mail address and
mail server provider. Select the icon to select the mail
server provider from a list of registered SMTP mail server
providers.
The recipient's mail address must be in the correct
email format and contain the @ symbol.
Select the
Attach Type
icon to attach event recordings
to outgoing mails.
Select the icon to remove the account.
SMTP Setup
Select
SMTP Setup
at the bottom right corner of the
screen to configure an SMTP server.
1
Enter the
SMTP Server
’s IP address or domain name
and then configure the
Port
and
Sender
settings.
Default SMTP server port number is
25
. Select
Test
to
send out a test mail using the current settings. Select
SSL/TLS or STARTTLS depending on the security
connection which the server supports.
•
If you have configured the DNS Server setting
under
Network - IP Address
, you can enter the
STMP server's domain name instead of its IP
address in the
SMTP Server
field.
•
Select the icon to select the mail server
provider from a list of registered SMTP mail
server providers.
•
Address entered under
Sender
must be in the
correct email format and include the @ symbol.
If user authentication is required by the SMTP server,
select
Use
and then enter the
User
and
Password
information.
2
Select
OK
to apply and exit.
This product contains content developed by OpenSSL
Project for use in Open SSL Toolkit (http://www.
openssl.org/).


