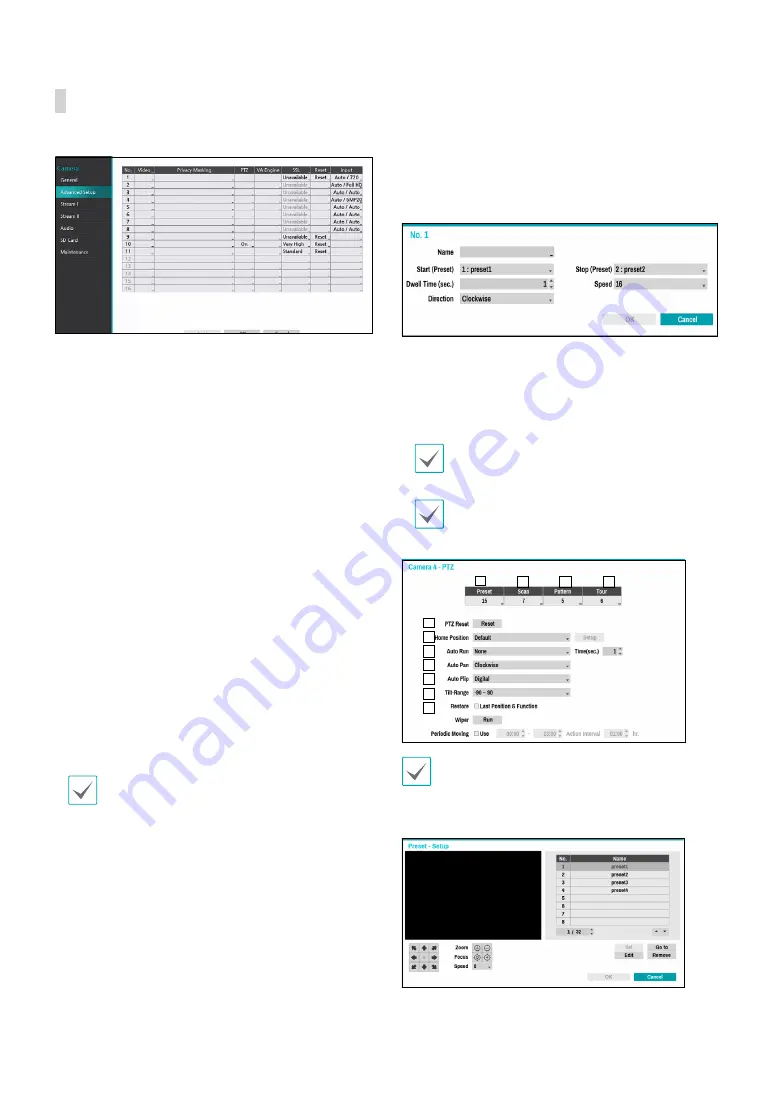
Part 2 - Configuration
47
Advanced Setup
Configure security and other advanced camera settings.
●
Video
: Adjust the camera image sensor settings such
as white balance and exposure. Configuration options
may differ depending on the camera model.
●
Privacy Masking
: Enable/disable and configure
privacy masking for the camera.
●
VA Object Calibration
: Configure detailed settings
for object detection and face detection. VA Object
Calibration affects Object Detection, Intrusion,
Loitering, Line Crossing and Face Detection events.
The following four functions may differ depending on
the actual camera type.
–
Maximum/Minimum
: Limit the maximum and
minimum size of the object to be detected.
–
Mount Type
: Set the environment in which the
camera records video.
–
Sensitivity :
Adjust the object detection sensitivity.
–
Object/Face Engine Daytime/Nighttime
Threshold
: Adjust the day/night threshold for
object detection and face detection engine.
●
SSL
: Set the camera’s security level as
Unavailable
,
Standard
,
High
, or
Very High
.
Standard
,
High
and
Very High
settings apply SSL (Secure Sockets Layer)
protection to the camera.
The more cameras security level is set to
Very High
,
the more the device loads may occur due to the
decoding of received data such as video and audio.
This may cause the total recording performance to
decrease and not work as you set it to. In this case,
you must improve the load by lowering the security
level or by lowering the recording bitrate.
●
Reset
: Resets the port or cameras.
–
Factory Reset
: Control the PoE Switch’s port. This
option is available when connecting to Video In/
PoE port or using a DirectIP PoE Switch (optional).
Select
PoE Reset
to reboot the camera. It is not
supported by video encoders.
–
Soft Reset
: Reboots the camera.
–
Factory Reset
: Resets the NVR to all its initial
factory settings. It is supported by DirectIP cameras
only.
●
Input
: Select the input type and mode. It is only
supported for video encoders.
●
PTZ
: If using an RS-485-compliant camera, configure
it for use in PTZ Mode.
–
PTZ Product
: Choose to select the model of
installed PTZ device.
–
ID
: Choose to assign an ID to each PTZ device.
– Choose to set up
Baud Rate
,
Data Bit
,
Stop Bit
and
Parity
of the connected device.
Refer to the PTZ device manufacturer’s instructions
for the proper settings.
Types of configuration options shown vary
depending on the PTZ functions supported by the
camera.
1
2
3
4
5
6
7
8
9
0
!
@
#
Numbers shown below Preset, Scan, Pattern, and
Tour indicate the numbers of configured functions.
1
Preset
Use the buttons below to choose a preset position.


