background image

Part 2 - Configuration

75

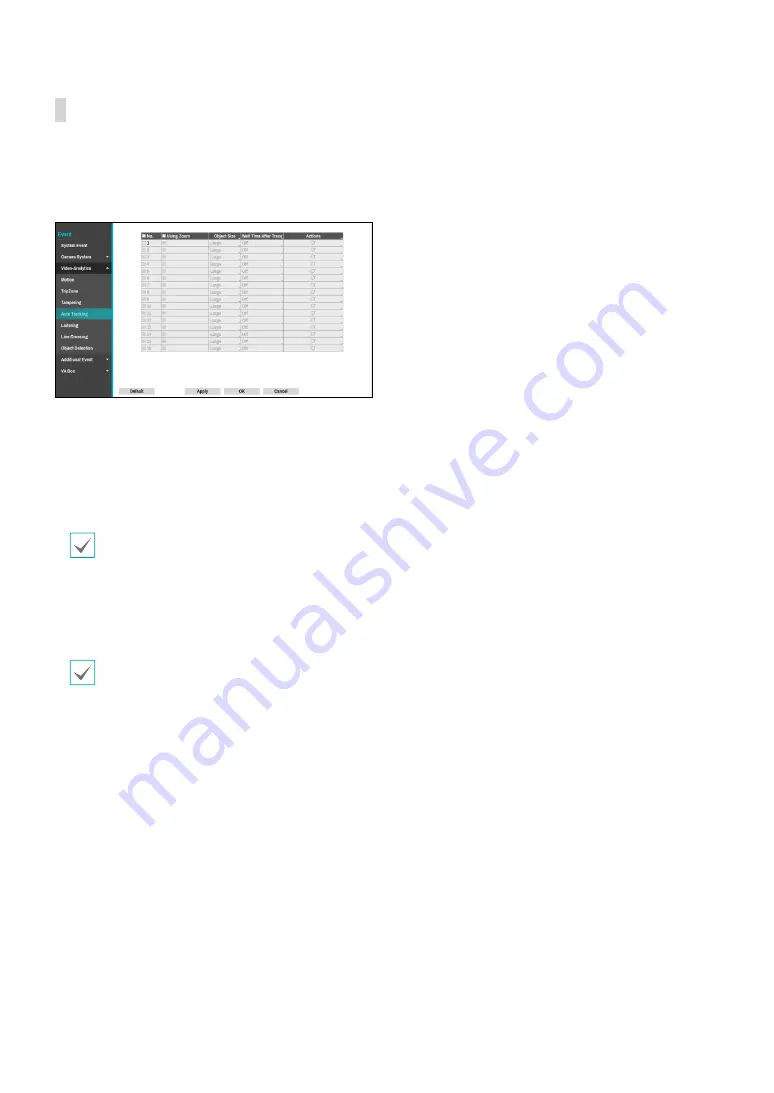
Video-Analytics_Auto Tracking

When the PTZ camera detects a moving object, the 
camera operates the PTZ to track the mobing object. 
Auto tracking event occur simultaneously when the PTZ 
camera tracks an object.


No.:

 Select which cameras to apply Auto Tracking to.


Using Zoom

: When tracking an object, the PTZ zooms 

in the object.


Obejct Size:

 Set the zoom level when using auto 

tracking. The larger the object size is set, the larger the 
object will be displayed on the screen.

This setting is enabled only when the Zoom 
function is on.


Wait Time After Trace: 

After the object tracking is 

completed, the camera monitors the end poistion for 
a set period of time and then moves the PTZ to the 
initial position.


If you do not set this function, the PTZ will not 
move to the initial position after auto tracking 
ends.


Only some PTZ cameras support this event. 
Please contact the manufacturer for availability 
of this event.


When setting the PTZ with an linked action in the 
Action tab, the camera where the event occurs 
cannot be set to PTZ linked action camera. For 
instance, when setting PTZ on the Auto Tracking-
Actions(no.8) tab, you cannot set PTZ of no.8 
camera.


Actions

: Specify which actions to take when Alarm-In 

is detected.


Record

: Specify which cameras to begin linked 

recording on when an event occurs. If the schedule 
is set to Event or Time & Event mode, the selected 
cameras will begin linked recording when an event 
occurs.


Alarm-Out

: Designate event-triggered alarm-out 

channels (each for the NVR and camera) and beeps.


Notify

: Configure to be notified of events by Mail, 

LAN1 through 5, Push, FTP, and/or Alert Window.


PTZ

: Moves the PTZ camera to a specific preset 

position when an event occurs.


Event Monitoring: 

Selects the cameras to monitor 

when an event occurs.

Summary of Contents for DR-2300P Series

Page 1: ...Powered by Network Video Recorder Operation Manual DR 2304P A DR 2404P A DR 2308P A DR 2316P A...

Page 2: ...and use If you need to disassemble the product for functionality expansion or repair purposes you must contact your retailer and seek professional assistance Both retailers and users should be aware...

Page 3: ...ting instructions adjust only those controls that are covered by the operating instructions as an improper adjustment of other controls may result in damage and will often require extensive work by a...

Page 4: ...INTERFERENCE AT THEIR OWN EXPENSE WARNING CHANGES OR MODIFICATIONS NOT EXPRESSLY APPROVED BY THE PARTY RESPONSIBLE FOR COMPLIANCE COULD VOID THE USER S AUTHORITY TO OPERATE THE EQUIPMENT THIS CLASS O...

Page 5: ...r any problems resulting from the use thereof The information contained herein is subject to change without notice Revisions or new editions to this publication may be issued to incorporate such chang...

Page 6: ...ration Mode 22 Login 22 Live Menu 24 Zoom 26 PTZ Control 27 Dewarping Control NVR 28 Dewarping Control Camera 29 Event Monitoring 29 Covert Camera 29 Context Menu Access 30 Edit Group 30 Video Recordi...

Page 7: ...Record Setup 59 General 59 Advanced Setup 60 Schedule 61 Pre Event 63 Smart Failover 63 Statistics 64 Event Setup 65 System Event 65 Camera System 66 Camera System_Audio Detection 66 Camera System_Cam...

Page 8: ...Exceed the Time Limit 81 VA Box_Social Distancing Violation 83 VA Box_Mask Rule Violation 84 VA Box_VA Loss 85 Device Setup 85 Alarm Out 85 Alarm Out_Setup 85 Alarm Out_Schedule 86 Remote Control 86 V...

Page 9: ...112 Camera 112 Device 112 VA Box 113 Alarm Box 113 System 114 Storage 114 Network 115 Part 3 Search 117 Time Lapse Search 117 Context Menu 122 Motion Search 122 Text In Search 123 ANPR Search 124 Cli...

Page 10: ...Search Mode 133 Part 5 Appendix 136 NAT Function Example 136 Camera WebSetup Connection 137 IDIS Web Connection through IDIS Camera 137 IDIS Center Program Connection through IDIS Camera 138 RTSP Con...

Page 11: ...Click the question mark button on the bottom left corner and refer to the instruction on setting up a password An email address and UPR files are required to find the password Otherwise you may not b...

Page 12: ...settings refer to the Date Time section under System Setup on page 35 3 Choose the desired Recording Method and click Next 4 Choose the desired Recording Quality and click Next Higher recording qualit...

Page 13: ...Continuous Profile 1 Motion Profile 3 Continuous Profile 2 Motion Profile 4 Continuous Profile 3 Motion Continuous Profile 1 Profile 2 Profile 4 5 Choose the desired codec and click Next 6 Click Fini...

Page 14: ...ter s UPnP function refer to the router s operation manual 4 Enter in the Device Name field the NVR name to be registered on the FEN server and then click Check to check its availability The device na...

Page 15: ...mouse and select Camera Registration to run the Camera Registration mode It allows you to scan for the cameras connected to the NVR 1 2 3 4 5 1 Camera Scan Button 2 Camera View Menus 3 Camera List Are...

Page 16: ...gs exceed the system performance In this case please make adjustments to optimize the performance Mode Select the scan mode Auto Scan LAN Lists cameras in a LAN environment If Auto Scan LAN fails to r...

Page 17: ...abled The NVR allocates an IP address automatically in the range of 10 10 0 128 to 10 10 254 254 by using DHCP to the camera connected to the NVR s VIDEO IN port On DHCP Server Video In Network is con...

Page 18: ...era list depending on the search scope such as specified IP address range Screen Auto Assign Assigns the detected cameras on the video display area Camera list By using the camera information file csv...

Page 19: ...performance bitrate is not allocated Quailty IPS and Resolution can be low If a channel has a camera already registered bitrates may not be lower than current stream settings You can change the bitrat...

Page 20: ...on a camera list entry Add Remove Camera Adds or removes the selected camera The Add Camera option is inactive if the camera has already been added to the screen Authentication Enter the necessary ca...

Page 21: ...g up the camera menu Remove Camera Removes the registered camera Remove Device Removes the registered encoder Color Control Adjusts the camera s color settings Information Displays the camera s basic...

Page 22: ...ct Camera Registration Login Configuring the NVR s settings and accessing its searching and other functions require an authorized user login 1 Bring up the Live menu and either press the SETUP button...

Page 23: ...be enabled to use find password function 3 Enter an UPR User Password Reset verification and then click on UPR Verification button 4 Select the UPR file and then click on Import button To use UPR fun...

Page 24: ...to hide the menu Use the Arrow buttons on the remote control to select the menu options 1 2 3 4 5 6 7 8 9 0 1 Login Logout 2 Layout 3 Previous Group Next Group 4 Display 5 Freeze 6 Alarm 7 Panic Reco...

Page 25: ...te control The icon is displayed on the upper right part of the screen while Sequence is in progress Full Sequence Displays all channels in sequence while in Live mode single and split screen settings...

Page 26: ...Indicates an event monitoring Indicates dewarping is in use Indicates HDD use The icon to the left is shown if using the overwrite setting Otherwise remaining HDD space is shown as a percentage value...

Page 27: ...ol Authority is necessary in order to control PTZ cameras A message will prompt if there is no PTZ camera displayed on the Live screen Zoom in out and shift focus using the PTZ Control ZOOM FOCUS butt...

Page 28: ...image on NVR image While in live mode and search mode right click on the mouse to select Dewarping from the context menu The screen is changed to the Dewarping mode Mount Type Choose a position that t...

Page 29: ...the upper right portion of the screen To use the Event Monitoring feature navigate to Display Setup Main Monitor and enable Event Monitoring Event Monitoring remains in effect throughout the entire Li...

Page 30: ...ween the NVR and camera the microphone connected to the NVR will terminate automatically when the microphone on the remote is turned on The remote microphone takes priority Information Select a networ...

Page 31: ...tion under Record Setup General has been configured Panic Recording will automatically terminate after the specified duration of time has elapsed For more information refer to the Record Setup on page...

Page 32: ...lected search mode will be initiated For more information on data search refer to the Part 3 Search on page 118 Remote Control Buttons during Playback 1 Camera Button Displays the selected recording i...

Page 33: ...When using Use 2FA feature registered mobile device must be authenticated before entering the setup menu For more information on 2FA function refer to Use 2FA on page 40 1 While in Live mode press the...

Page 34: ...the right of the cursor Converts keyboard Batch Assignment Certain table format menus such as the shown in the Camera Setup on page 46 allow you to change the title value In this case changing the ti...

Page 35: ...rmation on 2FA function refer to Use 2FA on page 40 Setup Exports current NVR settings or imports existing settings If the NetFS feature is in use you can export or import NVR settings in the register...

Page 36: ...nerate reports for troubleshooting Date Time Date Used to change the system s date setting Time Used to change the system s time setting Date Format Time Format Used to change the system s date and ti...

Page 37: ...2 Select a date 3 Select OK to apply and exit Select the icon to delete the existing holiday date User Use this option to register users and assign permissions 1 Select Group and enter a group name A...

Page 38: ...tings 9 Select Apply or OK to exit Group names user names passwords and email can be entered using the virtual keyboard For more information on using the virtual keyboard refer to the Text Input via V...

Page 39: ...Copy The user who has permission for Clip Copy can perform Clip Copy If the user does not have permission Clip Copy is not allowed but only search is allowed Setup Camera Setup May configure camera s...

Page 40: ...connecting to the NVR from a remote location Waiting Period Select the limit time for aceess after automatic expiration Security Use this option to configure security settings Use 2FA Two factor auth...

Page 41: ...tion The maximum number of device that can be registered is 16 When the mobile device registration is complete the following message will appear Click Disable 2FA at the bottom left corner of the scre...

Page 42: ...n formatted indicates either Record or Not Using If you have connected an unformatted storage device the Use As value will be indicated as Not Formatted Information Indicates if the disk is being used...

Page 43: ...ta on the two disks at the same time between two disks all existing data on the two disks will be erased Once you start mirroring all existing data on the two disks will be erased Please be careful no...

Page 44: ...Generating Interval as one day period only the reports from the last 24 days can be viewed If the NVR is turned off the reports will automatically turn off The reports are organized by recent date an...

Page 45: ...ON file on HTTP notifications Value Set the value of system properties to be included in a JSON file on HTTP notifications About User agreement User agreement for the use of the FEN service If you agr...

Page 46: ...the device itself may not be visible for scanning and registration by the NVR For more information about supported network devices and models contact your retailer The supported scan modes may vary d...

Page 47: ...login 1 Select the desired deivce from the list and click the Add Camera button then the login window will appear 2 Select a user enter the password and then select OK By selecting Apply to All Devic...

Page 48: ...or the network device will appear Select Skip to skip the authentication settings for the current network device and to display the Authentication window of the next network device 3 When the password...

Page 49: ...audio This may cause the total recording performance to decrease and not work as you set it to In this case you must improve the load by lowering the security level or by lowering the recording bitrat...

Page 50: ...elected preset s name Remove Used to remove the selected preset 2 Scan Used to set up a profile for moving the camera between two points At least two presets must be available in order to use the scan...

Page 51: ...mages from the concerned camera on the left side of the screen Selecting Apply or OK displays a popup screen that indicates whether the profile has been set up successfully 5 PTZ Reset Reboots the cam...

Page 52: ...ss the lighting conditions and adjust the setting automatically Selecting Manual allows the user to adjust the setting manually Sharpness Adjust the sharpness level Adjust the contours to make the ima...

Page 53: ...other area of images brightly and clearly by blocking the backlight in the certain area Dark parking lot entrances and gas station entrances at night for example Local Exposure compensates for the bri...

Page 54: ...ocus movement format as Auto Manual Semi Automatic It may not be supported depending on the device WDR Disables or enables the WDR Wide Dynamic Range When the very dark and very bright areas exist sim...

Page 55: ...ode Nighttime Mode Enable disable IR Mode Auto Allow the system to enable disable IR Mode automatically Schedule Set up the IR Mode schedule IR Mode is disabled for all days and times that are designa...

Page 56: ...uttons on page 19 Apply the video profile settings of the camera selected under Camera Channel to a different camera Live Remote Video Profile Check the current Live video picture quality and edit rem...

Page 57: ...t Codec Lower bitrate by using the intelligent codec Some camera models may not support the Intelligent Codec function When using intelligent codec function the start of some functions such as clip co...

Page 58: ...ect an audio codec G 711 u Law G 711 a Law ADPCM 16KHz or G 726 Associated Audio In Associates the selected audio channel with the camera It is supported by video encoders only Audio In Select an audi...

Page 59: ...s only supported for the cameras supporting Failover recording of SD memory card For cameras is in use by other NVRs or the newly registered cameras the Format option displays Other Please format the...

Page 60: ...of days has elapsed Select between 1 day and 999 days To disable Auto Deletion select Never If enabled recording data will be stored on the NVR for the specified number of days and then deleted automa...

Page 61: ...or Time Recording data is deleted first The system s recording time may change depending on recording quality resolution motion and other configurations made by the user The duration specified under L...

Page 62: ...Mode Options Mode Select No Record Time Event or Time Event No Record Unless the Panic Record button is pressed no recording will take place during the scheduled time frames on the scheduled days Time...

Page 63: ...time recording icons are as follows Time Lapse Time Audio Detection Alarm In Trip Zone Motion Detection Tampering Video Loss Text In Recording Fail Fan Error Exceed the People Limit Exceed the Time L...

Page 64: ...e Smart Failover When the connection is recovered again Smart Failover Service enables the data recorded on SD memory card to record on NVR Smart Failover Depending on whether Recording Failover Servi...

Page 65: ...ion as shown below Capacity Indicates the sum of all storage capacity in the camera group Click icon under Capacity tap to calculate the capacity and throughput by each group and display the remaining...

Page 66: ...panic recording actions Check Recording The system will assume an error if the system has been scheduled to record normally but recording does not take place during scheduled intervals Select Schedul...

Page 67: ...HDDs composing mirroring is in error DR 2404P model For system events only an e mail notification of actions can be selected In order to use the Notify Callback feature the NVR must be registered to...

Page 68: ...specified time frame Camera System_Camera Fan Error The event occurs when the fan has stopped in the fan mounted camera No Select which cameras to apply Fan Error to Actions Specify which actions to...

Page 69: ...r the time specified after the initial video loss was detected Set the value between 0 1 and 15 seconds or choose Never This is supported only when video encoders are connected Use Ignoring Time Selec...

Page 70: ...ls each for the NVR and camera and beeps Notify Configure to be notified of events by Mail LAN1 through 5 Push FTP and or Alert Window PTZ Moves the PTZ camera to a specific preset position when an ev...

Page 71: ...d then select clear or reverse the selection From the zone selection screen press the button on the remote control or right click on the mouse to open up the Zone Setup menu Select Confirm the block s...

Page 72: ...indow PTZ Moves the PTZ camera to a specific preset position when an event occurs Event Monitoring Selects the cameras to monitor when an event occurs In order to use the Callback feature the NVR must...

Page 73: ...selection in the selection window Reverse Clear the blocks selected within the selection window and select all unselected blocks within the selection window Select All Select all blocks Clear All Cle...

Page 74: ...the time frame in 15 minute increments Times outside the specified range will be assumed as nighttime by the system Video Analytics_Tampering No Select which cameras to apply Tampering to Sensitivity...

Page 75: ...itial position after auto tracking ends Only some PTZ cameras support this event Please contact the manufacturer for availability of this event When setting the PTZ with an linked action in the Action...

Page 76: ...s not affect Loitering recording Use Ignoring Time Loitering detection will be disabled during the specified time Actions Specify which actions to take when Tampering is detected Record Specify which...

Page 77: ...te event triggered alarm out channels each for the NVR and camera and beeps Notify Configure to be notified of events by Mail LAN1 through 5 Push FTP and or Alert Window PTZ Moves the PTZ camera to a...

Page 78: ...indow PTZ Moves the PTZ camera to a specific preset position when an event occurs Event Monitoring Selects the cameras to monitor when an event occurs In order to use the Callback feature the NVR must...

Page 79: ...on the remote program Select Panic Record to specify which alarm in channels to use Panic Record commences when the corresponding alarm in occurs and terminates when the alarm in is deactivated Additi...

Page 80: ...t occurs If the schedule is set to Event or Time Event mode the selected cameras will begin linked recording when an event occurs Alarm Out Designate event triggered alarm out channels each for the NV...

Page 81: ...as will begin linked recording when an event occurs Alarm Out Designate event triggered alarm out channels each for the NVR and camera and beeps Notify Configure to be notified of events by Mail LAN1...

Page 82: ...rs Alarm Out Designate event triggered alarm out channels each for the NVR and camera and beeps Notify Configure to be notified of events by Mail LAN1 through 5 Push FTP and or Alert Window PTZ Moves...

Page 83: ...t be registered on the remote program In order to use the Exceed the Time Limit feature Queue Management should be set on the channel VA Box_Exceed Occupancy Limit Event occurs when the In Out coeffic...

Page 84: ...ls each for the NVR and camera and beeps Notify Configure to be notified of events by Mail LAN1 through 5 Push FTP and or Alert Window PTZ Moves the PTZ camera to a specific preset position when an ev...

Page 85: ...or wearing a mask on a person s face and set the event to occur when a violation occurs Detection Type Set the Non Mask Mask Rule Ignoring Interval Event log and remote notification are not performed...

Page 86: ...gered alarm out channels each for the NVR and camera and beeps Notify Configure to be notified of events by Mail LAN1 through 5 Push FTP and or Alert Window PTZ Moves the PTZ camera to a specific pres...

Page 87: ...n event occurs On Alarm out is always on Off Alarm out is always off Channels Configure alarm out port and beep settings Remote Control Port Select None or RS232 Click the Setup button and then select...

Page 88: ...n No Select the registered VA Box number and click the Add Box button to register the camera MAC Address Displays the scanned device s MAC address Address Displays the scanned device s IP address Mode...

Page 89: ...h as IDIS Center to check the analysis results 1 1 DV 1104 People Counting Count the number of people passing through the line on the live screen Right click on the zone setup screen to bring up the P...

Page 90: ...the details of the VA Box Select the VA Box s Analytic Type first before you use this setup Dynamic Background Suppression Recognize the objects people even if the background is moving Light Disturba...

Page 91: ...upancy Limit event Boundary Set a virtual border to count the floating population Depending on the location of the boundary the number of people may be incorrectly calculated Save Save the changes and...

Page 92: ...p the Crowd Detection Menu Undo Return to the previously set zone Save Save the changes and exit the menu Cancel Exit the setup screen without saving the changes Configuration Set the environment of C...

Page 93: ...the zone setup screen to bring up the Social Distancing Violation Menu Undo Return to the previously set zone Save Save the changes and exit the menu Cancel Exit the setup screen without saving the ch...

Page 94: ...screen to bring up the Mask Violation Menu Undo Return to the previously set zone Save Save the changes and exit the menu Cancel Exit the setup screen without saving the changes Configuration Set the...

Page 95: ...you can select USB storage only Select USB storage to display USB search window and then select the corresponding upgrade package from the storage device connected to the NVR s USB port After selectin...

Page 96: ...ned device s protocol Name The Registered indicates the VA Box is registered to the NVR and Not registered indicates the VA Box is not registered to the NVR Status Registered indicates the Alarm Box i...

Page 97: ...On and Off You will be able to change the settings if Use DirectNDC is enabled DirectNDC service allows you to access the NVR and control it remotely using a PC or mobile devices via Ethernet Port Co...

Page 98: ...Button on the CALENDER button the remote control F10 or Windows Press the F10 or Windows key to display the Live Monitoring menu or Search menu on the screen This is the same as pressing the MENUbutto...

Page 99: ...u made 1 Enter the IP address of the NVR 2 Adjust the frequency of the ping test 3 Select Run to do the test The test result is displayed 4 Select Close to exit If using a firewall select Change Port...

Page 100: ...pplication you can easily enter the IP address using the QR code There is a limit to the number of users allowed to connect remotely at the same time Contact the service center for more information IP...

Page 101: ...ns the and or symbol it might not be able to connect to the NVR from the IDIS Web program When registering NVR with the IDIS mobile application you can easily enter the IP address using the QR code FE...

Page 102: ...NetFS feature N A Disables the NetFS feature ALL Enables the NetFS feature Upgrade Allows you to use the upgrade file that was uploaded to the NetFS site Setup Allows you to import or export a setup f...

Page 103: ...s access such as specific MAC address IP address and receiving network port of the NVR Select Use Firewall to activate firewall function Click the icon at the bottom of the list to set up a firewall r...

Page 104: ...pe Set the IP address the MAC address or the network port Action Select which actions to apply this NAT rule to PORT_FORWARD Allow the access by combining an external TCP UDP port with an internal por...

Page 105: ...s Enter the IP address of the receiving server and set Retry to between 1 and 10 in case of connection failure Select the Setup button at the lower right corner of the screen to configure Callback Ret...

Page 106: ...ng you to enter the Group name You can select between CBF and MP4 When selecting CBF the NVR will attach an event detected video clip to an email When selecting MP4 the NVR will attach the event detec...

Page 107: ...P server 1 Select the SMTP server Type 2 Enter the SMTP Server s IP address or domain name and then configure the Port and Sender settings Default SMTP server port number is 25 Select Test to send out...

Page 108: ...Clip When sending an e mail event recordings will be attached and you can set the time to record MP4 clips Event recordings are attached only for the event that the camera generates Push Configure Pus...

Page 109: ...clip to the FTP site When you select MP4 the NVR will attach an event detected video clip to the FTP site Site Information Displays information for the FTP site For the FTP notification to work prope...

Page 110: ...rameters must be included when sending the http requests Click the Setup icon at a bottom right corner of the window When the following window appears click the button to set the HTTP attributes such...

Page 111: ...llicit video leaks a watermark are added to the user name site or email Camera No Displays the camera number on the upper left corner of the camera screen Title Displays the camera name on the upper l...

Page 112: ...urs Supported resolutions may be restricted depending on the monitor 3840 x 2160 50 60Hz resolution is supported only in HDMI 2 0 monitor We recommend using 3840 x 2160 or 1920 x 1080 resolution If yo...

Page 113: ...cording Fail of Main Stream Recording Fail of Sub Stream Check Alarm In The two events are supported by some products only VA Box This screen displays an overview of VA Box events When an event occurs...

Page 114: ...fer to the System Event on page 66 Disk Partially Almost Full Disk Partially Full If the storage device is not in Recycle status event status is displayed when a disk in one of multiple quota groups r...

Page 115: ...han as designated by the user Generates a system event Temperature N A Unable to detect the disk s temperature Good Operating within normal temperature range Bad Disk temperature higher than as design...

Page 116: ...h is connected to the LAN port and shows how many cameras are connected Clicking the image displays the camera s channel number Clicking the image displays status information of the device connected t...

Page 117: ...TWORK CLIENT ports do not support PoE Number of Connected Clients Indicates whether there are clients connected to the NVR via an external network and how many clients are connected indicates at least...

Page 118: ...ct Control Area 2 Press Menu once more to move the Control Area 3 In 2 seconds after moving the Control Area the Control Area becomes selected and the corresponding menu disappears 4 After selecting t...

Page 119: ...uttons 4 Bottom Activates the bottom record table Use the arrow buttons to select a record table 5 None Activates the arrow and playback buttons as a recording function The error OSD OUT OF CODEC MEMO...

Page 120: ...s OSD On Off Enables disables the status OSD feature Aspect Ratio On Off Displays the video accordingly to camera screen size in the ratio of the original image 4 Alarm Pressing this button while the...

Page 121: ...ugh video recordings Playback controls have the same functions as their remote control counterparts Jog Shuttle Adjust the playback method and speed Jog shuttle s vertical indicator indicates the curr...

Page 122: ...Search Perform ANPR Search 5 Move Search video recordings based on date and time Specify the date and time and then select Go to jump to the corresponding video recording Select a bookmark button on...

Page 123: ...ing Purple Event Recording Yellow Pre Event Recording Red Panic Recording Green Faulty recording due to a temporary disruption in device connection Smart Failover Recording Live Messages Display a mes...

Page 124: ...and 5 High Min Blocks The Min Blocks option is available with Motion Search only Once all the options have been configured select Search Select search results entry to display the video recording on...

Page 125: ...r Playback mode to open up the Clip Copy setup window Specify the From and To settings A B Clip Copy Designate a start point and an end point and copy the data in between Select Clip Copy A B Clip Cop...

Page 126: ...Touch Clip Copy configures the storage range automatically based on the storage drive s capacity If there is insufficient space available on the selected storage device you will only be able to Clip C...

Page 127: ...cting the specific event displays the screen to be stationary By clicking the button on the camera right you can copy the event You can uncheck the First and Last options at the top of the Event Log S...

Page 128: ...ect which channels to search recording fail events in Exceed Occupancy Limit Select which channels to search Exceed Occupancy Limit events in Crowd Detection Select which channels to search Crowd Dete...

Page 129: ...k position Select Bookmark list and then the icon to delete the corresponding bookmark Overlapped Recording Search If the system s clock is changed to a point in the past overlapping recordings may be...

Page 130: ...pp or above Internet Explorer Ver 7 0 or above 32 Bit IDIS Web only works with Microsoft Internet Explorer and will NOT work with other browsers IDIS Web does not work in Microsoft Windows 8 metro UI...

Page 131: ...llow websites to open windows without address or status bars Enable To use IDIS Web on Microsoft Windows Vista or above launch Internet Explorer by right clicking on the icon and selecting the Run as...

Page 132: ...eo screen using a printer connected to the computer 6 Click to save the current video screen as an image file 7 Click TYPE 1 to configure rendering mode OSD settings and AlarmOut beep Select rendering...

Page 133: ...le Audio Enables audio transmission with remote locales Select to display buttons Enables transmission of audio to the remote locale via microphone Enables playback of audio from the remote locale on...

Page 134: ...current video screen using a printer connected to the computer 6 Click to save the video recording as an executable file 7 Click to save the current video screen as an image file 8 Click TYPE 1 to co...

Page 135: ...e calendar The time table at the bottom displays recording data information for the selected date Select a point in time to display video from that moment If multiple recordings are available for the...

Page 136: ...ystem If no name is entered for the camera the name used at the remote locale is shown on the screen Enable Audio If audio was recorded with the video enabling this option plays audio upon playback li...

Page 137: ...guration Guide 1 3 5 7 9 11 13 15 10 12 14 16 2 8 6 4 32EA PC WEB Setup IDIS Web IDIS Center program RTSP D i r e c t I P S w i t c h NVR WAN Ethernet 0 IP Address 10 0 125 211 Getway 10 0 0 1 VIDEO I...

Page 138: ...html Enter the HTTP port number of the camera 16001 to have port forwarded IDIS Web Connection through IDIS Camera Access the IDIS Web of the camera which is internal VIN network from the PC Port For...

Page 139: ...camera which is internal VIN network from the clients such as the IDIS Center program Port Forward through 2 routers NVR Port Number and Remote Port Number of the Camera Eth 0 WAN Port 11002 Eth 1 VIN...

Page 140: ...003 Eth 1 VIN IP IP address of the camera Eth 1 VIN Port Remote port number of the camera Approach Access RTSP function using media players such as VLC Player You can monitor live video images through...

Page 141: ...Part 5 Appendix 141 Memo...

Page 142: ...IDIS Co Ltd For more information please visit at www idisglobal com...

Reviews: