16
INSTALL
6.0 ADDING DEVICES INTO THE SYSTEM
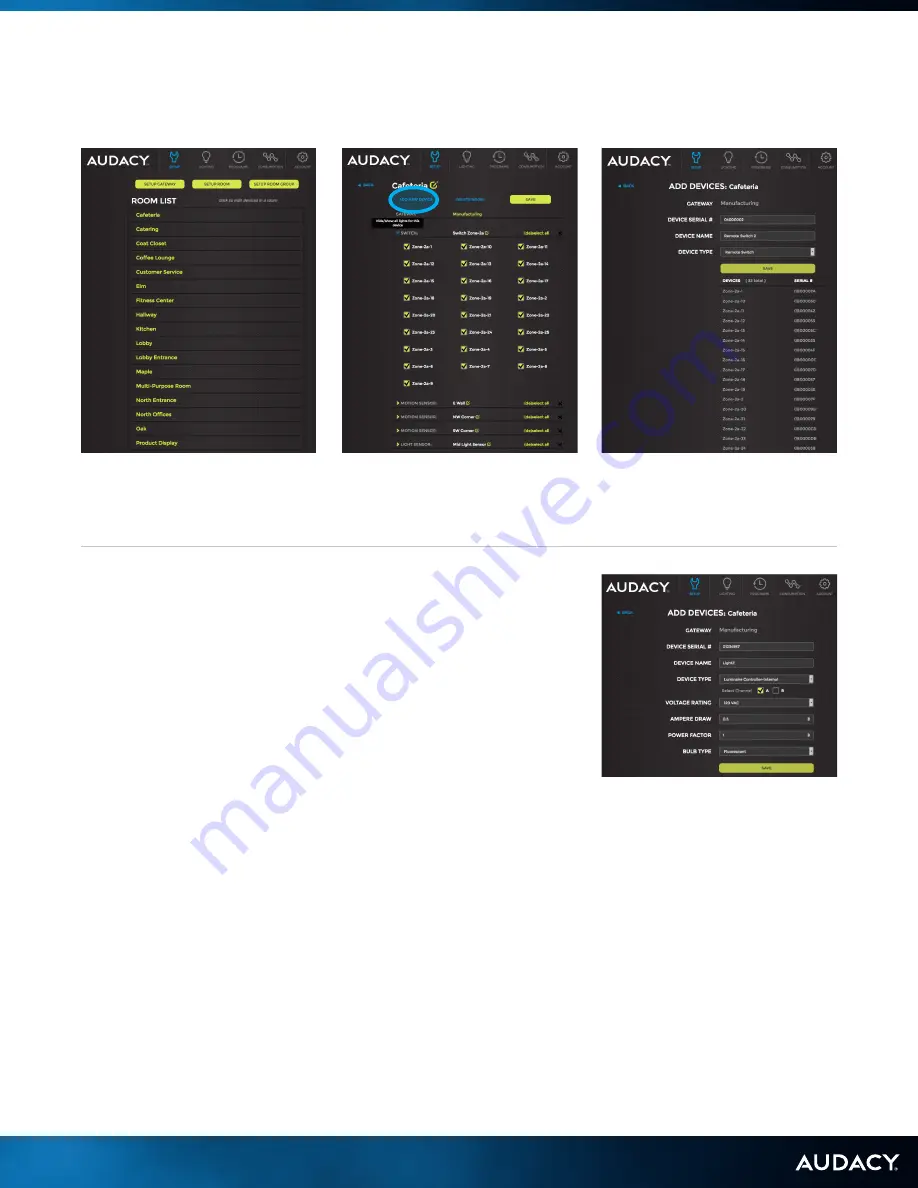
6.2 AUDACYCONTROLS.COM INSTALLATION METHOD
6. If the device is a Luminaire Controller you have the option to “Show
advanced controller settings” to add fixture details.
Device Type
– Type will automatically populate.
Select Channel
– Channel A should be used in most configurations; Channel B
should be used if the Luminaire Controller is being used as a repeater or when there is
more than 1 Gateway being used in the same vicinity.
Voltage Rating
– Set according to fixture; used to calculate consumption data.
Ampere Draw
– Set according to fixture; if multiple fixtures are controlled by the same
Luminaire Controller the Amperage draw should be the total of all fixtures controlled.
Used to calculate consumption data.
Power Factor
– Set according to fixture; used to calculate consumption data.
Note: Modifying the default value of 1 is typically not needed due to the high power factor
for most lighting systems.
Bulb Type
– Set according to fixture.
Note: Incorrect data could result in inaccurate consumption reporting
7. Click SAVE.
1. Click SETUP.
2. Select the room to add the
device to from the Room List.
3. Click ADD NEW DEVICE.
4. Input Device Serial Number.
5. Click DEVICE NAME to rename
device from default device ID.
Summary of Contents for Audacy Wireless Controls
Page 1: ...1 OPERATIONS USER MANUAL NOVEMBER 2016 ...
Page 5: ...5 INSTALL ...
Page 17: ...17 CONFIGURE ...
Page 20: ...20 CONTROL ...
Page 27: ...27 APPENDIX ...
Page 34: ...34 APPENDIX F LUMINAIRE CONTROLLER ONE LINE DRAWINGS ESCGRID 1000 PWM LUMINAIRE CONTROLLER ...
Page 42: ...42 APPENDIX G SENSOR COVERAGE PATTERNS WALL MOUNT MODEL VSW 1300 G SENSOR COVERAGE PATTERNS ...
Page 43: ...43 APPENDIX F LUMINAIRE CONTROLLER ONE LINE DRAWINGS CEILING MOUNT MODEL VSC 1300 ...
Page 47: ...47 APPENDIX Duplicate as needed ROOM LOCATION DEVICE TYPE SERIAL ...


