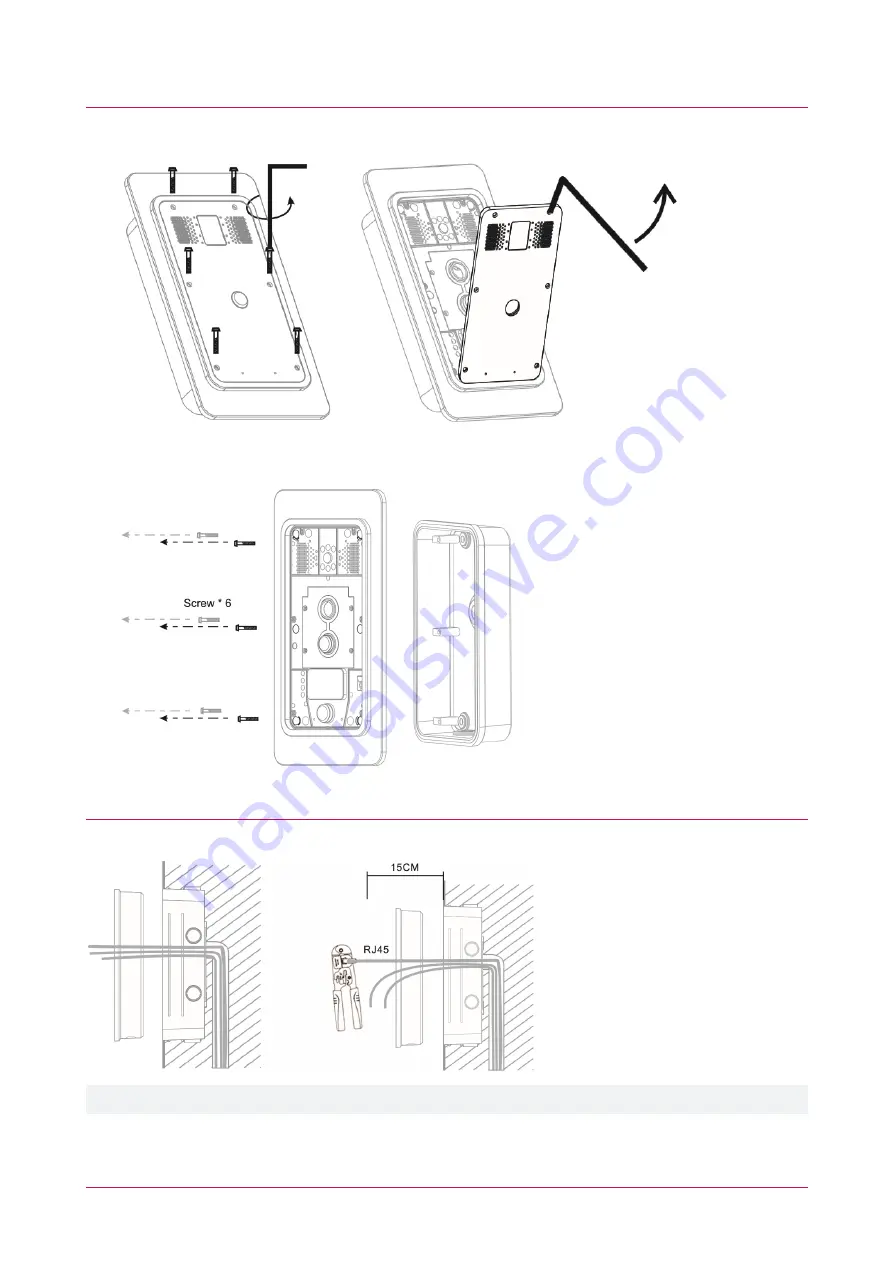
Unpacking the Intercom
1.
Using the
L-shaped hex tool
, remove the 6 screws and carefully remove the
front panel
.
2.
Using the
Phillips screwdriver
, remove the 6 main screws and separate the
back panel
.
Mounting
Pull the cable through the cable hole in the
back panel
, leaving 15-20cm excess cable length.
Note
: the intercom is equipped with a secondary cable hole at the bottom of the back panel.
PRT-IPIC-POE-C | Vandal Resistant VoIP Intercom with Camera | Installation Manual
19


