background image


Copyright © 2014 ICP DAS Co., Ltd. All Rights Reserved.    E-mail: [email protected] 


iP

-8000

-M

RT

U

 Quic

k S

ta

rt

 Guide


1  

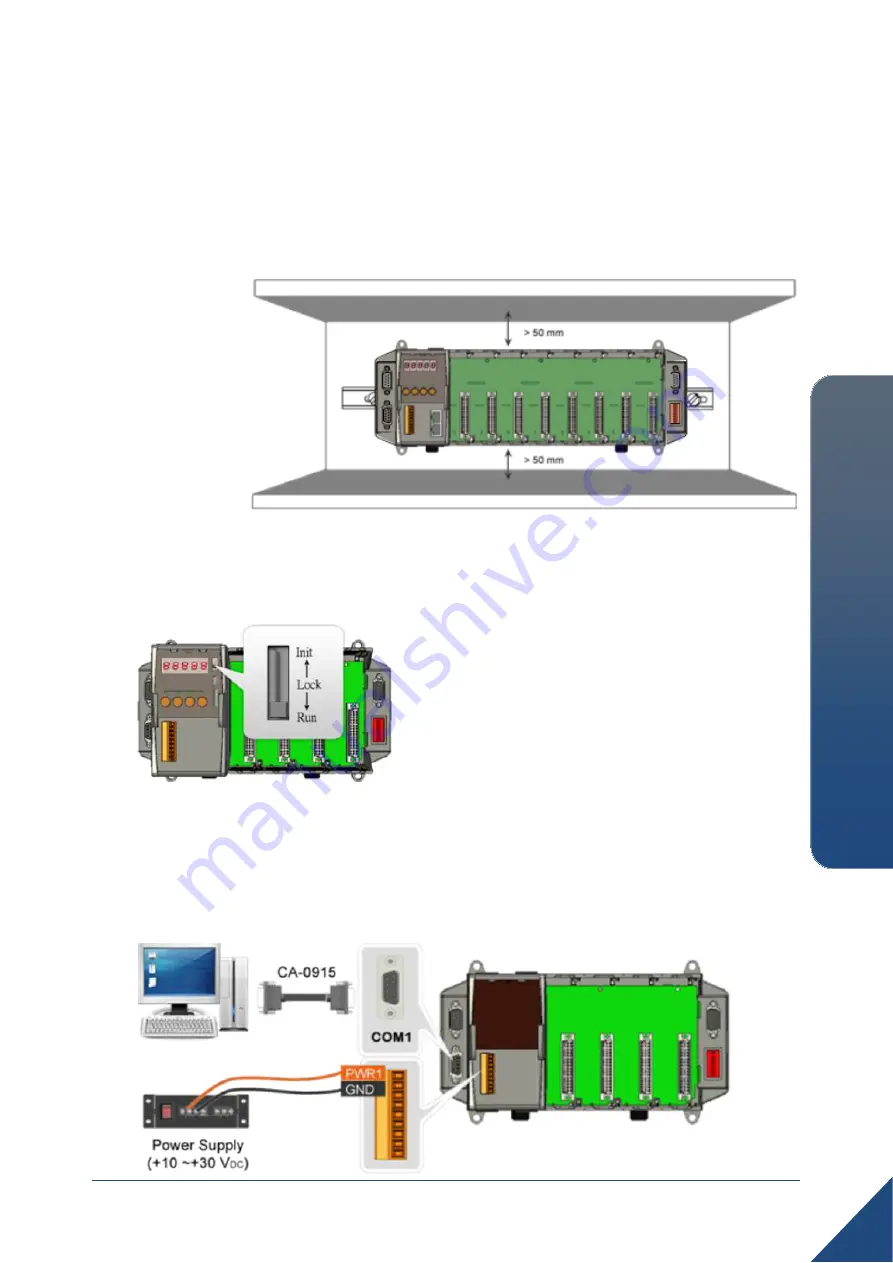
Mounting the Hardware 

The iP-8000-MRTU installation must provide proper ventilation, spacing, and grounding 
to ensure the equipment will operate as specified. A minimum clearance of 50mm 
between the iP-8000-MRTU and the top and bottom side of the enclosure panels must 
be provided. 


2  

Configure the Boot Mode 


Before starting any installation, be sure that 
the DIP switch is placed in the “

Run

” position. 


3  

Connecting to PC and Setting up the Power 

i. Connect 

PC

 to 

COM1

 through a 

RS-232

 cable. 

ii. Connect the 

+24 V

DC

 power supply

 to 

PWR1

 and 

GND

 terminals. 


Summary of Contents for iP-8000-MRTU

Page 1: ...This Quick Start Guide will provide information needed to get started In addition to this guide the package includes the following items iP 8000 MRTU Software Utility CD RS 232 Cable Screw Driver iP 8...

Page 2: ...the equipment will operate as specified A minimum clearance of 50mm between the iP 8000 MRTU and the top and bottom side of the enclosure panels must be provided 2 Configure the Boot Mode Before start...

Page 3: ...icpdas com products PAC xpac remote_io_support_list htm 5 Setting the Net ID The Net ID must be unique in the network It can be from 01 to FF This 8 bit DIP switch allow you to change the Net ID After...

Page 4: ...us Utility shortcut on the desktop ii Click the Modbus RTU button in the middle of the Select Controller dialog iii Select the COM port and then click the Connect button Click the Search button in the...

Page 5: ...t the About option from the Help menu to get the I O configuration and firmware information iii Check the module status diagram ensuring for the I O modules to be matched Step 3 Set I O configuration...

Page 6: ...start retrieving I O values The I O values will be displayed in the Mapping tables iv Select File option from the Save menu and select a location where the configuration file is about to be saved This...

Page 7: ...1 Stop Bit and Modbus RTU Slave Mode The COM Port settings can be configured with the Modbus Utility The new settings will take effect after rebooting the iP 8000 MRTU The figure of ASCII Mode shows a...

Page 8: ...nd Stop Bits Step5 Click the Set button to apply for new settings 3 How do I reset the COM Port to the default value Step1 Go to 7 seg LED press the MODE and SET buttons simultaneously for about 2 sec...

Reviews: