Installtion guide
A
A-9
Step4. Configure the remote control sysytem (Continued)
2. Settings on the Remote station’s PC
This section describes how to setup the Remote station (Client) PC.
Before configuring the settings, connect a speaker and microphone, or headset to the Remote station’s PC.
See the RS-BA1 Instruction Manual (“4. SETTINGS FOR A REMOTE STATION PC” section) for details.
1
Network setting
q
Double-click the “Remote Utility” icon on your desktop to open the Remote Utility.
w
“Please set your own PC information” appears, then click [OK].
e
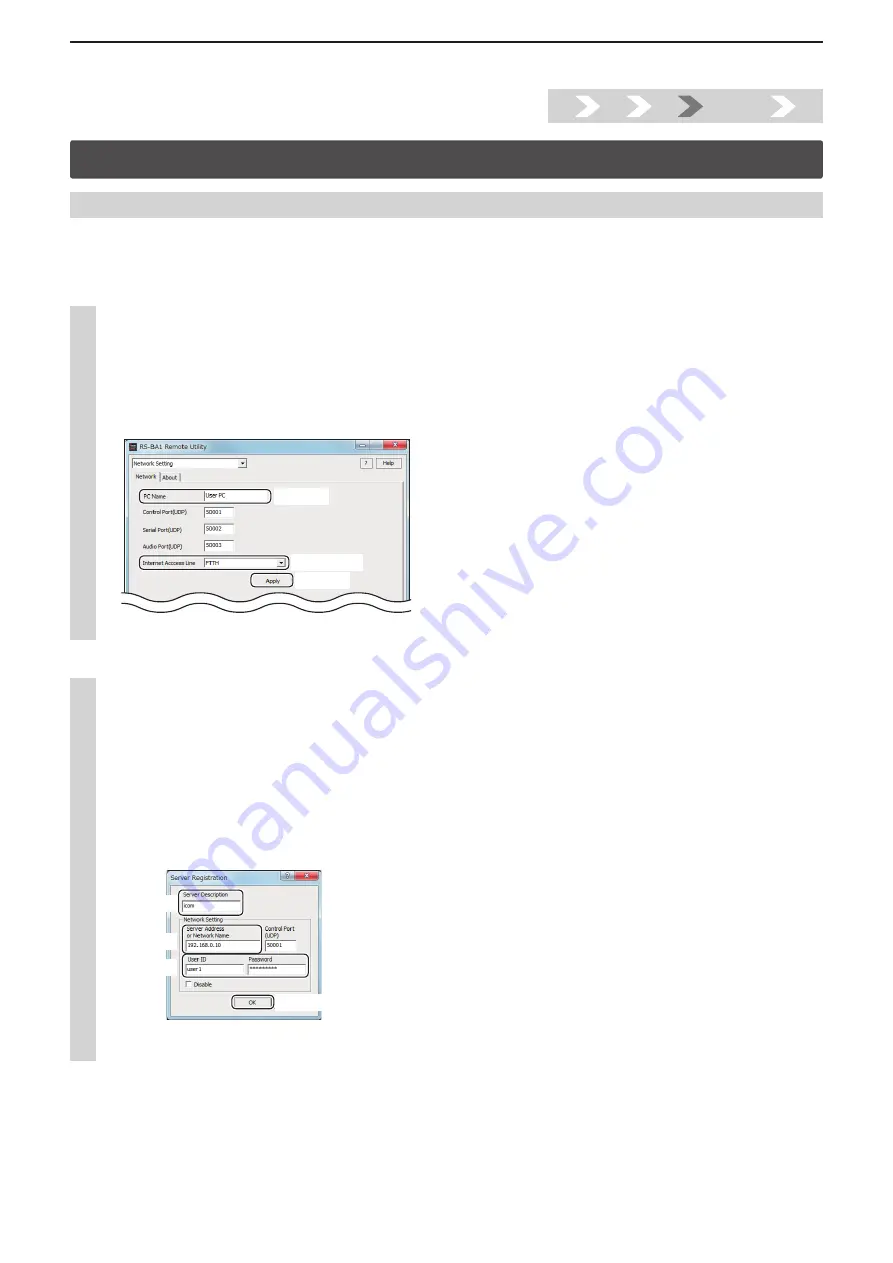
The Network Setting screen appears. Configure the network settings as described below.
q
Enter a name for your PC in the “PC Name” field. (ex. User PC)
w
Select your internet access line type in the “Internet Access Line” menu. (ex. FTTH)
e
Click [Apply] to save the network settings.
q
Enter
w
Select
e
Click
r
After clicking, “Take effect after restarting the application” appears, then click [OK], and restart the Remote Utility.
2
Connecting to the Base station
q
Select the Radio Operation mode from a drop-down list located at the top of the screen, and then click the [Server
List] tab.
w
The Server List screen appears, then click [Add].
e
The Server Registration screen appears. Register a Base station as described below.
q
Enter a name for the Base station in the “Server Description”
field. (ex. icom)
w
Enter the IP address, domain name or computer name of the Base station’s PC in the “Server Address or Network
Name” field. (ex. 192.168.0.10)
e
Enter your user ID (ex. user 1) and password (ex. Icom12345) which are registered in the Base station, in the “User
ID” and “Password” fields.
r
Click [OK] to save the settings and close the screen.
q
Enter
w
Enter
e
Enter
r
Click
r
In the Server List screen, select the registered Base station, and then click [Connect].
• “CONNECTING” appears under the Base station name when the connection has succeeded.
1.
2.
3.
Step4.
5.


