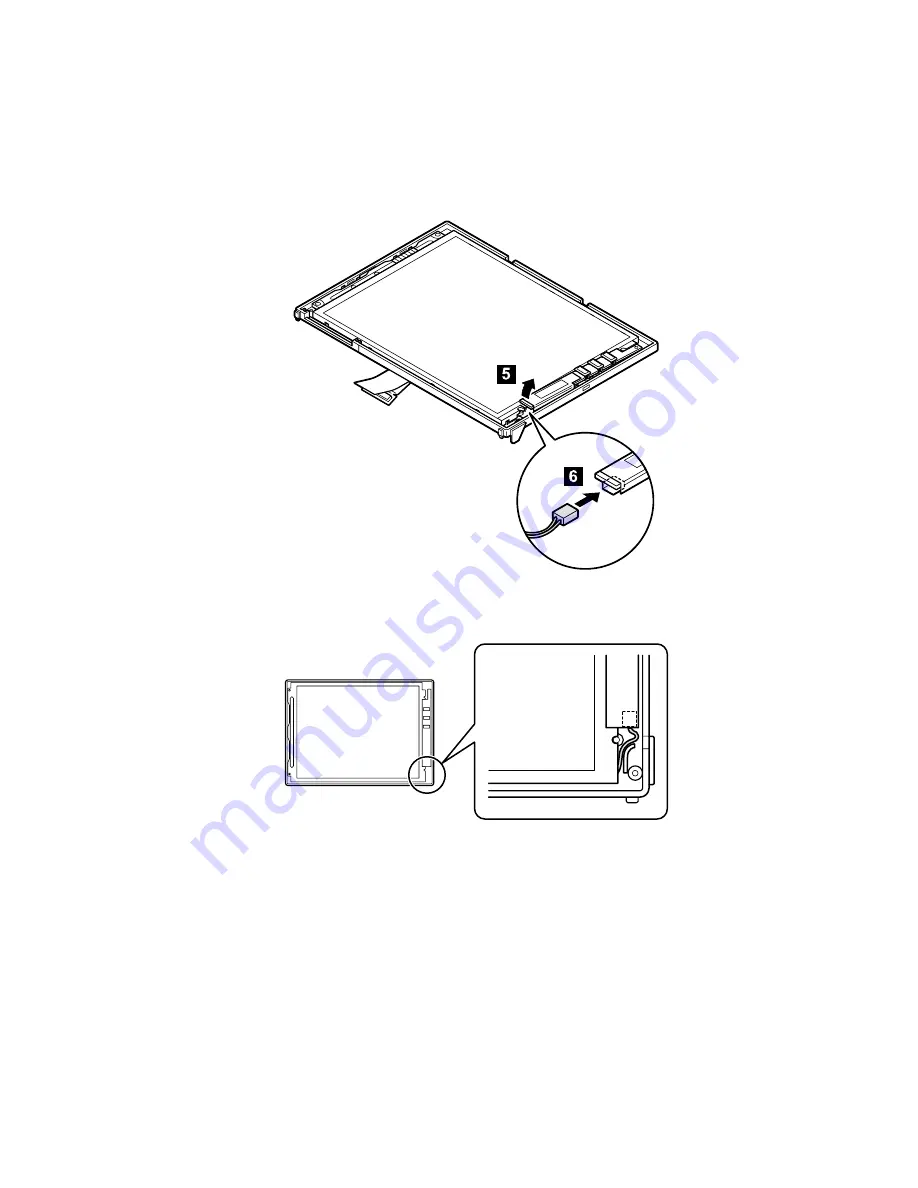
4. Lift the side of the inverter card (
5
) a little and plug
the cable into the connector on the bottom side of the
inverter card (
6
). Make sure that the other connector,
which was connected in the installing procedure
1
, is
not disconnected when you lift the inverter card.
When routing the cable, do as following figure.
Removing and replacing a FRU
ThinkPad TransNote
121
Summary of Contents for ThinkPad TransNote
Page 36: ...Checkout guide 32 ThinkPad TransNote ...
Page 61: ...Removing and replacing a FRU ThinkPad TransNote 57 ...
Page 62: ...1020 DIMM continued v Battery pack 1010 Removing and replacing a FRU 58 ThinkPad TransNote ...
Page 64: ...Removing and replacing a FRU 60 ThinkPad TransNote ...
Page 67: ...Removing and replacing a FRU ThinkPad TransNote 63 ...
Page 74: ... continued Removing and replacing a FRU 70 ThinkPad TransNote ...
Page 84: ... continued Removing and replacing a FRU 80 ThinkPad TransNote ...
Page 85: ...Removing and replacing a FRU ThinkPad TransNote 81 ...
Page 95: ...Removing and replacing a FRU ThinkPad TransNote 91 ...
Page 99: ... continued Removing and replacing a FRU ThinkPad TransNote 95 ...
Page 105: ...Removing and replacing a FRU ThinkPad TransNote 101 ...
Page 108: ...Removing and replacing a FRU 104 ThinkPad TransNote ...
Page 113: ... continued Removing and replacing a FRU ThinkPad TransNote 109 ...
Page 114: ... continued Removing and replacing a FRU 110 ThinkPad TransNote ...
Page 117: ... continued Removing and replacing a FRU ThinkPad TransNote 113 ...
Page 121: ... continued Removing and replacing a FRU ThinkPad TransNote 117 ...
Page 126: ...5 Tighten the screws 7 and 8 Removing and replacing a FRU 122 ThinkPad TransNote ...
Page 149: ...Notices ThinkPad TransNote 145 ...
Page 150: ... Part Number 22P2932 Printed in U S A 1P P N 22P2932 ...


