Using the Personalization Utility Program
Notes:
1. Do not use the tab key when
typing your information. Use
the Spacebar instead to insert
space between text.
2. You can use any type of font or
font size.
3. A sample file (
PERSSAMP.WRI
) is
available on the Utility Diskette.
4
Create your text information using Write and Paintbrush
of Windows as follows:
a)
Double-click on the Write icon in the Accessories window;
then type your personal information.
b)
Double-click on the Paintbrush icon in the Accessories
window.
c)
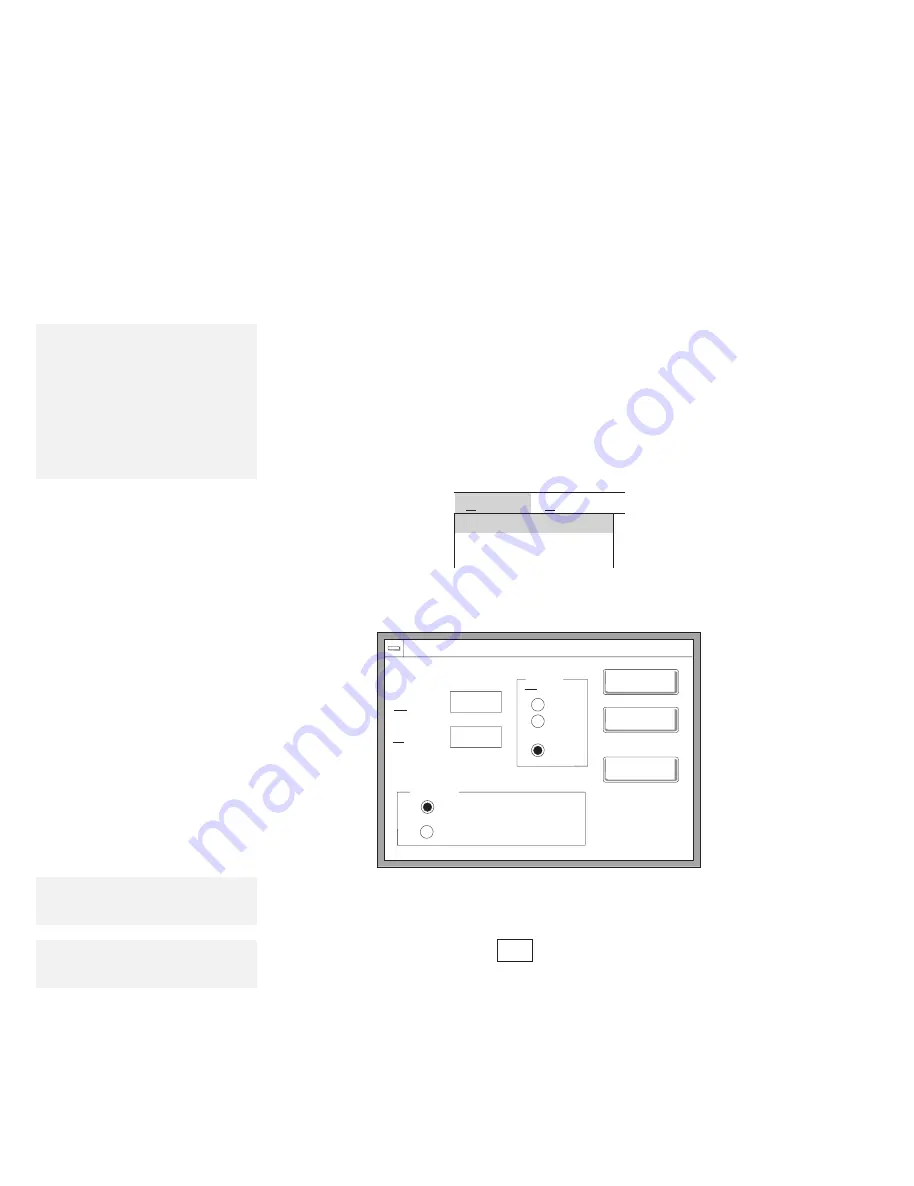
Select Options; then select Image Attributes... from the
pull-down menu.
Options
Help
Image Attributes...
Brush Shapes...
Edit Colors...
d)
Specify a Width of 320 and Height of 200; then select
pels under “Units” and Black and White for “Colors.”
Select OK.
Image Attributes
Units
Width:
Height:
in
OK
Cancel
Default
Black and White
Colors
Colors
cm
pels
320
200
Note:
When closing the Write window, you
can save the text for future use.
e)
Return to the Write window. Save the text to the
clipboard by selecting Edit and then Copy; then return to
the Paintbrush window.
f)
Click on the text tool (
abc
); then click on the position
where the text is to be placed.
g)
Paste the text by selecting Edit and then Paste, then
save it as a bitmap file to the backup copy of the Utility
Diskette.
h)
Close Write and Paintbrush.
Note:
A cursor ( | ) appears indicating
where the text will be placed.
126
IBM ThinkPad 755CX User's Guide
All manuals and user guides at all-guides.com


