


15.
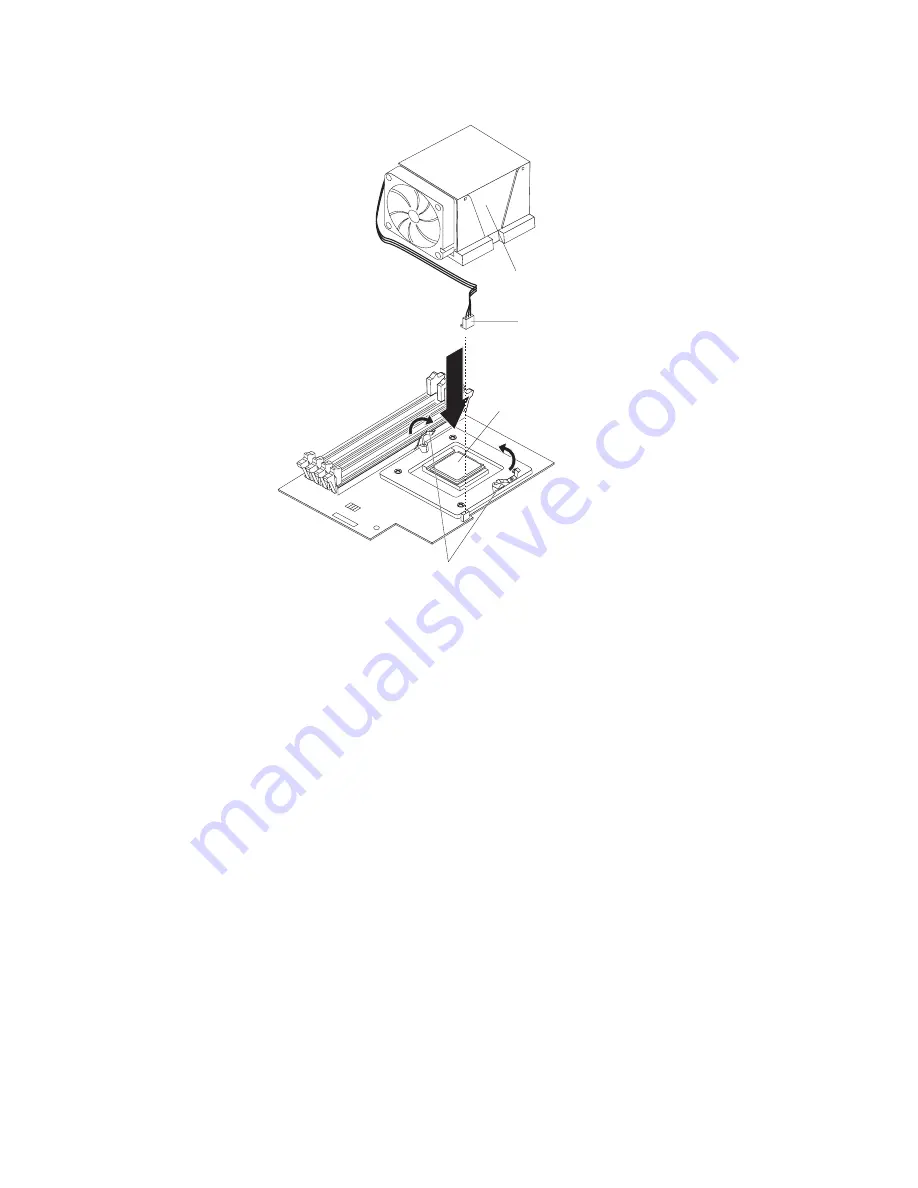
Install
the
fan
sink.
Microprocessor
Fan sink
Fan sink
cable
Retention
spring clips
a.
Make
sure
that
the
two
retention
spring
clips
on
the
microprocessor
retention
bracket
(on
the
microprocessor
board)
are
open
and
rotated
to
either
side
as
shown
in
the
above
illustration.
b.
Remove
the
fan
sink
from
its
package
and
remove
the
cover
from
the
bottom
of
the
fan
sink.
Make
sure
that
the
thermal
material
is
still
on
the
bottom
of
the
fan
sink.
c.
Remove
the
release
liner
and
orient
the
fan
sink
above
the
microprocessor.
d.
Make
sure
that
you
install
the
fan
sink
toward
the
rear
of
the
computer
so
that
the
front
of
the
fan
sink
and
the
fan-sink
screws
do
not
come
in
contact
with
any
electrical
components
on
the
microprocessor
board.
e.
Connect
the
fan-sink
cable
to
the
microprocessor
fan
connector
on
the
microprocessor
board;
then,
press
the
fan
sink
into
place
(see
the
illustration
in
“Optional
microprocessor
board
connectors”
on
page
36
for
the
location
of
the
connector).
f.
Raise
the
retention
spring
clips
into
position
on
each
side
of
the
fan
sink.
Start
both
screws
into
the
fan-sink
socket;
then,
tighten
both
screws.
Do
not
overtighten
the
screws.
16.
Install
at
least
one
pair
of
supported
DIMMs
on
the
microprocessor
board.
See
“Installing
memory
modules”
on
page
53
for
information
about
the
installation
order
and
the
type
of
supported
DIMMs.
17.
Install
the
microprocessor
air
baffle.
60
IntelliStation
A
Pro
Type
6224:
User’s
Guide
Summary of Contents for IntelliStation A Pro 6224
Page 1: ...IntelliStation A Pro Type 6224 User s Guide...
Page 2: ......
Page 3: ...IntelliStation A Pro Type 6224 User s Guide...
Page 8: ...vi IntelliStation A Pro Type 6224 User s Guide...
Page 22: ...8 IntelliStation A Pro Type 6224 User s Guide...
Page 46: ...32 IntelliStation A Pro Type 6224 User s Guide...
Page 124: ...110 IntelliStation A Pro Type 6224 User s Guide...
Page 130: ...116 IntelliStation A Pro Type 6224 User s Guide...
Page 131: ......
Page 132: ...Part Number 24R8390 Printed in USA 1P P N 24R8390...


