


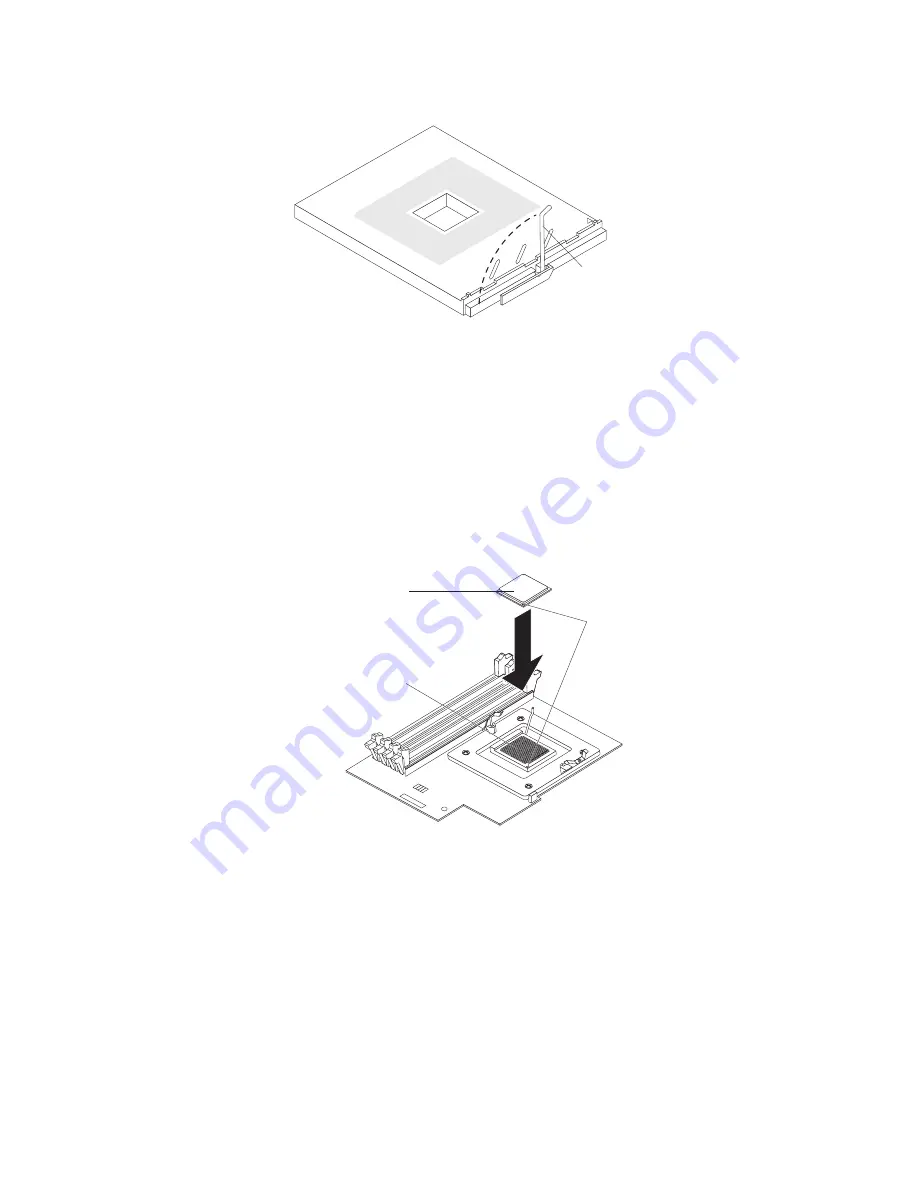
12.
Lift
the
microprocessor-release
lever
to
the
fully
open
position
(90°).
Lever open
Attention:
You
must
make
sure
that
the
locking
lever
on
the
microprocessor
socket
is
in
the
fully
open
position
before
you
insert
the
microprocessor
in
the
socket.
Failure
to
do
so
might
result
in
permanent
damage
to
the
microprocessor,
microprocessor
socket,
and
system
board.
13.
Install
the
new
microprocessor:
a.
Touch
the
static-protective
package
containing
the
new
microprocessor
to
any
unpainted
metal
surface
on
the
computer;
then,
remove
the
microprocessor
from
the
package.
b.
Position
the
microprocessor
over
the
microprocessor
socket
as
shown
in
the
following
illustration.
Carefully
press
the
microprocessor
into
the
socket.
Attention:
To
avoid
bending
the
pins
on
the
microprocessor,
do
not
use
excessive
force
when
pressing
it
into
the
socket.
Microprocessor
Microprocessor
orientation indicators
Microprocessor
socket
14.
Close
the
microprocessor-release
lever
to
secure
the
microprocessor.
Attention:
v
Do
not
disturb
or
contaminate
the
grey
thermal
material
on
the
bottom
of
the
new
fan
sink.
Doing
so
damages
its
heat-conducting
capability
and
exposes
the
new
microprocessor
to
overheating.
v
If
you
need
to
remove
the
fan
sink
after
installing
it,
call
for
service.
Chapter
4.
Installing
options
59
Summary of Contents for IntelliStation A Pro 6224
Page 1: ...IntelliStation A Pro Type 6224 User s Guide...
Page 2: ......
Page 3: ...IntelliStation A Pro Type 6224 User s Guide...
Page 8: ...vi IntelliStation A Pro Type 6224 User s Guide...
Page 22: ...8 IntelliStation A Pro Type 6224 User s Guide...
Page 46: ...32 IntelliStation A Pro Type 6224 User s Guide...
Page 124: ...110 IntelliStation A Pro Type 6224 User s Guide...
Page 130: ...116 IntelliStation A Pro Type 6224 User s Guide...
Page 131: ......
Page 132: ...Part Number 24R8390 Printed in USA 1P P N 24R8390...


