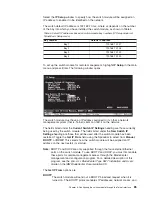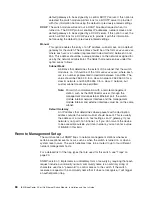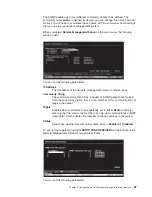
Complete the following steps to create a new user account:
1. Toggle the
Action
field to
<Add>
using the Spacebar. This will enable the
addition of a new user. The other options are:
<Delete>
Deletes a user entry.
<Update>
Makes changes to an existing user entry.
2. Enter the new user’s name in the
Username
field, assign an initial password in
the
New Password
field, and then confirm the new password in the
Confirm
New Password
field. Determine whether the new user should have root, user+,
or user privileges (see “Assigning Root, User+, and User privileges” for
descriptions of these privileges). The Spacebar toggles among these three
options in the
Access Level
field.
3. Highlight
APPLY
and press Enter to make the user addition effective.
4. Press Esc to return to the previous window or Ctrl+T to go to the root window.
A listing of all user accounts and access levels is displayed below the user
setup menu. This list is updated when
APPLY
is processed.
Important:
The command
APPLY
makes changes to the switch configuration for
the current session only. If you want your changes to be permanent, select
Save
Changes
in the main menu. Selecting
Save Changes
enters the current switch
configuration, including all changes, into NVRAM, and then restarts the switch
module.
Assigning Root, User+, and User privileges
There are three levels of user privileges: Root, User+, and User. Some menu
selections that are available to users with Root privileges might not be available to
those with User+ and User privileges.
Note:
User privileges are also known as normal user privileges.
The following table summarizes the Root, User+, and User privileges.
Table 4. Root, User+, and User privileges
Switch configuration
Privilege
Management
Root
User+
User
Configuration
Yes
Read only
Read only
Network monitoring
Yes
Read only
Read only
Community strings and trap
stations
Yes
Read only
Read only
Update firmware and
configuration files
Yes
No
No
System utilities
Yes
Ping only
Ping only
Factory reset
Yes
No
No
Reboot switch
Yes
Yes
No
User accounts management
Add/update/delete user
accounts
Yes
No
No
View user accounts
Yes
No
No
Chapter 6. Configuring the switch module through the Telnet interface
79
Summary of Contents for BladeCenter Management Module
Page 1: ...IBM BladeCenter 4 Port Gb Ethernet Switch Module Installation and User s Guide ERserver ...
Page 2: ......
Page 3: ...IBM BladeCenter 4 Port Gb Ethernet Switch Module Installation and User s Guide ERserver ...
Page 9: ...Japanese Voluntary Control Council for Interference VCCI statement 159 Index 161 Contents vii ...
Page 10: ...viii IBM BladeCenter 4 Port Gb Ethernet Switch Module Installation and User s Guide ...
Page 18: ...xvi IBM BladeCenter 4 Port Gb Ethernet Switch Module Installation and User s Guide ...
Page 32: ...14 IBM BladeCenter 4 Port Gb Ethernet Switch Module Installation and User s Guide ...
Page 92: ...74 IBM BladeCenter 4 Port Gb Ethernet Switch Module Installation and User s Guide ...
Page 134: ...116 IBM BladeCenter 4 Port Gb Ethernet Switch Module Installation and User s Guide ...
Page 136: ...118 IBM BladeCenter 4 Port Gb Ethernet Switch Module Installation and User s Guide ...
Page 138: ...120 IBM BladeCenter 4 Port Gb Ethernet Switch Module Installation and User s Guide ...
Page 155: ...Appendix D Understanding and troubleshooting the Spanning Tree Protocol 137 ...
Page 158: ...140 IBM BladeCenter 4 Port Gb Ethernet Switch Module Installation and User s Guide ...
Page 172: ...154 IBM BladeCenter 4 Port Gb Ethernet Switch Module Installation and User s Guide ...
Page 177: ...Japanese Voluntary Control Council for Interference VCCI statement Appendix G Notices 159 ...
Page 178: ...160 IBM BladeCenter 4 Port Gb Ethernet Switch Module Installation and User s Guide ...
Page 183: ......
Page 184: ... Part Number 59P6530 Printed in U S A 1P P N 59P6530 ...


