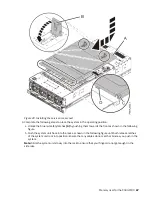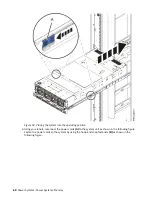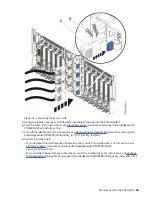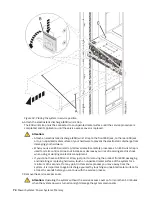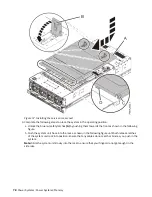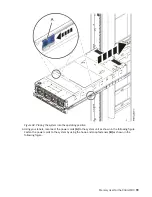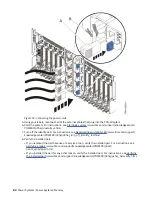
Figure 51. Connecting the power cords
5. Using your labels, reconnect all of the external cables that plug into the PCIe adapters.
6. Start the system. For instructions, see Starting a system (www.ibm.com/support/knowledgecenter/
POWER9/p9haj/crustartsys.htm).
7. Turn off the identify LED. For instructions, see Deactivating an identify LED (www.ibm.com/support/
knowledgecenter/POWER9/p9haj/p9haj_turn_off_identify_led.htm).
8. Verify the installed part.
• If you replaced the part because of a service action, verify the installed part. For instructions, see
Verifying a repair (www.ibm.com/support/knowledgecenter/POWER9/p9ect/
pxect_verifyrepair.htm).
• If you installed the part for any other reason, verify the installed part. For instructions, see Verifying
the installed part (www.ibm.com/support/knowledgecenter/POWER9/p9haj/pxhaj_hsmverify.htm).
Memory riser for the 9040-MR9 69
Summary of Contents for 9040-MR9
Page 1: ...Power Systems Memory modules for the 9040 MR9 IBM ...
Page 4: ...iv ...
Page 14: ...xiv Power Systems Power Systems Memory ...
Page 17: ...Figure 1 Removing the power cords L003 or or Memory modules for the 9040 MR9 3 ...
Page 30: ...or or or or 16 Power Systems Power Systems Memory ...
Page 46: ...Figure 23 Removing the power cords L003 or or 32 Power Systems Power Systems Memory ...
Page 59: ...Figure 32 Removing the power cords L003 or or Memory riser for the 9040 MR9 45 ...
Page 70: ...Figure 40 Removing the power cords L003 or or 56 Power Systems Power Systems Memory ...
Page 86: ...or or or or 72 Power Systems Power Systems Memory ...
Page 105: ......
Page 106: ...IBM ...


