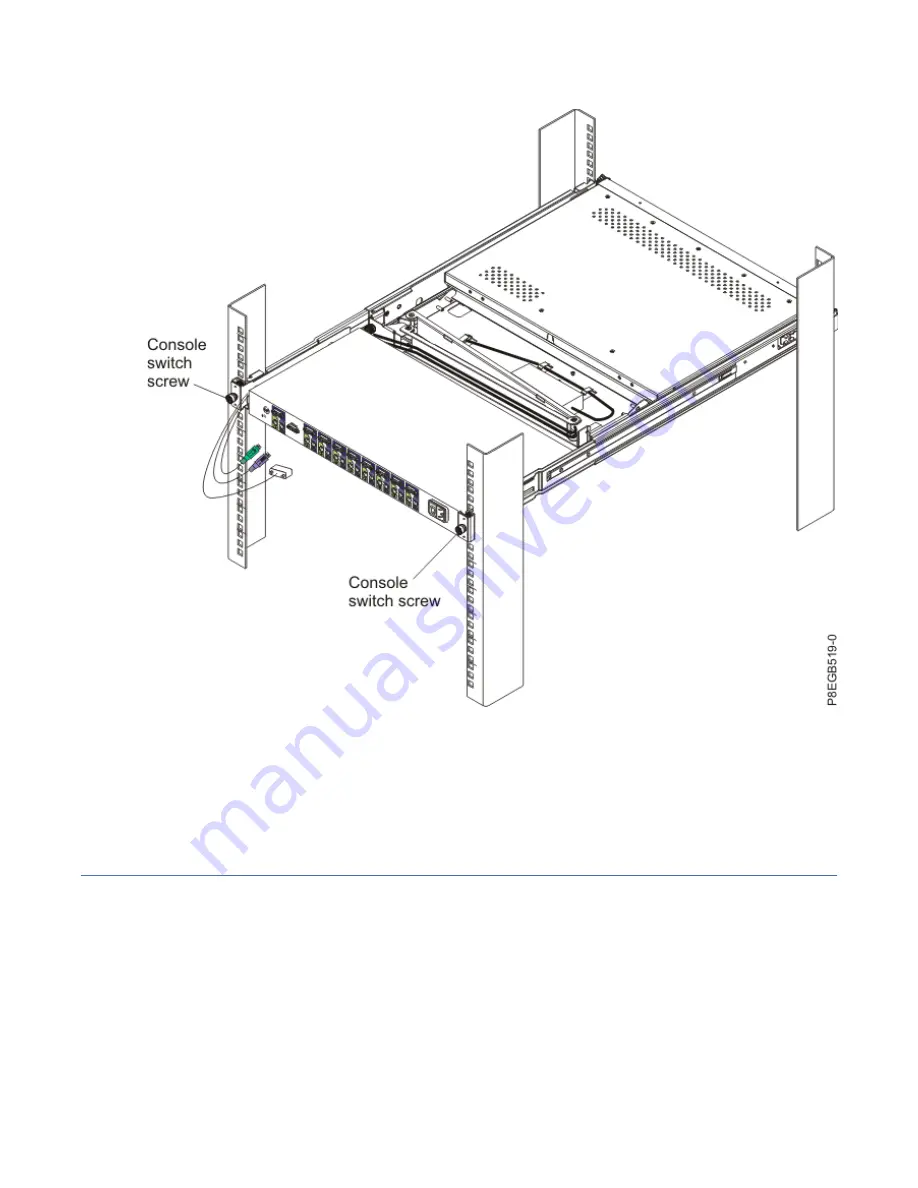
2. Install the console switch behind the flat-panel monitor and keyboard tray using four (two on each
side) of the Phillips screws supplied in your miscellaneous hardware kit.
3. Route the power, video, and keyboard-and-mouse cables through the channel in the left-side bracket
on the console switch. Then, connect the video, keyboard, and mouse connectors to the console
switch.
4. For information about connecting the flat-panel monitor, thin keyboard, and servers to the console
switch, see the documentation provided with the console switch.
Using the TFT-LCD display
This topic collection provides the information about using the TFT-LCD display.
This chapter contains information about using the TFT-LCD display. For most applications, the factory
default settings on the display do not require adjustment.
Using the on-screen display (OSD) menu
Learn how to use the OSD menu to adjust the characteristics of the image that is being displayed.
Using the control buttons
Learn how to use the control buttons on the TFT - LCD display.
The control buttons on the lower right of the LCD display are shown in the following illustration.
18 Power Systems: Installing the 7316-TF4 18.5-Inch and 7316-TF5 17.3-Inch Flat Panel Rack-Mounted
Monitor and Keyboard
Summary of Contents for 7316-TF4
Page 4: ...iv ...
Page 71: ...Installing the 7316 TF4 18 5 Inch Flat Panel Rack Mounted monitor and keyboard 57 ...
Page 89: ......
Page 90: ...IBM ...


