Installing a hard disk drive
The dx340 server configurations support installation of three hard disk drive types.
The following sections describe installing each type of hard disk drive.
Installing a 3.5-inch hot-swap hard disk drive
Note:
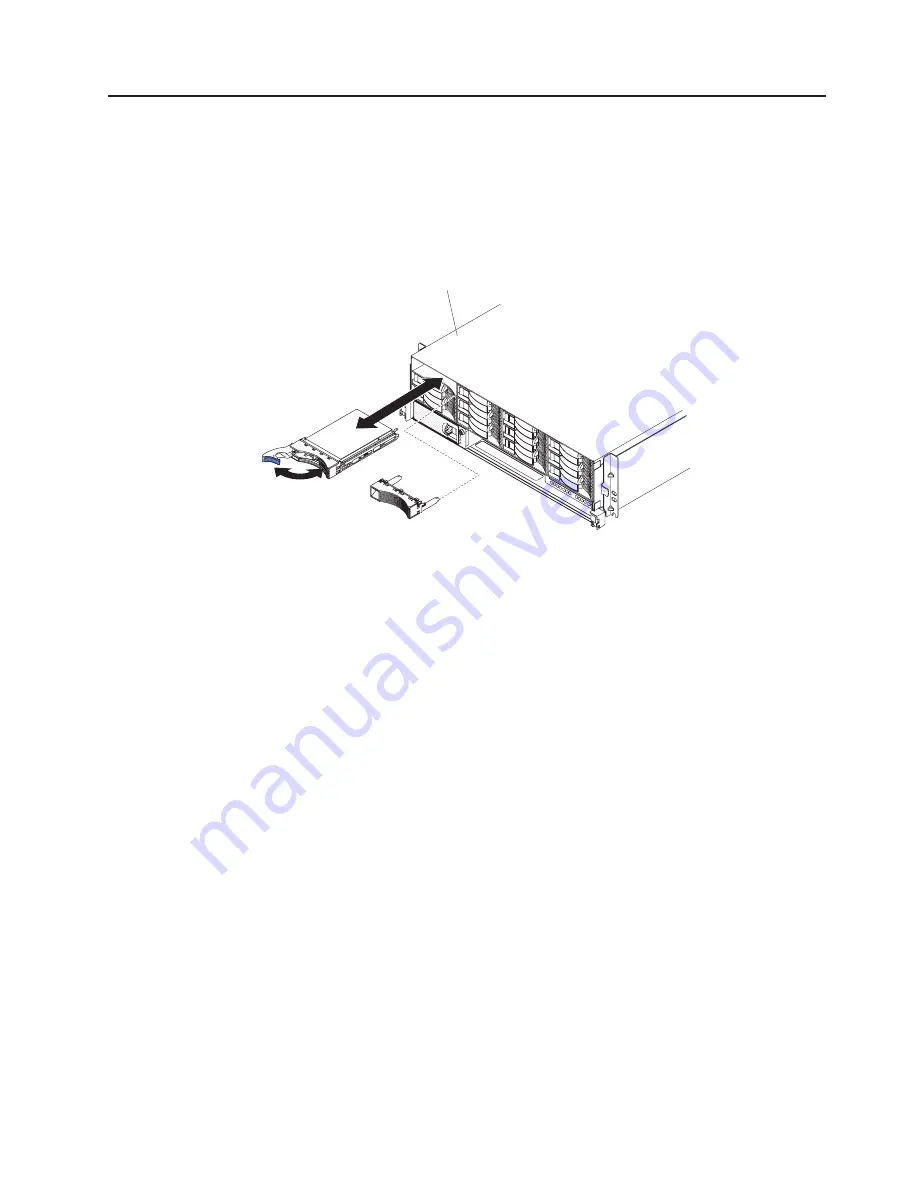
The following illustration shows how to install a 3.5-inch hot-swap hard disk
drive in a 3U chassis.
3U chassis
To install a hot-swap hard disk drive, complete the following steps:
1. Read the safety information that begins on page v and “Installation guidelines”
on page 23.
2. Touch the static-protective package that contains the hard disk drive to any
unpainted
metal surface on the chassis or rack; then, remove the hard disk
drive from the package.
Attention:
Do not press on the top of the drive. Pressing the top might
damage the drive.
3. Make sure that the drive tray handle is in the open position.
4. Align the drive with the guide rails in the drive bay; then, carefully slide the drive
into the bay until the drive stops.
5. Rotate the drive tray handle to the closed position.
Note:
If you install or remove a hard disk drive, see the documentation that comes
with your RAID adapter for information about reconfiguring the disk arrays.
Chapter 3. Installing optional devices
37
Summary of Contents for 6385
Page 1: ...System x iDataPlex dx340 Types 6385 6386 6389 7831 7832 and 7834 User s Guide ...
Page 2: ......
Page 3: ...System x iDataPlex dx340 Types 6385 6386 6389 7831 7832 and 7834 User s Guide ...
Page 12: ...x IBM dx340 User s Guide ...
Page 24: ...12 IBM dx340 User s Guide ...
Page 60: ...48 IBM dx340 User s Guide ...
Page 84: ...72 IBM dx340 User s Guide ...
Page 85: ......
Page 86: ... Part Number 69Y3931 Printed in USA 1P P N 69Y3931 ...


