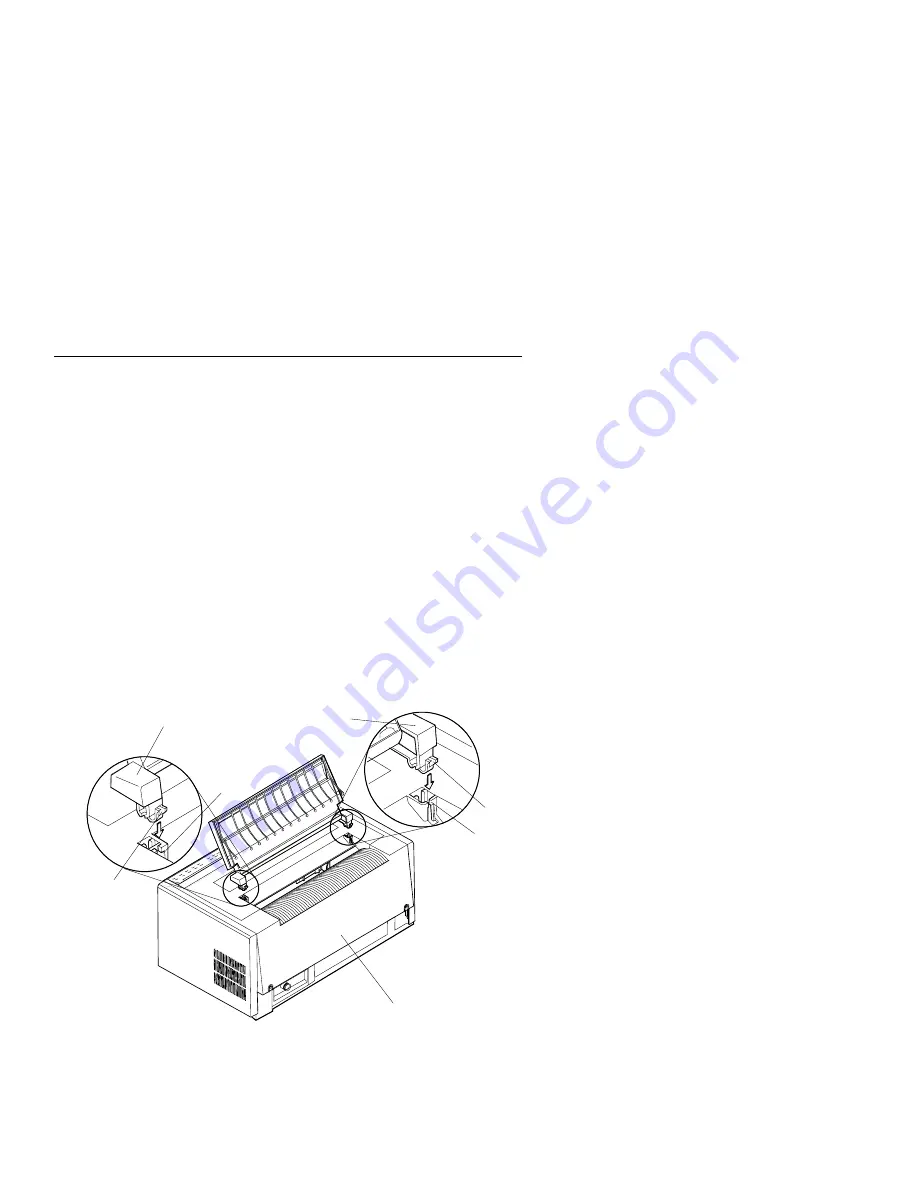
Using the Acoustic Cover
The following sections describe how to remove and reinstall the
acoustic cover.
Removing the Acoustic Cover
If you need to remove the acoustic cover for any reason from the
paper exit area, follow these steps:
1. Pivot the acoustic cover open until it is vertical.
2. Locate the latch release tabs on both brackets.
3. Depress the latch tabs while lifting the acoustic cover.
Reinstalling the Acoustic Cover
To reinstall the
acoustic cover over the paper exit area, follow these
steps:
Note: The figure in this section shows the
rear of the printer.
1. Locate the slots near the paper exit area of the access cover.
Rear View
B r a c k e t
B r a c k e t
S lot
L a tc h
S lot
L a tc h
1-114
User’s Guide Model 302
Summary of Contents for 4232 PRINTER MODEL 302
Page 1: ...4232 Printer Model 302 User s Guide SA24 4386 01...
Page 2: ......
Page 3: ...4232 Printer Model 302 User s Guide SA24 4386 01 IBM...
Page 9: ...Index X 7 Contents vii...
Page 10: ...viii User s Guide Model 302...
Page 54: ...1 32 User s Guide Model 302...
Page 86: ...1 64 User s Guide Model 302...
Page 130: ...The printer displays Bidirectional Adjustment 1 108 User s Guide Model 302...
Page 166: ...2 24 User s Guide Model 302...
Page 184: ...Figure 4 1 Sample Printer Configuration Printout Parallel Attached 4 10 User s Guide Model 302...
Page 185: ...Figure 4 2 Sample Printer Configuration Printout Serial Attached Chapter 4 Tests 4 11...
Page 187: ...The printout should look similar to Chapter 4 Tests 4 13...
Page 190: ...The sample printout appears as follows 4 16 User s Guide Model 302...
Page 192: ...4 18 User s Guide Model 302...
Page 200: ...A 8 User s Guide Model 302...
Page 248: ...C 12 User s Guide Model 302...
Page 250: ...D 2 User s Guide Model 302...
Page 270: ......
Page 273: ......
Page 274: ...IBM Part Number 56G9390 Printed in U S A 56G939 SA24 4386 1...


