


2.7. Network Setup
RJ-45 Network Port on the Annexxus-series device allows it to be connected to an Ethernet/Fast Ethernet standard
(10/100Base-TX) network, complying with the IEEE 802.3U standard. Annexxus device may be connected to a hub, switch
or router with a straight through CAT5e cable, or directly to the DVR/NVR with a crossover CAT5e cable.
See Annexxus Default IP Configurations section for information on Annexxus factory default IP configurations.
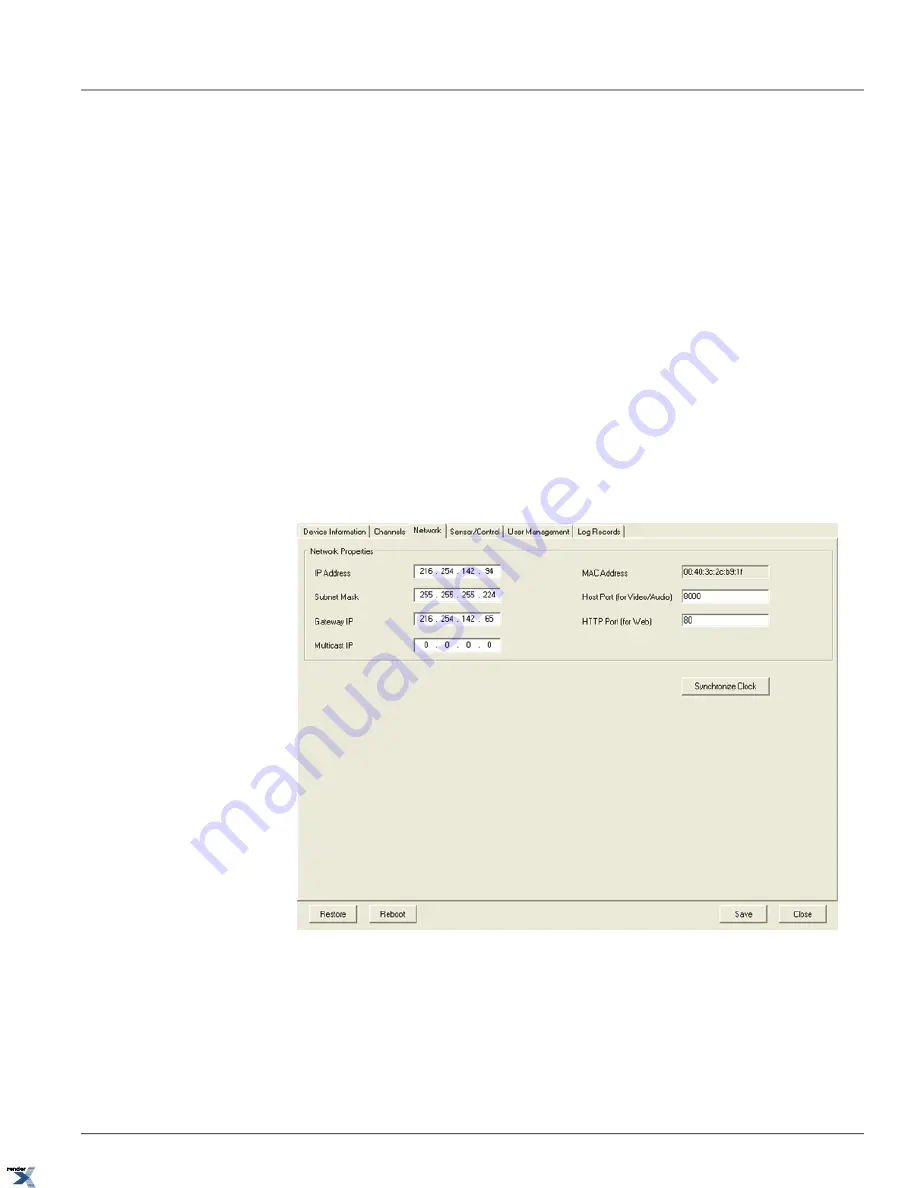
In the Network Setup, the authorized users can obtain the device's MAC Address and/or change the Annexxus device IP
Address, Subnet Mask, Gateway IP, Multicast IP (currently not supported), Host Port (for Video/Audio) and/or HTTP Port
(for Web access). Please contact your network administrator for more information on your network particulars.
Important:
Make sure to open all ports required for viewing Annexxus Device remotely. The following ports must be
forwarded: 80, 554, 8000, 8200
Unique
IP address
must be assigned to each Annexxus unit before installation. Unless this step is completed prior to
installation, the customer will be unable to detect Annexxus module on their LAN/WAN network. See Changing IP Address
section for instructions on how to change Annexxus IP address.
It is highly recommended to
Synchronize Annexxus Clock
to the time zone, where the module is being installed.
Unless this step is completed, the time stamp on video recordings and log records (if available) will not match the current
time. See Synchronizing Annexxus Clock section for instructions on how to synchronize Annexxus device clock.
47
Network Setup
Chapter 2. Remote Connection via SRX-Pro/iP-Pro
Server
XML to PDF by RenderX XEP XSL-FO Formatter, visit us at