45
7.4.2
Placing back the disc brushes
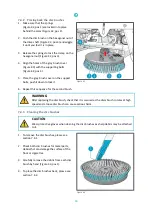
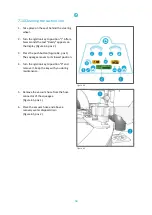
1.
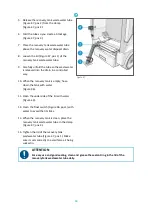
Make sure that the springs
(Figure 42, pos 1) are locked into place
behind the cams (Figure 42, pos 2).
2.
Push the disc brush on the hexagonal nut of
the drive shaft (Figure 42, pos 3) and wiggle
it until you feel it is in place.
3.
Release the springs to lock the clamp on the
hexagonal nut (Figure 42, pos 3).
4.
Align the holes of the grey brush cover
(Figure 40) with the supporting bolts
(Figure 42, pos 4).
5.
Place the grey brush cover on the support
bolts, push it down to lock it.
6.
Repeat this sequence for the second brush.
Figure 42
WARNING
After replacing the disc brush, check that it is secured as the discs brush rotates at high
speed and a loose disc brush can cause serious harm.
7.4.3
Cleaning the disc brushes
CAUTION
Wear protective gloves when cleaning the disc brushes as sharp debris may be attached
to it.
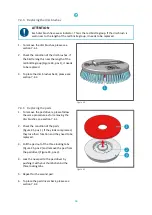
1.
To remove the disc brushes, please see
section 7.4.1.
2.
Check both disc brushes for metal parts,
debris that can damage the surface of the
floor or cigarettes.
3.
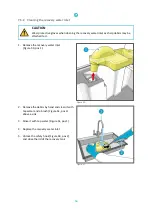
Carefully remove the debris from each disc
brush by hand (Figure 43, pos 1).
4.
To place the disc brushes back, please see
section 7.4.2.
Figure 43

