background image


Hydro-View / Hydro-Hub  
User Guide 


To re-order quote part number:  
Revision:  
Revision date:  

HD0864 
1.0.0 
August 2019 

Summary of Contents for Hydro-Hub

Page 1: ...Hydro View Hydro Hub User Guide To re order quote part number Revision Revision date HD0864 1 0 0 August 2019 ...

Page 2: ...RS IN DOCUMENTATION The product described in this documentation is subject to continuous development and improvement All information of a technical nature and particulars of the product and its use including the information and particulars contained in this documentation are given by Hydronix in good faith Hydronix welcomes comments and suggestions relating to the product and this documentation AC...

Page 3: ...ydronix com sales hydronix com Website www hydronix com North American Office Covers North and South America US territories Spain and Portugal Address 692 West Conway Road Suite 24 Harbor Springs MI 47940 USA Tel 1 888 887 4884 Toll Free 1 231 439 5000 Fax 1 888 887 4822 Toll Free 1 231 439 5001 European Office Covers Central Europe Russia and South Africa Tel 49 2563 4858 Fax 49 2563 5016 French ...

Page 4: ...4 Hydro View Hydro Hub User Guide HD0864 Rev 1 0 0 ...

Page 5: ...Hydro View Hydro Hub User Guide HD0864 Rev 1 0 0 5 Revision history Revision No Software Version Date Description of Change 1 0 0 1 0 0 0 August 2019 First Release ...

Page 6: ...6 Hydro View Hydro Hub User Guide HD0864 Rev 1 0 0 ...

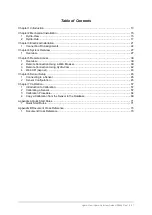
Page 7: ...cess 39 1 Overview 39 2 Remote Connection Using a Web Browser 39 3 Remote Connection Using Hydro Com 42 4 Web API asp net 43 Chapter 6 Sensor Setup 45 1 Connecting to a Sensor 45 2 Sensor Configuration 45 Chapter 7 Calibration 57 1 Introduction to Calibration 57 2 Calibrating a Sensor 57 3 Calibration Procedure 64 4 Copy a Calibration from the Sensor to the Database 69 Appendix A Quick Start Rules...

Page 8: ...8 Hydro View Hydro Hub User Guide HD0864 Rev 1 0 0 ...

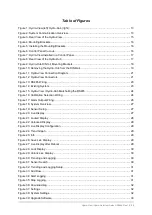
Page 9: ...g 23 Figure 14 Existing System 23 Figure 15 Hydro View Hydro Hub Marshalling the RS485 24 Figure 16 Calibration Selection Wiring 24 Figure 17 Alarm Output Wiring 26 Figure 18 System Overview 27 Figure 19 Sensor Setup 27 Figure 20 Live Display 27 Figure 21 Locked Display 28 Figure 22 Unlocked Display 28 Figure 23 Live Display Configuration 28 Figure 24 Trend Graph 29 Figure 25 Info 29 Figure 26 Sav...

Page 10: ...ss 42 Figure 56 Hydro Com Ethernet Search 42 Figure 57 Sensor 43 Figure 58 Sensors on the Network 45 Figure 59 Manual Search 45 Figure 60 Live Values Selector 45 Figure 61 Live Values 46 Figure 62 Calibration Section Selector 46 Figure 63 Sensor Settings Selector 46 Figure 64 Sensor Details 47 Figure 65 Analogues 48 Figure 66 Digital I O 49 Figure 67 Signal Processing 49 Figure 68 Averaging 50 Fig...

Page 11: ...ed Calibration Coefficients 61 Figure 99 Expanded Calibration Graph 62 Figure 100 Calibration Graph Selection Panel 62 Figure 101 Quick Start Rules Selector 62 Figure 102 Quick Start Rules Applied 63 Figure 103 New Calibration 64 Figure 104 Collection Bucket 65 Figure 105 Average Unscaled Values Taken During Averaging 65 Figure 106 Add Calibration Row 65 Figure 107 Average Unscaled Values Added to...

Page 12: ...12 Hydro View Hydro Hub User Guide HD0864 Rev 1 0 0 ...

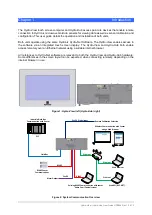
Page 13: ...b both enable access remotely over an Ethernet network using a suitable internet browser All references to Hydro Net software are relevant to both the Hydro View and Hydro Hub hardware Some differences in the screen layout can be expected when connecting remotely depending on the internet browser in use Figure 1 Hydro View left Hydro Hub right Web Browser Wireless Communication with Sensor using a...

Page 14: ...Chapter 1 Introduction 14 Hydro View Hydro Hub User Guide HD0864 Rev 1 0 0 ...

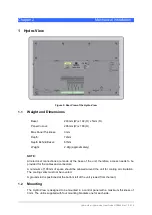
Page 15: ...OTE All electrical connections are made at the base of the unit therefore access needs to be provided for the cables and connectors A minimum of 100mm of space should be allowed around the unit for cooling air circulation The cooling vents must not be covered A ground stud is positioned at the bottom left of the unit viewed from the rear 1 2 Mounting The Hydro View is designed to be mounted in a c...

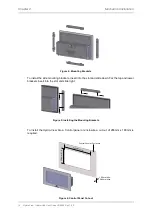
Page 16: ...ets insert into the slot and slide down For the top and lower brackets insert into the slot and slide right Figure 5 Installing the Mounting Brackets To install the Hydro View into a Control panel or enclosure a cut out of 265mm x 168mm is required Control Panel or Enclosure 265mm 1 0 168mm 1 0 1 00mm Min 3 00mm Max Figure 6 Control Panel Cut out ...

Page 17: ...brackets and insert the unit through the cut out Re fit the mounting brackets and tighten the screws evenly to pull the fascia towards the control panel Ensure the gasket is compressed against the control panel Control Panel or Enclosure Figure 7 Hydro View Installed in a Control Panel 2 Hydro Hub Figure 8 Rear View of the Hydro Hub ...

Page 18: ...ables and connectors A minimum of 100mm of space should be allowed around the unit for cooling air circulation The cooling vents must not be covered A ground stud is positioned at the bottom left of the unit viewed from the rear 2 2 Mounting The Hydro Hub is designed to be installed on to a standard 35mm DIN rail The unit is supplied with two DIN rail mounting brackets Figure 9 Hydro Hub DIN rail ...

Page 19: ...Mechanical Installation Chapter 2 Hydro View Hydro Hub User Guide HD0864 Rev 1 0 0 19 Figure 10 Removing the Hydro Hub from the DIN Rail ...

Page 20: ...Chapter 2 Mechanical Installation 20 Hydro View Hydro Hub User Guide HD0864 Rev 1 0 0 ...

Page 21: ...stem design All images shown in this chapter are of the Hydro View however the Hydro Hub utilises the same connection layout and configuration Figure 11 Hydro View Connection Diagram The image below shows the electrical connectors Dependant on the model of unit in use some connectors will not be available Field Bus Optional Digital Input Optional Micro SD Card Ethernet USB USB Power Input RS485 Al...

Page 22: ...r 10 24v DC Hydro View Power 11 18 Digital Inputs 0 7 24v DC 8 Digital inputs 24v DC These inputs are used for remote calibration selection 19 Digital input Common Digital inputs 0v DC 20 27 Digital Inputs 8 15 8 Digital Inputs 24v DC These Inputs are used for remote calibration selection 28 Digital Input Common Digital Inputs 0v DC 1 1 Power Supply The unit requires 24v DC with a nominal power ra...

Page 23: ...ing the RS485 protocol to add a Hydro View Hydro Hub to the network Communicating using the RS485 Hydro Link Protocol Sensor Control System Figure 14 Existing System RS485 networks are designed to have a single master communicating with the sensors as a result it is not possible to allow the Control system and Hydro View Hydro Hub to communicate at the same time The Input RS485 is configured to en...

Page 24: ...librations are selected using a Binary format When a calibration change is requested all data stored in the database for the selected calibration is downloaded to the relevant sensor Note If outdoors cabling for the expansion board is to be used it must be limited to 30 metres or less Digital inputs 1 4 are used to select the sensor and inputs 8 15 are utilised to select the calibration number req...

Page 25: ...s are selected using their RS485 node address 1 16 Binary 0000 is used to select sensor address 1 Binary 1111 is used to select sensor address 16 1 5 3 Selecting a Calibration To select a calibration inputs 8 16 are used Any calibration in the Available Calibration list for the selected sensor can be selected Each calibration is allocated a unique number when created Any calibration number up to 2...

Page 26: ...Ethernet The Ethernet port is provided to enable the Hydro View Hydro Hub to be connected to a local network Once connected to the network remote access to the unit is possible using Hydro Com or any compatible internet browser 1 8 USB The unit has four built in USB ports to enable data backup software upgrade and to connect a Keyboard Mouse ...

Page 27: ...sensors The Overview screen is divided into seven sections If the control buttons are not available click or touch on any part of the display to make them visible Note Some options are only available with a valid user account 1 1 Sensor Setup The sensor setup section provides access to any connected sensor on the network See Chapter 6 for details Figure 19 Sensor Setup 1 2 Live Display The Live Di...

Page 28: ...ble Add a Display Save Display Settings Figure 22 Unlocked Display To add a sensor to the display click on the Add a Display button The Live display is divided into three sections Live Values To configure the live display select the required values on the screen Sensor Output Type Measurement Mode Selected Sensor Add Live Display Figure 23 Live Display Configuration Additional Live displays can be...

Page 29: ...ecting the Info Tab Figure 25 Info 1 2 2 Save a Live Display Once a display has been configured it can be saved to enable quick access to the same values Click the Save Display button to save the configuration Figure 26 Save Live Display When the software is restarted the saved sensor values will be automatically displayed Figure 27 Live Display after Reboot ...

Page 30: ...memory stick must to be inserted into the unit using one of the available USB ports to store the data The USB memory stick must be FAT32 formatted and a maximum size of 32GB For systems connecting via a remote connection no USB memory stick is required The data will be stored in a location dependant on your current browser settings Figure 30 Trending and Logging 1 3 1 Trending and Logging Setup To...

Page 31: ...etup Additional sensors and values can be logged by clicking add Row Figure 33 Figure 33 Add Row To start the Trending and Logging click Start Logging Figure 34 Start Logging Click Stop Logging to stop the logging Figure 35 Stop Logging Once the logging has stopped the data can be downloaded If using a Hydro View touch screen unit the data is downloaded to the attached USB memory stick If using a ...

Page 32: ...e Ethernet settings that can be used to configure the system to DHCP or Static IP address The sensor RS485 communication setup is also available in this section Figure 37 Settings 1 4 1 System Settings Temperature Units System Language Fieldbus Address Fieldbus Datasheet Version Operating system Software Version Backup Restore system settings Upgrade System Software Figure 38 System Settings Tempe...

Page 33: ...d on a USB memory stick inserted into the unit To upgrade the software click Upgrade Figure 39 and select the software upgrade file Figure 39 Upgrade Software 1 4 3 Backup Restore System Settings The Hydro Net software has the ability to create a backup of the system settings This enables a commissioning engineer to configure the system and to then retain a copy of the system to restore the unit a...

Page 34: ...l automatically determine the fastest speed available with the connected sensors on the network When set to Fixed Baud the software will attempt to communicate at the configured speed If communication at the configured speed is not possible the baud rate will be set at the maximum available for the connected sensor up to the Max Baud rate Once the Baud rate settings have been saved the current Bau...

Page 35: ...or level provides access to search for connected sensors Live values from the sensor can be displayed and the calibration pages are also enabled The Trending and logging facility is also available Engineer Engineer level provides full access to all functions 1 5 2 Default Passwords On start up the software is automatically locked To unlock the software use the following default passwords Superviso...

Page 36: ...or to manually search click the search button Figure 45 Figure 45 Search Sensor Network While the unit is searching the sensor network all other functions are disabled Figure 46 Figure 46 Search in Progress 1 7 Communication Test The Communication Test section enables the user to perform diagnostics on the optional expansion board and Alarm output 1 7 1 Alarm Output The Alarm output can be switche...

Page 37: ...rd Each input can be energised using a 24vDC signal and confirmed operational using the indicator lights The test will also calculate the Sensor address and calibration number selected using the input signals Figure 48 If the expansion board is not fitted the indicator lights will not be visible Calculated sensor Calibration values Digital Input Test Figure 48 Expansion Board Test ...

Page 38: ...Chapter 4 System Overview 38 Hydro View Hydro Hub User Guide HD0864 Rev 1 0 0 ...

Page 39: ...dro Com Internet Browser Router DHCP or Static Web API ASP NET Wireless Connections Ethernet Hydro View Hydro Hub Figure 49 Remote Access Overview 2 Remote Connection Using a Web Browser 2 1 Compatible Browsers Remote access to the Hydro View Hydro Hub is available via the following compatible web browsers Chrome Edge Firefox Safari and Internet Explorer 11 2 2 Setting up a Connection To remotely ...

Page 40: ... IP address can be located using the following steps Power up the Hydro View and open the User Accounts section Figure 50 User Accounts Log in as an engineer level user Select the system settings and open the IP Settings tab Figure 51 System Settings Record the current IP address Figure 52 IP Address Open a compatible internet browser on a machine connected to the same local network as the Hydro V...

Page 41: ... available devices Any connected devices will be listed Figure 54 Hydro Hub IP Address If more than one Hydronix Ethernet device is connected to the network ensure the IP address of any previously configured devices is known before searching It is recommended to clear the Ethernet list before searching for a Hydro Hub on the network To clear the list right click on any IP address in the list and s...

Page 42: ...he computer running the browser must have Bonjour Print Services software installed Multicast DNS must be enabled on the network 3 Remote Connection Using Hydro Com 3 1 Setting up a Connection To communicate with a sensor connected to a Hydro View Hydro Hub open Hydro Com and select Ethernet in the Sensor Setup Trending and logging or Live Display sections The software will search for any connecte...

Page 43: ...or to configure Monitor using Hydro Com 4 Web API asp net The Hydro Net API allows developers to quickly and easily interface with a Hydronix sensor network using a web service The Hydro Net API sends all data responses as JSON Objects For details on using the API see the Hydro Net API Developers Guide HD0801 ...

Page 44: ...Chapter 5 Remote Access 44 Hydro View Hydro Hub User Guide HD0864 Rev 1 0 0 ...

Page 45: ...nnected sensors on the network The available sensors will be displayed at the top of the screen Figure 58 Sensors on the Network To manually detect a sensor on the network use the search facility Figure 59 Manual Search 2 Sensor Configuration The sensor configuration section is divided into four sections 2 1 Live Values Figure 60 Live Values Selector The Live Values section displays the current ou...

Page 46: ...Available Calibrations Available Calibrations are calibrations that have been generated using the Hydro Net software and are stored in the database Each calibration has a unique number to enable selection using the optional expansion board See page 24 for details 2 2 2 Sensor Calibrations The Sensor Calibration sections enable the user to view the calibration data stored in the sensor These are th...

Page 47: ...are for all Hydronix sensors The Hydro Net software will select the relevant firmware for the specific sensor and upload the data This feature will prevent incorrect firmware uploading to a sensor which can make it inoperable Clicking the Upgrade Sensor button will invoke a file open box Browse to the downloaded file and confirm the selection The upgrade process can take a few minutes to complete ...

Page 48: ...re 65 Analogues The Analogue Configuration section enables the configuration of the following sensor settings Output Type Output Variable 1 and 2 Output Variable Mode Moisture Low and High Alarm Mode The Output Variable Mode selector configures which measurement mode is used for the output type The option is only available on Moisture and Unscaled Output types The available Measurement Modes F E V...

Page 49: ... output 2 3 4 Signal Processing Figure 67 Signal Processing The Signal Processing frame is used to configure the filtering applied to the sensors Raw output and to set the measurement mode used for the Unscaled output this facility is not available with all sensors The signal processing frame enables the following to be configured Filtering See the Configuration and Calibration Guide HD0679 for de...

Page 50: ...uto Track Configuration The Auto Track output alarm is used to indicate when the deviation in the sensor s moisture reading is below the configured limit for a set amount of time To configure Auto Track the user must calculate the maximum deviation that is acceptable As well as the deviation the user must configure the number of data points to be sampled by the sensor seconds Once configured the s...

Page 51: ... 0 to 100 and is called the Unscaled value The air Zero Unscaled and the water 100 Unscaled values are displayed and configured using the factory settings frame It is not necessary to alter these in normal operation To check if the factory settings are correct see the resonator section on page 54 To access this section enter password 0336 Note Changing the calibration may adversely affect the oper...

Page 52: ...mm Sensor Figure 71 Air Water Factory Calibration 5 Allow the working temperature of the sensor to stabilise 6 Open the Factory settings section and press the Update button next to the current Water value The software will make a measurement and the new frequency and amplitude readings will be displayed in the Water reading box Figure 72 Update Water Calibration 7 Remove the sensor from the water ...

Page 53: ... water reading based on the previous air water difference Figure 75 AutoCal When using AutoCal with a Hydro Probe Orbiter certain arm types require the selection of the type and length from the drop down menu If this option is not available the connected arm has been automatically detected by the Hydro Probe Orbiter Head Unit Figure 76 Arm Selection During the AutoCal procedure the ceramic face mu...

Page 54: ...etermining if a sensor is operating correctly The frequency and amplitude response should always be within the factory Air and Water values Page 51 With the sensor clean and with no obstructions in front of the ceramic face plate the frequency and amplitude should be very close to the factory Air value When a hand is placed on the ceramic face plate the frequency and amplitude should be within the...

Page 55: ...utput outside the configured high low limits Digital I O status Digital I O 2 mode Red light Output Analogue output has been driven beyond its upper or lower limits Sensor outside max or minimum temperature Figure 81 Current Sensor Status 2 4 3 Sensor Output Status The Sensor Output Status displays the current frequency amplitude and temperature measurements The current run time for the sensor is ...

Page 56: ...orced to a known value to confirm the correct operation To force the analogue output set the required output to a specific value and press Start The output will now stay as set until the Stop button is pressed Figure 84 Analogue Output Control Digital I O s The functionality of the digital inputs and output can be checked using the Digital Input and Output frame The current status of both Digital ...

Page 57: ...onix moisture sensors excluding the Hydro Probe have the ability to select the measurement mode used to calculate the Unscaled output To output moisture using the different measurement modes requires separate coefficients for each mode F E and V In older Hydronix sensors Pre Firmware HS0102 the sensor has to be calibrated separately in each mode to create the coefficients When Hydro Net software i...

Page 58: ... only in Hydro Net software If the calibration in the sensor was created using legacy software it is advisable to create a new calibration using the existing calibration data However this will only create a calibration in a single measurement mode If all measurement modes are required the calibration process must be re done Coefficients Set Using Hydro Hub Software Coefficients Set Using Legacy So...

Page 59: ... and Calibration Guide HD0679 or the appropriate sensor user guide for more details on how to set the averaging functionality for specific applications 2 5 2 Automatic Averaging Digital input 1 can be used to determine when to start the averaging For a bin installation the sensor input may be generated from the bin gate switch to give a 24VDC input when the gate is open The same set up can be used...

Page 60: ...s will be held constant The Unscaled values displayed next to Average Unscaled are the batch average values used in the calibration Figure 92 Batch Average Values Figure 92 Sensor Averaging Stopped Average Unscaled values are added to the calibration chart by clicking Add Row Figure 93 Add Row The Unscaled values for all available measurement modes are included in the chart Figure 94 Figure 94 Ave...

Page 61: ... selected points to the calibration graph Figure 97 Calculate Calibration Once the calculation is completed the calibration coefficients are updated and displayed on the information tab Figure 98 An R value for each measurement modes coefficients is also included The R can be used to indicate how close the data in the calibration is to the calculated best fit line An ideal calibration where the be...

Page 62: ...te measurement mode for the application Figure 100 See the Configuration and Calibration guide HD0679 for advice on selecting the most suitable measurement mode to use Calibration points and best fit lines for each measurement mode Current calibration points in the sensor for each measurement mode Figure 100 Calibration Graph Selection Panel 2 6 Quick Start Rules Quick Start Rules are only availab...

Page 63: ... no longer be used It should be noted that the Quick Start Rules have been designed around a sensor mounted at the suggested angle See the individual sensor user manuals for more information Hydro Net software enables the selection of one of five Quick Start material types 0 2mm Sand No 8 0 4mm Sand No 4 4 8mm Gravel 3 8 8 16mm Stone 0 5 0 75 16 22mm Stone 1 If however different materials are bein...

Page 64: ...ic averaging using the bin gate signal is in use confirm that Averaging is displayed on the Points page when the bin gate opens and Hold is displayed when the gate is closed If manual averaging is to be used ensure that the averaging is only started once the material is flowing and is stopped before the gate is closed or the flow stops Note If a bin gate is used to trigger the averaging the gate m...

Page 65: ...n During Averaging 7 Add the Unscaled values to the chart by clicking Add Row Figure 106 Add Calibration Row Figure 107 Average Unscaled Values Added to Chart 8 Thoroughly mix the collected material to ensure the moisture is evenly distributed 9 Weigh a clean empty heat proof bowl 150 00 g Figure 108 Clean Bowl 10 Place a minimum of 500g of the material in the bowl All other material must remain i...

Page 66: ...aboratory standards must be followed when heating especially if the material is organic as high temperatures can cause other constituents of the material to be burnt off Check industry standards for the maximum temperature suitable for the material Figure 111 Heat Material 13 Carefully break up any lumps of material using a metal spoon Do not allow any material to be lost from the bowl or to stick...

Page 67: ...e used 𝑀𝑀𝑀𝑀𝑀𝑀𝑀𝑀𝑀𝑀𝑀𝑀𝑀𝑀𝑀𝑀 𝑀𝑀𝑀𝑀 𝐵𝐵 𝐶𝐶 𝐶𝐶 𝐴𝐴 𝑥𝑥 100 Where A Weight of the empty bowl B Weight of the bowl and wet material C Weight of the bowl and the dry material In the above example the moisture calculated as 𝑀𝑀𝑀𝑀𝑀𝑀𝑀𝑀𝑀𝑀𝑀𝑀𝑀𝑀𝑀𝑀 𝑀𝑀𝑀𝑀 650 625 625 150 𝑥𝑥 100 𝑀𝑀𝑀𝑀𝑀𝑀𝑀𝑀𝑀𝑀𝑀𝑀𝑀𝑀𝑀𝑀 𝑀𝑀𝑀𝑀 25 475 𝑥𝑥 100 𝑀𝑀𝑀𝑀𝑀𝑀𝑀𝑀𝑀𝑀𝑀𝑀𝑀𝑀𝑀𝑀 𝑀𝑀𝑀𝑀 5 26 Wet Weight Moisture Content If the control process in use requires the moisture to ...

Page 68: ...earch Figure 116 Pagination 21 After the calibration points have been calculated selecting the Include column will add the points to the calibration graph Figure 117 Selected Points 22 Click Calculate to refresh the graph with the selected points Figure 118 Calibration Points Added to the Graph 23 It is now possible to evaluate the points and to inspect the best fit line that has been generated Th...

Page 69: ...ta will be available in the Sensor Calibration tab Figure 120 Sensor Calibration Tab 4 Copy a Calibration from the Sensor to the Database If the connected sensor s calibration data is not stored in the Hydro Net database it is possible to copy the data points and coefficients from the sensor to the database This enables the user to make a copy of a calibration created on a different version of Sof...

Page 70: ...Chapter 7 Calibration 70 Hydro View Hydro Hub User Guide HD0864 Rev 1 0 0 ...

Page 71: ...is greater than the selected materials quick start calibration slope set the calculated slope to the quick start calibration slope If the calculated slope is less than the selected quick start calibration slope set the calculated slope to the quick start calibration slope otherwise leave the slope as it is Recalculate intercept value from average from all points If the Unscaled value at zero moist...

Page 72: ...Appendix A Quick Start Rules 72 Hydro View Hydro Hub User Guide HD0864 Rev 1 0 0 ...

Page 73: ...nce This section lists all of the other documents that are referred to in this User Guide You may find it beneficial to have a copy available when reading to this guide Document Number Title HD0801 Hydro Net API Developers Guide HD0682 Hydro Com User Guide HD0865 Hydro View Hydro Hub Profibus Configuration Guide ...

Page 74: ...Appendix B Document Cross Reference 74 Hydro View Hydro Hub User Guide HD0864 Rev 1 0 0 ...

Page 75: ...ctory Settings Air and Water 47 AutoCal 48 Junction Box 23 Legacy Calibration Coefficients 54 Live Display Add 27 Live Values 28 Lock Display 30 Save a Display 29 Trend 28 Unlock Display 30 Mechanical Installation Air Circulation 15 18 Control Panel 16 DIN Rail 18 Mounting 15 18 Mounting Brackets 16 Panel Cut out 15 Overview 27 Live Display 27 Setup 27 Remote Access 37 Compatible Browsers 37 IP Ad...

Reviews: