E
F
G
1.
2.
3.
4.
I
H
A
B
C
D
19
S
ET
U
P
WINDING THE BOBBIN USING
THE AUXILIARY SPOOL PIN
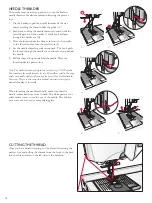
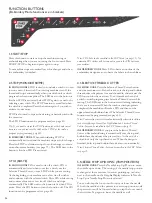
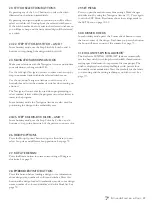
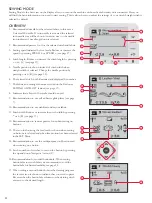
1. Place an empty bobbin on the bobbin spindle on the top
RI WKHPDFKLQH7KHEREELQRQO\ÀWVRQRQHZD\ZLWK
WKHORJRIDFLQJXS8VHRQO\R8649$51$
9,.,1*
®
bobbins.
2. Fold out the auxiliary spool pin. Place a spool cap and a
felt pad under the spool.
%ULQJWKHWKUHDGRYHUDQGEHKLQGWKHSUHWHQVLRQWKUHDG
JXLGH$DQGGRZQDURXQGWKHWKUHDGWHQVLRQGLVF%
WKHQWKURXJKWKUHDGJXLGH&DVLOOXVWUDWHG
*XLGHWKHWKUHDGWKURXJKWKHKROHLQWKHEREELQ'IURP
the inside to the outside.
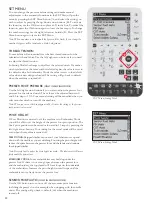
3XVKWKHEREELQVSLQGOHWRWKHULJKW$SRSXSPHVVDJH
DSSHDUVRQWKH*UDSKLF'LVSOD\+ROGWKHHQGRI WKH
WKUHDGÀUPO\ZKHQVWDUWLQJWRZLQG3UHVVWKHIRRWFRQWURO
WRVWDUWZLQGLQJ2QFHWKHEREELQEHJLQVWRZLQGFXWWKH
excess thread. When the bobbin is full it will stop rotating.
Release the foot control. Push the bobbin spindle back to
WKHOHIWUHPRYHWKHEREELQDQGFXWRII WKHWKUHDGRQWKH
thread cutter.
INSERTING THE BOBBIN
Press the ON/OFF switch to “O”.
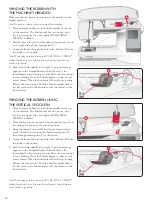
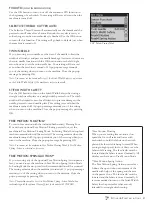
5HPRYHWKHEREELQFRYHUE\VOLGLQJLWWRZDUGV\RX
2. Place the bobbin in the bobbin case. It drops in only one
way with the logo facing up. The thread unreels from the
left of the bobbin. The bobbin will then rotate counter-
clockwise when you pull the thread.
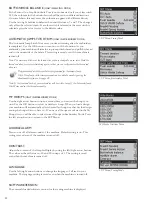
3ODFH\RXUÀQJHURQWKHEREELQWRNHHSLWIURPWXUQLQJDV
\RXSXOOWKHWKUHDGÀUPO\WRWKHULJKWDQGWKHQWRWKHOHIW
LQWRWKHWHQVLRQVSULQJ(XQWLOLW´FOLFNVµLQWRSODFH
&RQWLQXHWKUHDGLQJDURXQG)DQGWRWKHULJKWRI WKH
WKUHDGFXWWHU*6OLGHRQWKHEREE3XOOWKH
WKUHDGWRWKHOHIWWRFXW,


