39
S
EWING
M
ODE
PROGRAMMING
The programming function on your machine makes it possible
to create stitches with your own personal settings and to
combine stitches and letters into stitch programs. You can add
XSWRVWLWFKHVDQGOHWWHUVLQWKHVDPHSURJUDP6DYH\RXU
own stitches and programs in
0\6WLWFKHVDQGUHFDOOWKHPDQ\
time you like.
$OOVWLWFKHVLQ\RXUVHZLQJPDFKLQHDUHSURJUDPPDEOHH[FHSW
for buttonholes, darning stitches, button sewing and bartacks.
CREATE A STITCH PROGRAM
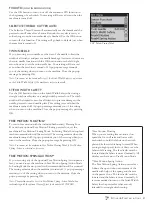
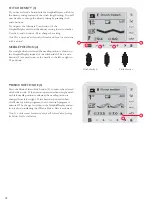
3UHVVWKH352*EXWWRQWRRSHQWKHPRGHIRU
programming.
7KH6WLWFK0HQXZKLFKZDVSUHYLRXVO\VHOHFWHGZLOOEH
NHSWZKHQHQWHULQJWKH3URJUDPPLQJ0RGH7RFKDQJH
WKHVWLWFKPHQXSUHVVWKH6WLWFK0HQXEXWWRQDQGVHOHFW
another stitch menu by using the arrow buttons.
3. Press the number of the stitch you wish to use. The stitch
ZLOODSSHDULQ3URJUDPPLQJ0RGH
4. Press the number of the next stitch and it will appear to
the right of the last entered stitch.
Note: Two numbers are displayed above the stitch program on the left
VLGHRI WKH*UDSKLF'LVSOD\7KHÀUVWQXPEHULVWKHSRVLWLRQRI WKH
selected stitch in the program. The second number, put in brackets, is
the total number of stitches in the program. The number above the
stitch program on the right side of the GraphicDisplay is the number
of the selected stitch.
ADD LETTERS
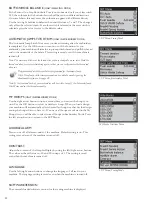
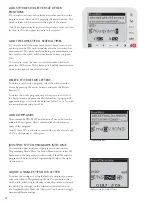
3UHVVWKH)RQW0HQXEXWWRQ8VHWKHDUURZEXWWRQVWR
VHOHFWDIRQWDQGSUHVV2.7KHPDFKLQHZLOOVKRZWKH
XSSHUFDVHDOSKDEHWLQ3URJUDPPLQJ0RGH
8VHWKHDUURZEXWWRQVWRVHOHFWDOHWWHUDQGSUHVV2.WR
add the letter to the program.
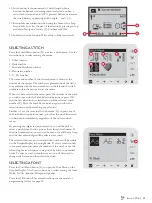
7. To switch to a lower case alphabet or numbers press the
6KLIWEXWWRQ
ABOUT PROGRAMMING LETTERS
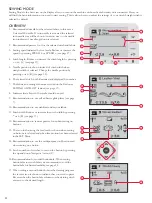
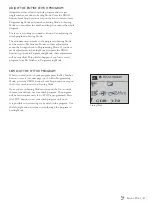
%RWKXSSHUDQGORZHUFDVHOHWWHUVZLOOEHVWLWFKHGZLWKD
7 mm stitch width. If there are letters going below the
EDVHOLQHLQFOXGHGLQWKHSURJUDPHJMS\WKHKHLJKWRI WKH
uppercase letters will be reduced.
$OOWH[WWREHVHZQRXWRQWKHVDPHSURMHFWVKRXOGEHLQWKH
same program to ensure the letters are sewn out in the same
height.
For instance, a name and an address should be in the same
SURJUDPZLWKD6723DIWHUWKHQDPH
“Husqvarna” and “VIKING” are in the same program.
“Husqvarna” and “VIKING” have been programmed separately.
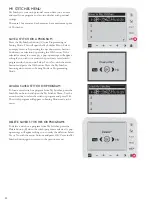
4.
6.
Programming Mode

