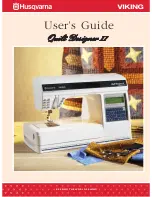
Learn your Quilt Designer II
7
1.
2.
3.
Accessory Tray / Sewing Surface
In the Accessory Tray there are special places for
presser feet, bobbins and needles plus space for
other accessories. Store the accessories in the tray so
they are easily accessible.
Slide the Accessory Tray onto the machine to
pro vide a larger work surface. Slide the Ac ces so ry
Tray to the left, passing the stop po si tion and
remove it if you wish to use the free arm.
If you need a larger work surface, there is a work
surface extension stored inside the rear cov er of the
tray.
Remove the Accessory Tray from the machine.
1. Open the rear cover of the tray and slide the work
surface extension up and out.
2. Place the work surface extension into the
Accessory Tray.
3. Slide the Accessory Tray back on to the
machine.
Summary of Contents for Quilt Designer II
Page 1: ...User s Guide KEEPING THE WORLD SEWING ...
Page 27: ...27 Utility Garment Sewing ...
Page 47: ...47 Quilting ...
Page 56: ...Quilting with Quilt Designer II 56 ...
Page 57: ...57 Decorative Sewing ...
Page 67: ...67 Care of your Quilt Designer II ...
Page 72: ...Care of your Quilt Designer II 72 ...
Page 73: ...73 Optional Stitch d Cards EmbroideryTheme ...
Page 77: ...77 Index ...


