Learn your Quilt Designer II
23
Attach Self-adhesive glide plate
Cord the buttonhole
Clearance Plate
Feed teeth
up
down
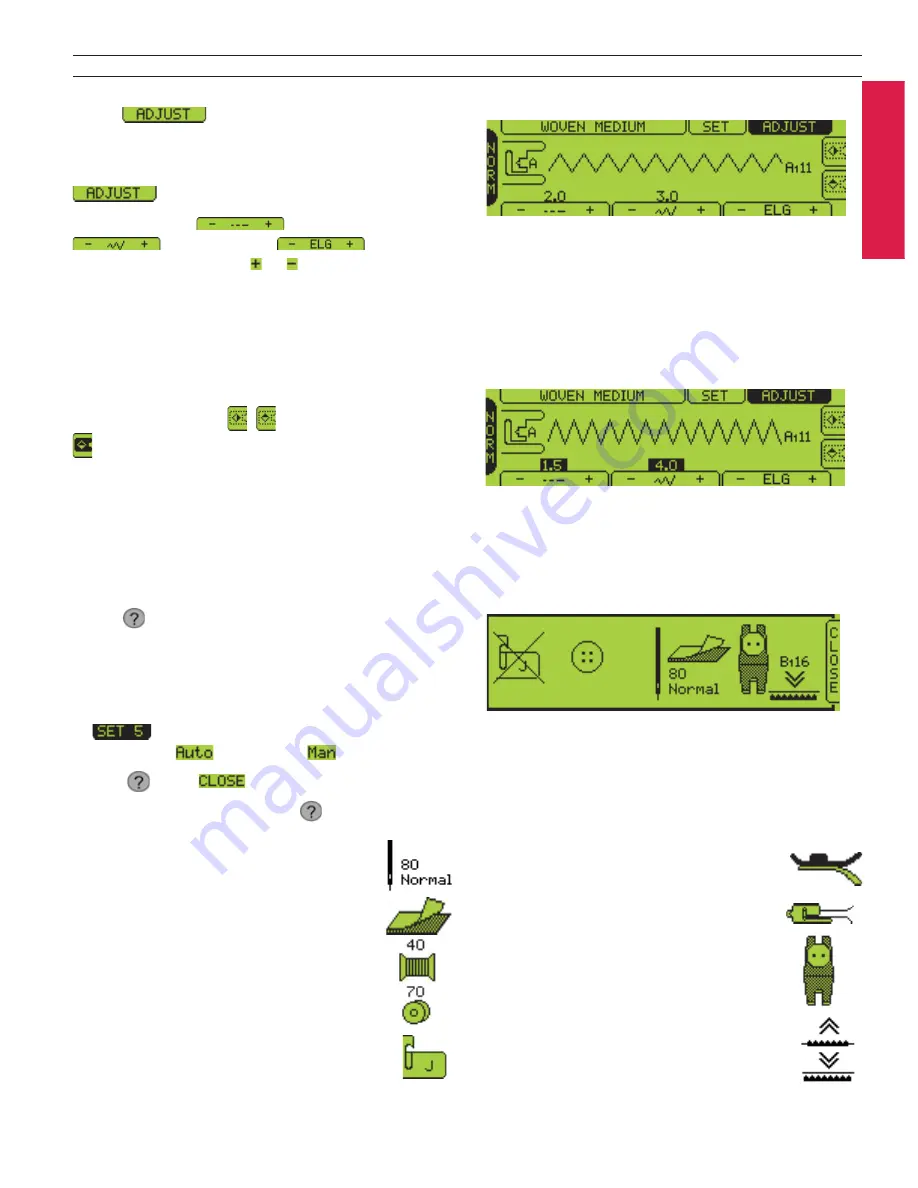
HELP Menu
Touch
in the upper right corner of the Touch
Screen and a Help Menu appears.
The Help Menu gives you information about the
selected stitch, type of needle, presser foot, sta bi liz er
etc.
In
choose to have the Help Menu appear
automatically,
or manually
(see page 22).
To exit
touch
Examples of symbols shown in
:
Needle
Stabilizer
Top thread, weight 40
Bobbin thread, weight 70
Presser foot
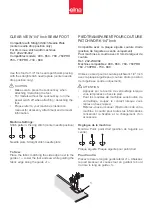
ADJUST Menu
Touch
to override default settings and
to make manual adjustments in stitch length and/
or stitch width. Elongation or mir ror imaging of
stitch es side to side and end to end are also done in
.
The stitch length
, stitch width
and elongation
can
be changed by touching or . Min i mum and
maximum settings are in di cat ed with a “beep” signal.
Note:
The elongation function is only available when
sewing sat in stitches (see page 63).
When an adjustment has been done, the number
in di cat ing the change is inverted in color, meaning
the text be comes green with black back ground. The
mirror image buttons
,
, are high light ed in black
when selected.
Settings that are not available have no number above
the tab and beep when touched.
Summary of Contents for Quilt Designer II
Page 1: ...User s Guide KEEPING THE WORLD SEWING ...
Page 27: ...27 Utility Garment Sewing ...
Page 47: ...47 Quilting ...
Page 56: ...Quilting with Quilt Designer II 56 ...
Page 57: ...57 Decorative Sewing ...
Page 67: ...67 Care of your Quilt Designer II ...
Page 72: ...Care of your Quilt Designer II 72 ...
Page 73: ...73 Optional Stitch d Cards EmbroideryTheme ...
Page 77: ...77 Index ...