4
Setup Instructions
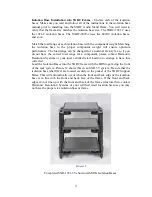
The SXRC Audio Stand consists of a frame structure and the isolation bases that
support each component. The components required to assemble the frame are
shipped in one or more boxes. The number of boxes depends on the system size.
Each box containing parts for the frame will be marked with the model number
starting with SXRC. All the wrenches required to put the frame together are
included with the shipment.
Work Surface
- Prior to unpacking any material, locate a very strong and very
stable work surface (capable of supporting 250 lb. load) or area on the floor that
will give you a very soft scratch resistant work area that is at least three feet by
three feet in size. The more space you have the better, as it will give you room to
move around the frame to complete assembly. It is important that the area be free
of all dirt, screws or small pebbles, and that it is covered with a clean soft
protective blanket of same size that will prevent damage to high quality finish on
the frame.
Unpacking Assembly Hardware
- Remove all the contents from all the boxes
marked with SXRC model number. Place all the hardware on a table adjacent to
your selected work surface and remove all the wrapping material. Be careful not
to drop or allow the anodized aluminum parts to contact each other as they may
scratch the surface. Do not stack the parts on top of each other once they are
removed from the protective packaging material. To make assembly easier group
identical parts together in an organized manner. Make sure all Struts are matched
for proper (same) length.
This audio stand will be assembled upside down. Depending on what frame
configuration you have purchased there will be a number of Support Braces that
have threaded studs already attached. Do not try to remove these threaded studs as
they are attached to the frame. These Support Braces with threads will be the top
of the audio stand.
Note:
Depending on how your SXRC audio stand frame was shipped it may arrive
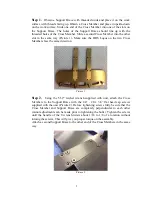
partially assembled. This means Steps 1 and 2 would have been completed so the
Support Braces and Cross Members will already be attached. If your SXRC was
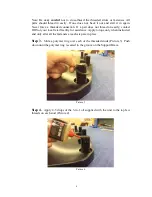
partially assembled, complete assembly by skipping Steps 1-2 and referring to the
instructions starting at Step 3.


