Hardware Components
Hardware Guide
1–9
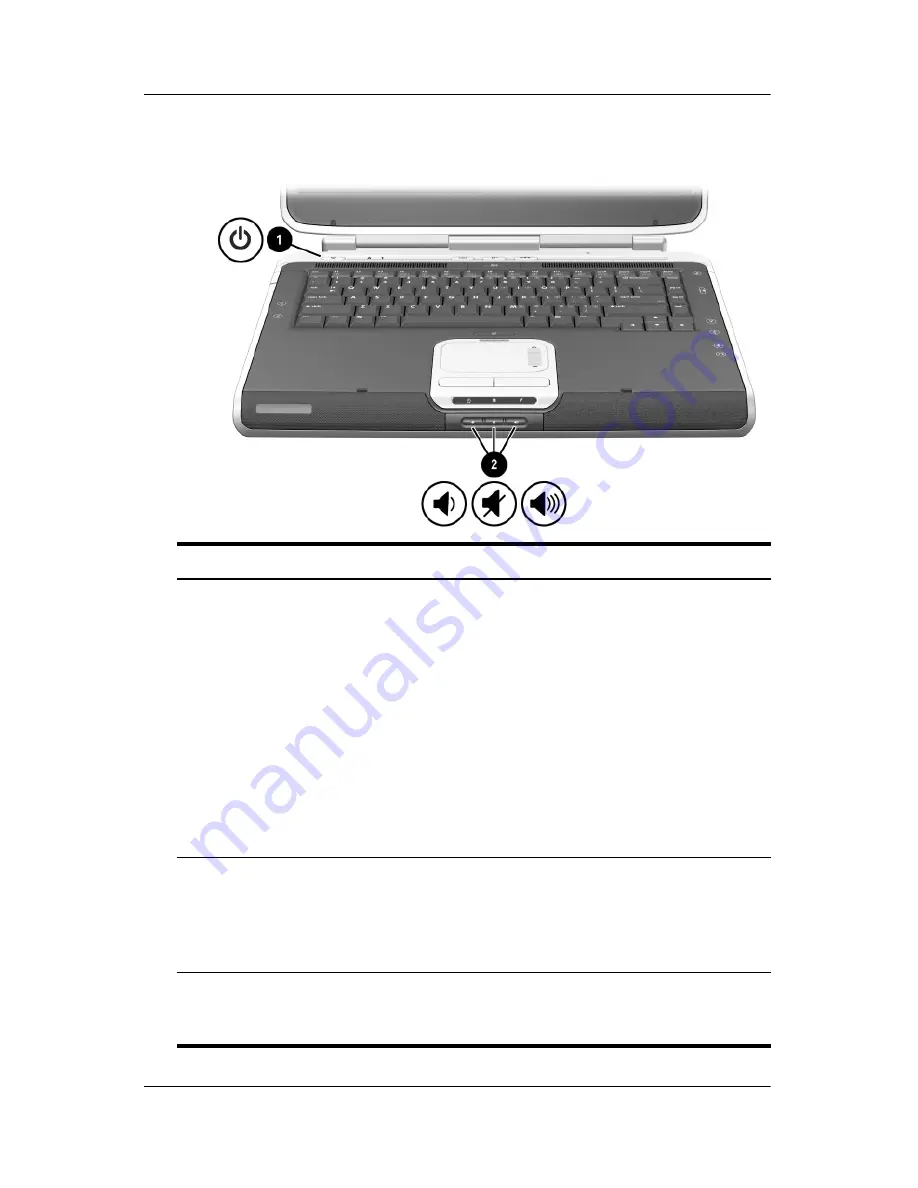
Power and Volume Controls
Component
Description
1
Power button*
When the notebook is:
■
Off, press the button to turn on the notebook.
■
On, briefly press the button to initiate Hibernation.
■
In Standby, briefly press the button to resume
from Standby.
■
In Hibernation, briefly press the button to resume
from Hibernation.
✎
If the system has stopped responding
and Windows shutdown procedures cannot
be used, press and hold the button for at least
4 seconds to turn off the notebook.
2
Volume
buttons (3)
Decrease, mute, and increase the system volume:
■
To decrease volume, use the left button.
■
To mute or restore volume, use the middle button.
■
To increase volume, use the right button.
*This table describes default settings. For information about changing the
function of the power button, refer to the “Power” chapter in the
Software
Guide on this CD.
Summary of Contents for nx9100 - Notebook PC
Page 47: ...2 6 Hardware Guide TouchPad and Keyboard Identifying hotkeys ...
Page 55: ...2 14 Hardware Guide TouchPad and Keyboard Identifying the keypad keys ...
Page 61: ...Battery Packs Hardware Guide 3 3 Inserting or removing the battery pack ...
Page 79: ...Drives Hardware Guide 4 9 Inserting a CD or DVD into an optical drive ...
Page 81: ...Drives Hardware Guide 4 11 Removing a CD or DVD from an optical drive when power is available ...
Page 89: ...Drives Hardware Guide 4 19 Connecting the Digital Drive to the USB port ...
Page 93: ...Drives Hardware Guide 4 23 I Inserting the Digital Drive into the Digital Bay ...
Page 117: ...7 4 Hardware Guide Modem and Network Connections Connecting the RJ 11 modem cable ...
Page 132: ...8 4 Hardware Guide Hardware Upgrades Inserting a PC Card ...
Page 136: ...8 8 Hardware Guide Hardware Upgrades Inserting a digital media card ...
Page 142: ...8 14 Hardware Guide Hardware Upgrades Opening the memory compartment ...
Page 144: ...8 16 Hardware Guide Hardware Upgrades Removing a memory module ...
Page 146: ...8 18 Hardware Guide Hardware Upgrades Inserting a memory module ...
Page 148: ...8 20 Hardware Guide Hardware Upgrades Closing the memory compartment ...
Page 150: ...8 22 Hardware Guide Hardware Upgrades Loosening the hard drive assembly retaining screws ...
Page 152: ...8 24 Hardware Guide Hardware Upgrades Removing the hard drive from the hard drive bracket ...
Page 154: ...8 26 Hardware Guide Hardware Upgrades Inserting the hard drive into the hard drive bay ...


