


Chapter 1
Setting Up the HP NetServer E 60
5
Configuring the System
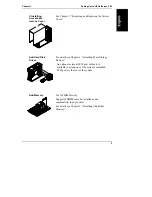
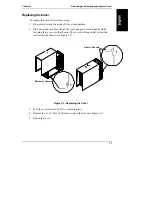
1) Connect
Peripherals
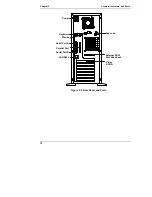
For details on rear panel interface connectors, see
Chapter 2.
For details on connecting the keyboard, mouse,
monitor, and UPS, see Chapter 8.
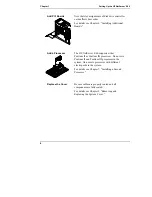
2) Boot the
HP
NetServer Navigator
CD-ROM
Turn on the monitor. Press the power-on button on
the HP NetServer, and press the eject button on the
CD-ROM drive.
Place the
HP NetServer Navigator CD-ROM
in the
drive, and close the drive. Press the Reset button. If
the system fails to restart, follow the instructions on
the screen.
When the HP Navigator starts, you can set the time
and date, and change the display language.
For details, see Chapter 9, "Configuring the Server
Using the
HP NetServer Navigator CD-ROM
."
3) Read the System
Readme File
Select
View Readme
from the HP Navigator main
menu. The Readme file contains the latest
information to help you install your HP NetServer.
4) Run Configuration/
Installation
Assistant
If you want to change the language, select
Set
Preferences
from the HP Navigator main menu and
choose a language. From the Navigator main menu,
select
Configuration and Installation Assistant
.
Select
Express
from the next screen to begin the
Express mode of configuration.
5) Choose a NOS
Select the Network Operating System (NOS) you
will install from the choices displayed.