


2 Installing Accessories in Your PC Workstation
Installing Memory
32
English
5
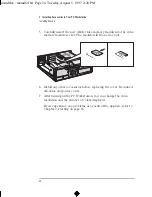
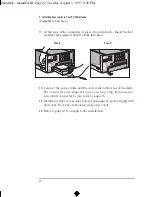
Repeat this procedure for each memory module you are installing.
6
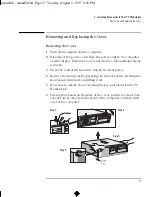
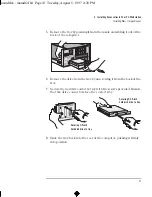
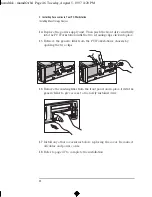
If you need to remove a memory module, gently open the retaining
clips and lift the module out of the socket.
7
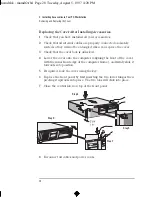
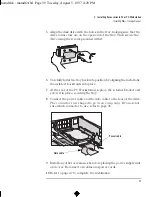
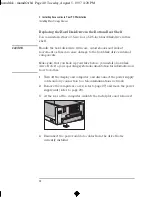
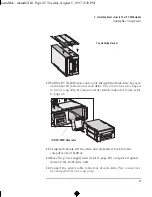
Install any other accessories before replacing the cover (refer to
page 28). Reconnect all cables and power cords.
8
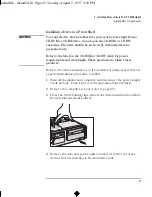
Turn on the display and then turn on the computer. The new memory
is automatically detected and configured. If you want to check this,
press the
key while
F2 Setup
is displayed at the bottom of the
screen. This displays a summary of the PC Workstation’s
configuration details
.
If you experience any problems as a result of the upgrade, refer to
Chapter 3, starting on page 55.
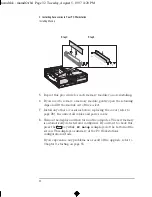
Step 3
Step 4
mamdt.bk : mamdt2.fb4 Page 32 Tuesday, August 5, 1997 4:20 PM
Summary of Contents for Kayak XA
Page 3: ...User s Guide mamdt bk title fb4 Page iii Tuesday August 5 1997 4 20 PM ...
Page 64: ...mamdt bk mamdt2 fb4 Page 54 Tuesday August 5 1997 4 20 PM ...
Page 86: ...mamdt bk mamdt3 fb4 Page 76 Tuesday August 5 1997 4 20 PM ...
Page 87: ...4 Technical Information mamdt4 fb4 Page 77 Tuesday August 5 1997 5 25 PM ...
Page 112: ...mamdt4 fb4 Page 102 Tuesday August 5 1997 5 25 PM ...
Page 128: ...mamdt bk mamdt5 fb4 Page 118 Tuesday August 5 1997 4 20 PM ...
Page 132: ...mamdt bk glossary fb4 Page 122 Tuesday August 5 1997 4 20 PM ...
Page 136: ...mamdt bk mamdt ix Page 126 Tuesday August 5 1997 4 20 PM ...
Page 148: ...mamdt bk mamdtsp fb4 Page 138 Tuesday August 5 1997 4 20 PM ...