


2.
Click on
Next
to display the second page of the wizard. (Or report an error if no tape storage
devices are currently attached to the HP D2D Backup System.)
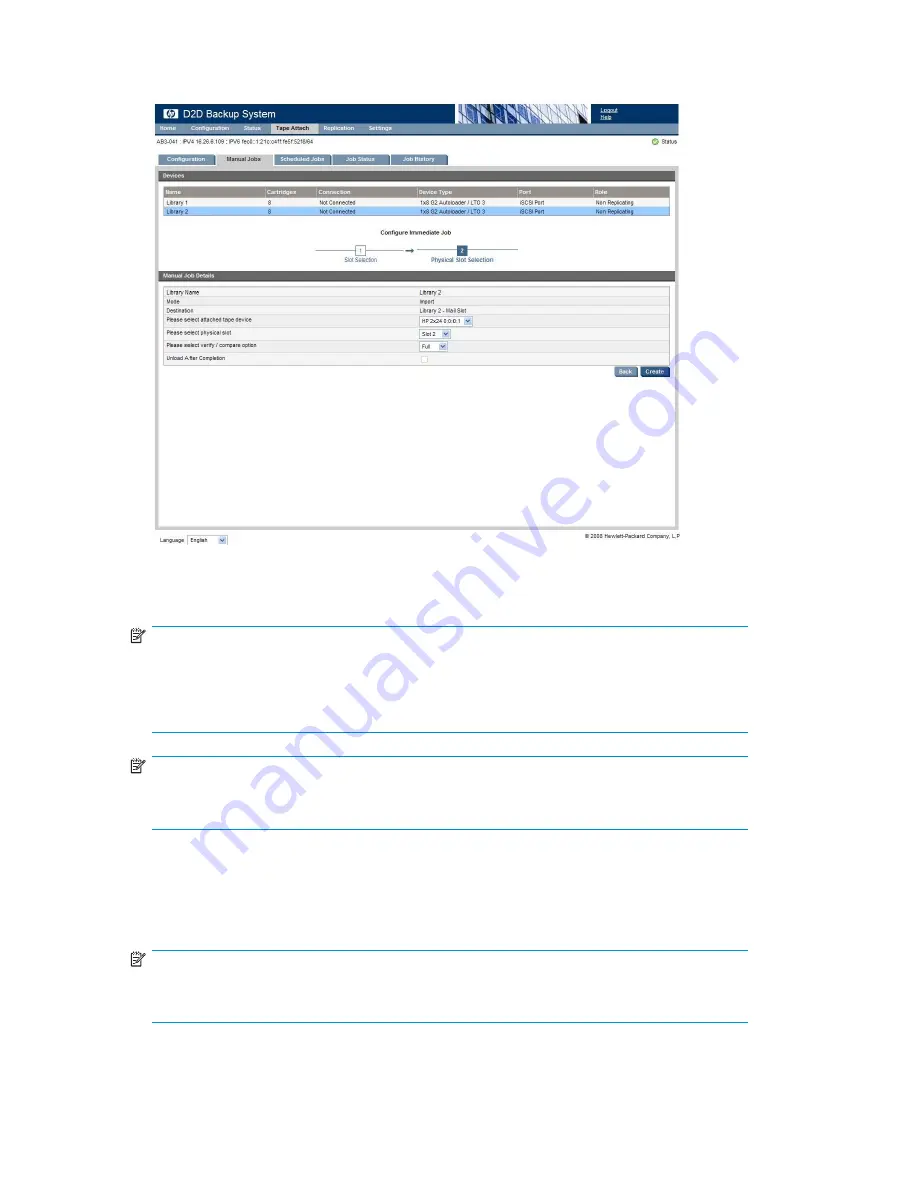
3.
Select the
attached tape storage device
from the pull-down list, the required
physical slot
if it is a
tape library, the required
verify/compare option
and whether the physical cartridge should be
unloaded
after the operation completes.
NOTE:
A
Full Verify
reads the data back after copy and compares it byte-by-byte with the original.
A
Quick Verify
also reads back the data, but only ensures that it can be read. It may save
some time if another tape device on the HP D2D Backup System is being accessed at the
same time as the copy operation.
No Verify
is the fastest option.
NOTE:
On physical tape libraries the
unload after completion
option moves the cartridge to the
mail slot if the mail slot is enabled and empty.
4.
Click
Create
.
5.
The process checks that media is loaded in the attached tape storage device and that it is blank. If it
is not blank, you are given the option of overwriting it or canceling the job. (It is not possible to
append data.) It also checks that there is cartridge data to be copied (it may have been subsequently
moved by the backup application).
NOTE:
In the case of libraries some of these checks can only be made after loading the cartridge
in a tape drive, which takes approximately one minute.
6.
The
Job Status
page is displayed and you can view progress in the
fi
nal column.
132
Using Tape Attach
Summary of Contents for D2D100
Page 16: ...16 About this guide ...
Page 26: ...26 Before you start ...
Page 56: ...56 Advanced installation ...
Page 86: ...86 Configuring and using replication ...
Page 150: ...150 Restore processes without replication ...
Page 156: ...156 Troubleshooting ...
Page 172: ...172 Hard disk replacement ...


