


2-17
Installing the Switch
Installation Procedures
6. Installing or Removing SFPs
You can install or remove an SFP from an SFP slot without having to power
off the switch. Use only HP SFPs (see
Table 1-1 on page 1-4
).
C a u t i o n
Hot swapping transceivers is supported. You can install or remove a
transceiver with the switch powered on, a reset will not occur. However, rapid
hotswaps are not recommended. Wait a few seconds for the Mode LED to turn
on (during initialization), and then turn off.
N o t e s
Ensure the network cable is NOT connected when you install or remove an
SFP.
C a u t i o n
Use only supported genuine HP SFPs with your switch. Non-HP SFPs are not
supported, and their use may result in product malfunction. Should you
require additional HP SFPs, contact your HP Networking Sales and Service
Office or authorized dealer.
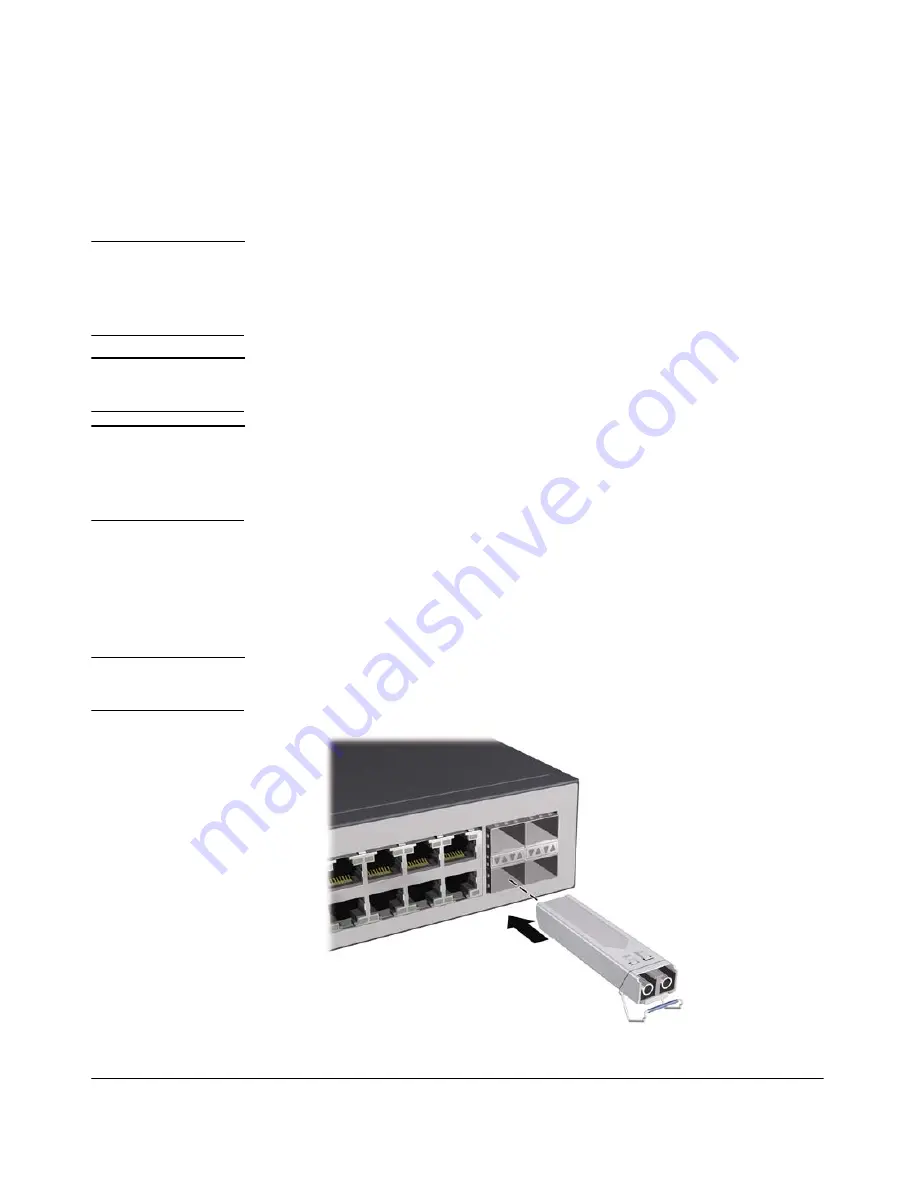
Installing the SFPs:
Remove the protective plastic cover and retain it for later use. Hold the SFP
by its sides and gently insert it into any of the slots on the switch until the SFP
clicks into place.
W A R N I N G
The fiber-optic HP SFPs are Class 1 laser devices. Avoid direct eye
exposure to the beam coming from the transmit port.
Figure 2-10. Installing an SFP
Summary of Contents for 2530-24
Page 2: ......
Page 3: ...HP 2530 Switch Series Installation and Getting Started Guide ...
Page 22: ...1 14 Introducing the Switch Switch Features ...
Page 48: ...2 26 Installing the Switch Sample Network Topologies ...
Page 54: ...3 6 Configuring the Switch Using the IP Address for Remote Switch Management ...
Page 68: ...4 14 Troubleshooting HP Customer Support Services ...
Page 82: ...A 14 Specifications Twisted Pair Cable Connector Pin Outs ...
Page 89: ...B 7 Safety and EMC Regulatory Statements Safety Information China Safety Information China ...
Page 91: ...B 9 Safety and EMC Regulatory Statements EMC Regulatory Statements Korea Taiwan ...
Page 92: ...B 10 Safety and EMC Regulatory Statements EMC Regulatory Statements ...
Page 98: ......


