

3.
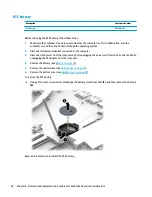
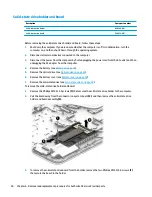
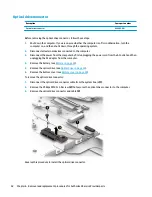
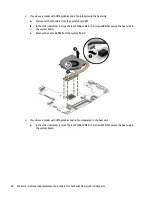
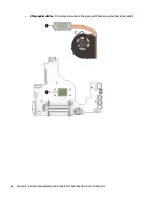
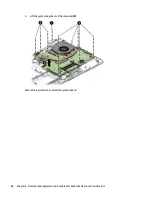
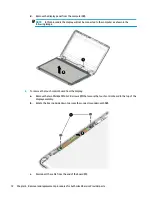
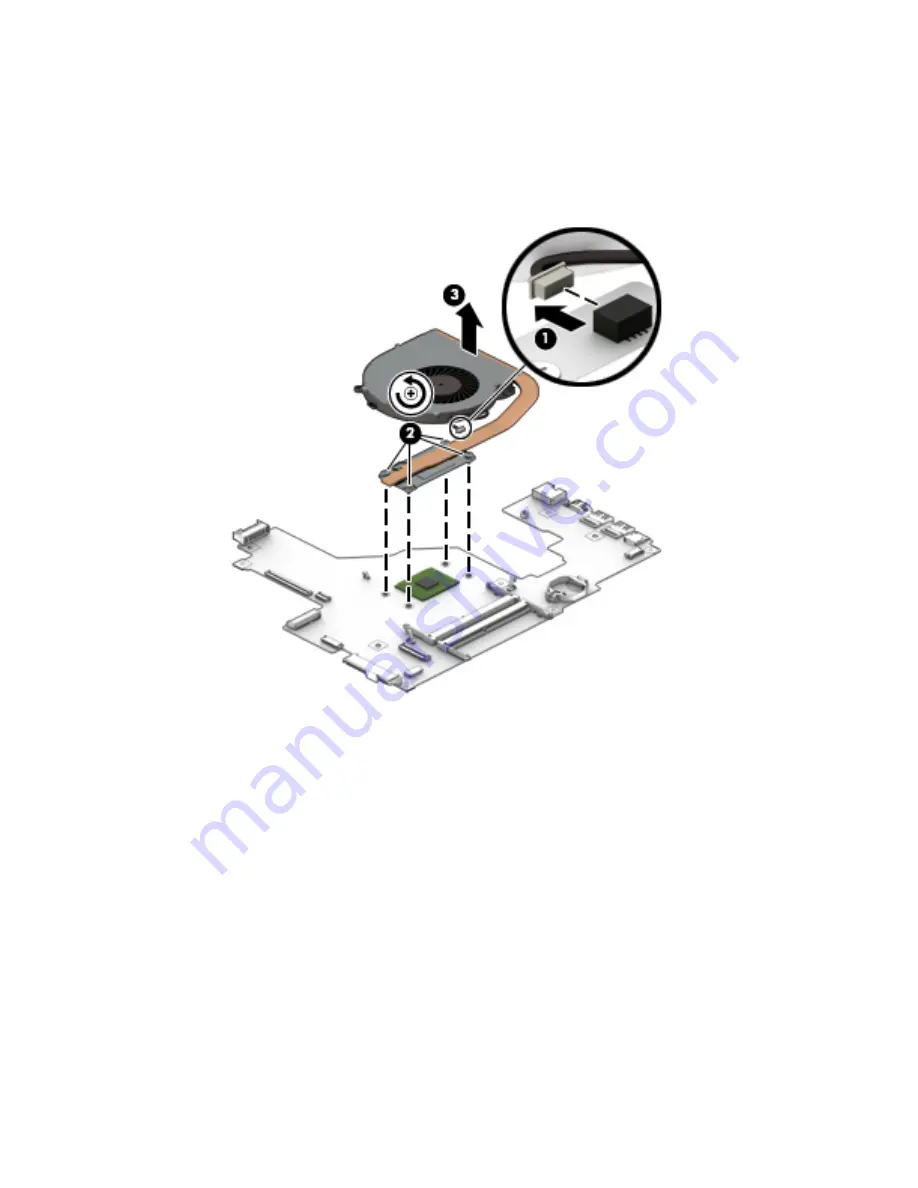
If you have a model with UMA graphics and a fan integrated in the heat sink:
a.
Disconnect the fan cable from the system board (1).
b.
In the order indicated, remove the four Phillips PM2.0×3.0 screws (2) that secure the heat sink to
the system board.
c.
Remove the heat sink (3) from the system board.
4.
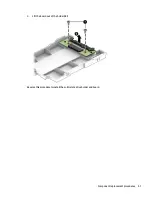
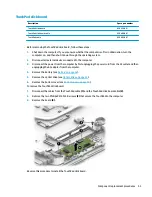
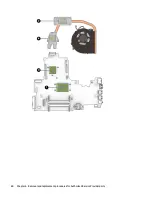
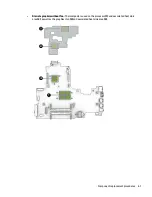
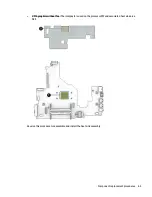
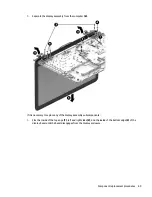
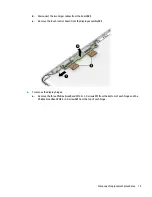
If you have a model with UMA graphics and no fan integrated in the heat sink:
a.
In the order indicated, remove the four Phillips PM2.0×3.0 screws (1) that secure the heat sink to
the system board.
58
Chapter 6 Removal and replacement procedures for Authorized Service Provider parts
Summary of Contents for 17-x Series
Page 1: ...HP Notebook PC Intel Models HP 17 x000 17 x099 Maintenance and Service Guide ...
Page 4: ...iv Safety warning notice ...
Page 8: ...viii ...
Page 14: ...6 Chapter 1 Product description ...
Page 29: ...Display assembly subcomponents Display assembly subcomponents 21 ...
Page 34: ...26 Chapter 3 Illustrated parts catalog ...
Page 68: ...60 Chapter 6 Removal and replacement procedures for Authorized Service Provider parts ...
Page 96: ...88 Chapter 8 Backing up restoring and recovering in Windows 10 ...
Page 102: ...94 Chapter 10 Specifications ...
Page 106: ...98 Chapter 11 Power cord set requirements ...
Page 108: ...100 Chapter 12 Recycling ...
Page 112: ...104 Index ...