


11 - 4
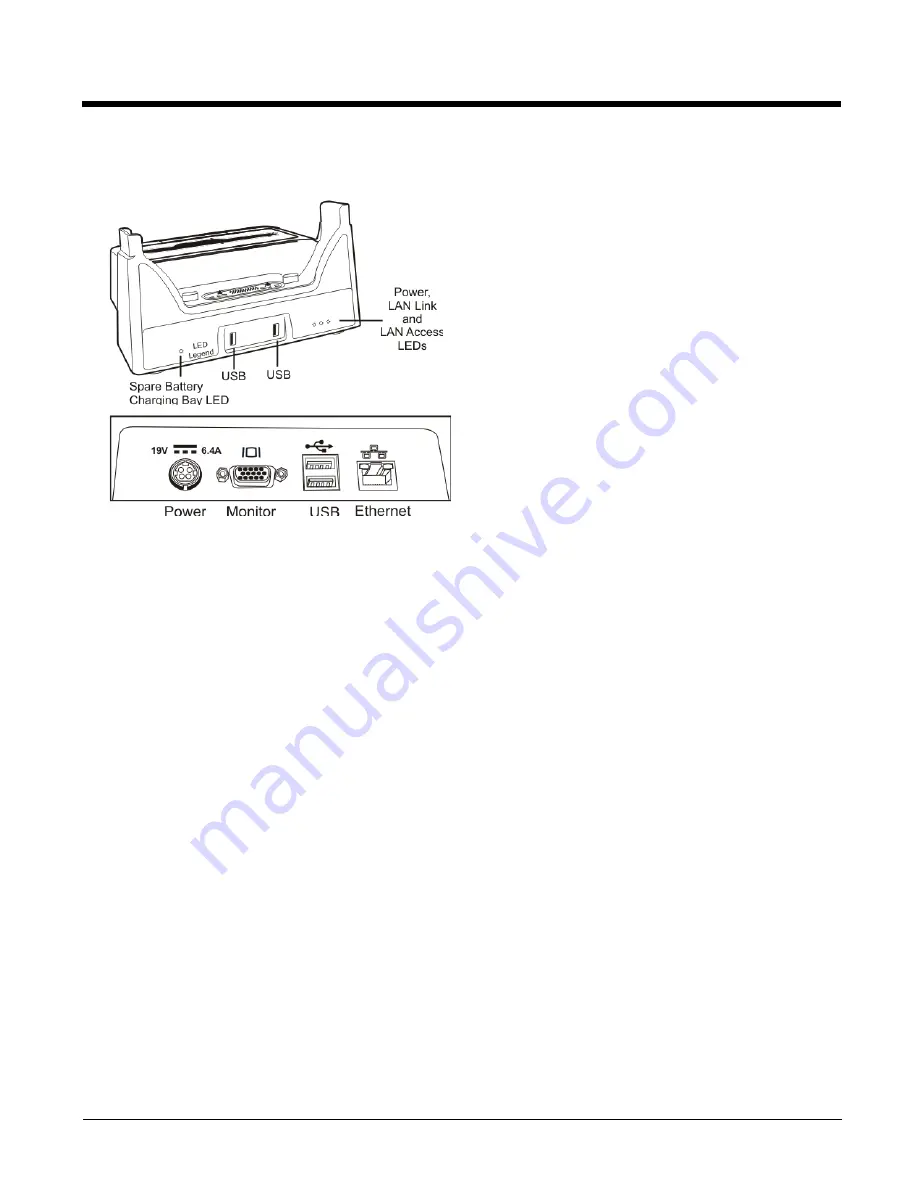
Connect Cables
Note: Route all cables to ensure they are protected from jostling, tugging or being disconnected by passing objects.
Power Port
Insert the dock end of the AC adapter cable assembly in this port. The Power LED on the front of the dock illuminates
when the dock is receiving AC power.
Serial Monitor Port
An external serial monitor cable can be connected to this port.
USB Ports
The Marathon dock has four USB 2.0 ports, two on the front of the dock and two on the rear of the dock. USB ports on
the dock support hot swapping.
Ethernet Connector
A standard RJ45 Ethernet connector is located on the back of the dock. Connecting an Ethernet cable to this port pro-
vides a Gigabit Ethernet connection. When a LAN connection is made via cable, the appropriate LAN LED on the front
of the dock is illuminated. A second LAN LED indicates LAN activity.
Using a Dock and a Second Monitor
Prerequisite: The Marathon is in the Dock, and a second monitor is attached to the dock. The Marathon display driver has
been setup to extend the Marathon display to the second monitor.
Use a connected USB mouse to select items on the displays. The mouse can be connected to the Marathon or the desktop
dock. When the Marathon display driver is setup to extend the Marathon display to the second monitor, cursor calibration on
the Marathon touch display is offset. Do not use the touch panel on the Marathon to select items on the display. When a
cabled USB mouse is used, the touch screen calibration is correct.
Summary of Contents for Marathon
Page 12: ...x ...
Page 16: ...1 4 ...
Page 38: ...3 8 ...
Page 50: ...5 8 ...
Page 128: ...6 78 ...
Page 160: ...9 4 ...
Page 178: ...11 10 Front View ...
Page 186: ...11 18 ...
Page 192: ...12 6 ...
Page 277: ...13 85 6 7 8 9 Cancel ...
Page 282: ...13 90 ...
Page 285: ...Back Cvr 1 ...


