SETUP OPTIONS
5–23
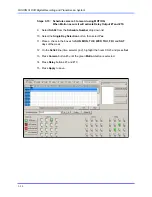
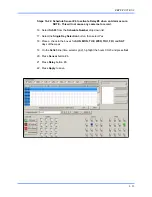
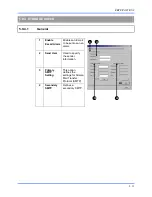
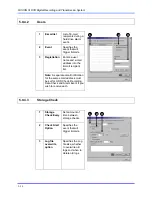
Steps 1-8: Schedule cameras 1 and 2 to be activated on Sensor # 3 and/or
Sensor #5 which will then activate Relay Output #7 and #13.
1.
Select
Sch01
from the
Schedule Number
drop down list.
(This should already be selected by default.)
2.
Select
the
Single Day Selection
button, then select
Yes
.
3. Place a check in the boxes for
SUN
,
MON
,
TUE
,
WED
,
THU
,
FRI
, and
SAT
days
of the week.
4.
On
the
Sch01
line (time selector grid), highlight the hours 00-23 and press
Set
.
5.
Press
Camera
buttons #1 and #2 until the Red
Sensor
buttons are selected.
6.
Press
Sensor
buttons #3 and #5.
7.
Press
Relay
buttons #7 and #13.
8.
Press
Apply
to save.
Summary of Contents for FUSION III DVR
Page 2: ...ISSUE DATE REVISIONS 1 June 2006 Initial Release 2 August 2006 Updated for content ...
Page 13: ......
Page 14: ......
Page 19: ......
Page 20: ......
Page 43: ...DVR BASICS 4 9 NOTES ...
Page 44: ......
Page 58: ...FUSION III DVR Digital Recording and Transmission System 5 14 5 5 2 FRAME SETUP LOW END ...
Page 134: ......
Page 142: ...FUSION III DVR Digital Recording and Transmission System 11 4 NOTES ...
Page 150: ...FUSION III DVR Digital Recording and Transmission System 12 8 NOTES ...
Page 156: ...FUSION III DVR Digital Recording and Transmission System 13 6 NOTES ...
Page 160: ...FUSION III DVR Digital Recording and Transmission System 14 4 NOTES ...
Page 164: ......
Page 165: ......
Page 166: ......
Page 167: ......


