6. Screen Display Setting
44
A11766820A
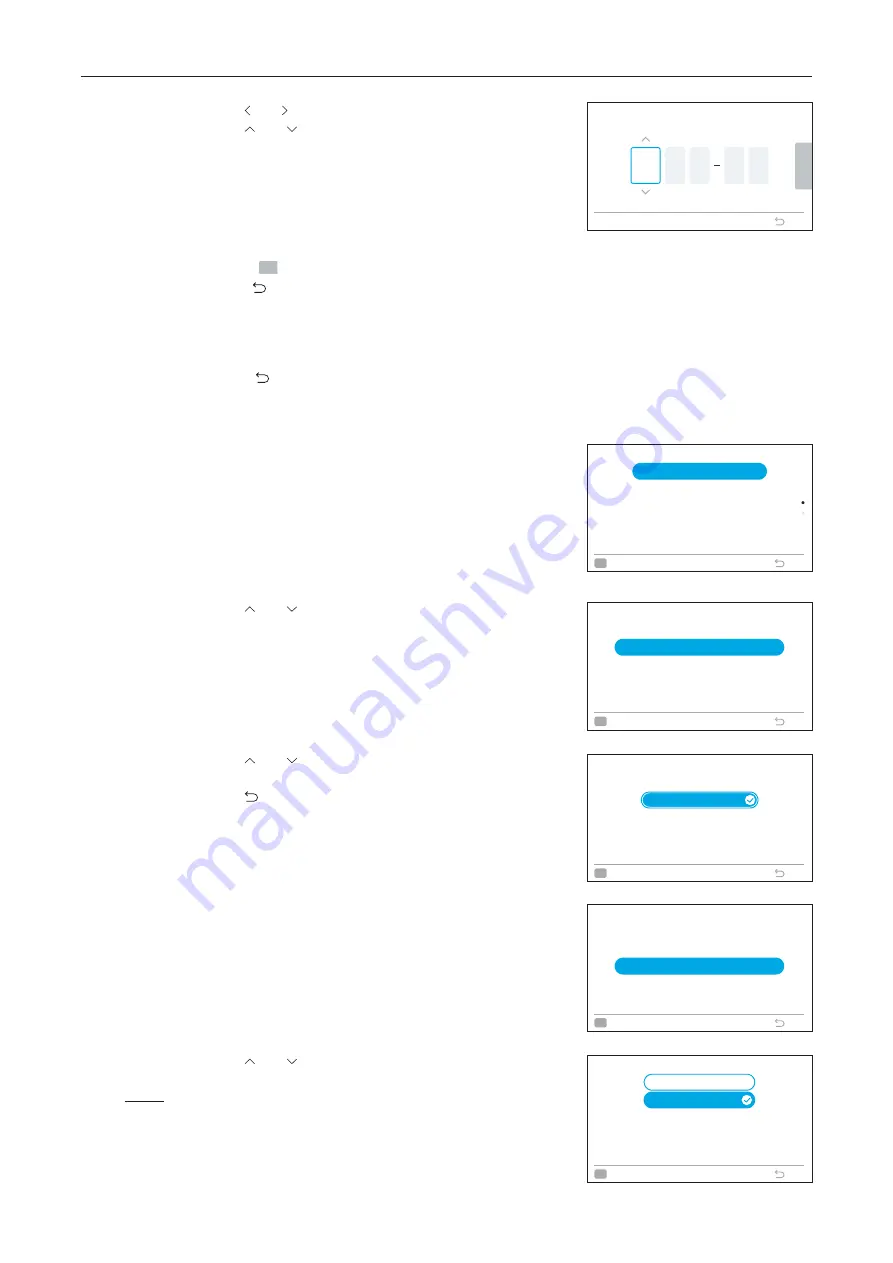
Step3. Press " " or " " to select "yyyy/mm/dd/hh/mm".
Press " " or " " to change the setting.
Step4. After making all settings,
If select "
OK
" and press "OK", the screen returns to Step2.
If press" ", the confirmation screen is displayed.
Select "Save" and press "OK" to confirm the setting and
the screen returns to Step2.
Select "Not Save", it returns to Step2 without any setting
changes.
If press " " again, it returns to Step3.
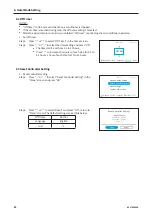
6.1.2 Time Format
1. Set time format
Step1. Select "Adjusting Date/Time" on the "Screen Display
Setting" screen and press "OK".
Step2. Press " " or " " to select "Time Format" and press "OK".
Step3. Press " " or " " to select 24 hour or 12 hour and press
"OK".
Press " " to return to Step2.
Adjusting Date/Time
2020
Y
M
06
H
00
D
01
M
19
OK
Back
Select OK to confirm
Adjusting Date/Time
Daylight Savings Time
Adjusting Date/Time
Time Format (AM/PM or 24Hour)
OK
Select
Back
(Mon) 16:30
Time Format
12Hour (11:04 AM)
24Hour (11:04)
OK
Sel
e
ct
Back
Screen Display Setting
Language Setting
Display Adjustment
Temperature
Run Indicator Brightness
Adjusting Date/Time
OK
Select
Back
(Mon) 16:30
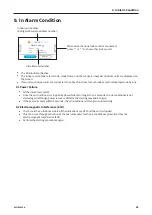
6.1.3 Daylight Savings Time
This function adjusts time forward or backward an hour when
daylight savings time starts or ends.
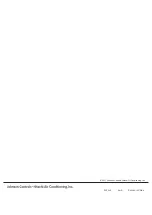
1. Set daylight savings time
Step1. Select "Daylight Savings Time" on the "Adjusting
Date/Time" screen and press "OK".
Step2. Press " " or " " to select the setting and press "OK".
NOTE:
•
In the same refrigerant system, this function can be set only on
one wired controller. Once set, the function is automatically
synchronized to the other wired controllers. Therefore, in the
same refrigerant system, you do not need to set this function on
multiple wired controllers simultaneously.
Adjusting Date/Time
Daylight Savings Time
Adjusting Date/Time
Time Format (AM/PM or 24Hour)
OK
Select
Back
(Mon) 16:30
Daylight Savings Time
OK
Sele
c
t
Back
Put 1h forward
Not Set
Put 1h backward


