12
5.1 Confirmation before power up the inverter
Please confirm the followings before operation.
(1) Connection of the power input (R,S,T, L1,N) and motor (U/T1, V/T2, W/T3) is correctly connected. Otherwise there is a risk of inverter failure.
(2) There must be no incorrect-connection of the control wiring. Otherwise there is a risk of inverter failure.
(3) Earth grounding is properly connected. Otherwise there is a risk of electric shock.
(4) There is no ground fault other than earth grounding terminal. Otherwise there is a risk of inverter failure.
(5) There must be no short circuit such as wire strands or chips etc., there must be no tools left inside the inverter. Otherwise there is a risk of
inverter failure.
(6) There must be no short circuit or ground fault at the output side. Otherwise there is a risk of inverter failure.
(7) Front cover must be closed. Otherwise there is a risk of inverter failure.
5.2 Changing parameters
One of the following is required when changing parameters on NE-S1 series inverters.
(1) Dedicated operator (NES1-OP)
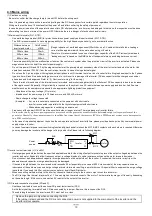
The operator (NES1-OP) is used with integration onto the inverter. It is not possible to use the operator external with cable.
(2) Digital operator (OPE-SRmini,OPE-S/SR/SBK)
Digital operator can be used with connector cable (ICS-1,3) and connected to the RS422/RS485 port (RJ45) in the inverter. Turn the
changeover switch to the operator side (OFF side) in that case (See page 9). Refer to the manual for each operator for the detailed information.
(3) 5-line LCD operator (WOP)
WOP having serial number of “16918938000081” or later (2011/07 production) is applied to NE-S1 series inverter. (English only)
WOP can be used with connector cable (ICS-1,3) and connected to the RS422/RS485 port (RJ45) in the inverter. Turn the changeover switch
to the operator side (OFF side) in that case (See page 9). Refer to the manual for WOP for the detailed information.
(4) PC programming tool (ProDriveNext)
ProDriveNext Version “1.2.33.000” and later is applied to the NE-S1 series inverter.
PC can be used with connector cable (ICS-1,3) and connected to the RS422/RS485 port (RJ45) in the inverter. Turn the selection switch to the
operator side (OFF side) in that case (See page 9). Refer to the manual for ProDriveNext for the detailed information.
NOTE: It is necessary to turn power off to store the changed data.
5.3 Power up the inverter
(1) Power up the inverter after confirming the items shown in above section 5.1.
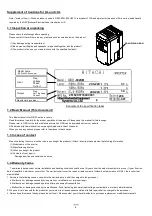
(2) Confirm the LED is emitting like shown below.
- Standard panel : Confirm that both PWR lamp and Key valid lamp are emitting
- Dedicated operator (NES1-OP) : Confirm that the PWR lamp is emitting. Display will be the one set by b038 (Initial display selection).
“0.00(output frequency monitor)” will be displayed under default condition.
(3) Refer to section “5.4 Operating the inverter” and set required parameters. And then refer to section “5.5 Motor operation”.
Note 1) It will take around 1.5 seconds for the inverter to be ready(each LED emits). Please take in account this delay in case of an application ,
for which this delay will be important.
Standard panel

