• Place cardboard or an old blanket on floor in order to protect the surface of the working table.
• Place the table saw assembly (A) upside down on the protective material.
•
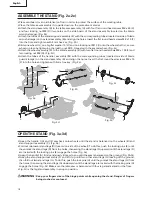
Attach the stand assembly (B) to the table saw assembly (A) with four flat round head screws M8 x 45 (C)
and four locking nut M8 (D)(two holes on the side board of the stand assembly located on the blade
wrench storage). (Fig. 2a)
•
Attach the tubes of the stand support assembly (E) with the corresponding tubes (located on side of blade
wrench storage) on the stand assembly (B) and align the holes. Insert the flat round head screws M8 x 10 (F)
into the hole and tighten with 5mm hex key. (Fig. 2b)
•
Slide one wheel (G), one big flat washer 10 (H) and one locking nut M10 (I) onto the wheel shaft (J), secure
wheel in place by tightening the locking nut M10. Repeat with the second wheel. (Fig. 2c)
•
Attach the wheel assembly (K) to the stand assembly (B) with two flat round head screws M8 x 100
(L) and
two locking nut M8 (D). (Fig. 2d)
•
Attach the tubes of the handle I assembly (M) with the corresponding tubes (located on side of blade
guard storage) on the stand assembly (B) and align the holes. Insert the flat round head screws M8 x 10
(F) into the hole and tighten with 5mm hex key. (Fig. 2e)
ASSEMBLE THE STAND (Fig. 2a-2e)
•
Grasp the handle I (A) and tilt saw back onto wheels until the stand is balanced on the wheels (B) and
stand support assembly (C). (Fig. 3a)
•
Fold out two lower stand legs (D) (located on side of the wheel). To do this, push the locking pins (E) until
they unlock the stand legs (D) from the holes, then swing the stand legs (D) upward until the stand legs (D)
are locked with the locking pins (E) engage the holes. (Fig. 3a)
•
Grasp the handle I (A) firmly and slowly tilt saw to you until the saw is balanced on the ground. (Fig. 3b-3c)
•
Grasp the stand support assembly (F) and lift it up until two other stand legs (G) leaving off the ground,
then fold out two stand legs (G). To do this, push the lock pins (H) until they unlock the stand legs (G) from
the holes, then swing the stand legs (G) downward until the stand legs are locked with the locking pins (H)
engage the holes. (Fig. 3c) Make sure the table saw is balanced with four leg stands stand on the floor.
• Fig. 3d is the leg stand assembly in an open position.
OPEN THE STAND (Fig. 3a-3d)
Fig. 2a
Fig. 2d
Fig. 2e
Fig. 2b
Fig. 2c
18
English
WARNING:
Keep your fingers clear of the hinge points while opening the stand. Danger of fingers
being crushed or contused.
B
A
C
F
D
E
M
I
L
F
K
B
G
H
B
J
B
D


