


HIKVISION DS-8100-S User‟s Manual
64
Figure 8. NTP Settings Menu
4.
Check the
NTP
checkbox to enable feature.
5.
Set NTP settings:
• Synchronize Every:
Time in minutes to synchronize with NTP server.
• NTP Server:
IP address of NTP server.
6.
Click OK to save and exit menu.
Note:
Time synchronization interval has a range of 0-10080ms, normally 7200ms. If the DVR is used on a public
network, you should use a NTP server that has a time synchronization function, such as the server at the National Time
Center (IP Address: 210.72.145.44). If the DVR is setup in a more customized network, NTP software can be used to
establish a NTP server used for time synchronization.
Configuring a Remote Alarm Host
With a remote alarm host set, the DVR will send a signal to the host when an alarm is triggered. The remote alarm host
must have the Network Video Surveillance software installed.
To set up a remote alarm host:
1.
Enter Network settings menu by clicking Menu > Setting > Network.
2.
Select the
Advanced
tab.
3.
Click the Set butt next to
Host/Others
to enter the Host/Others menu, as shown in Figure 9.
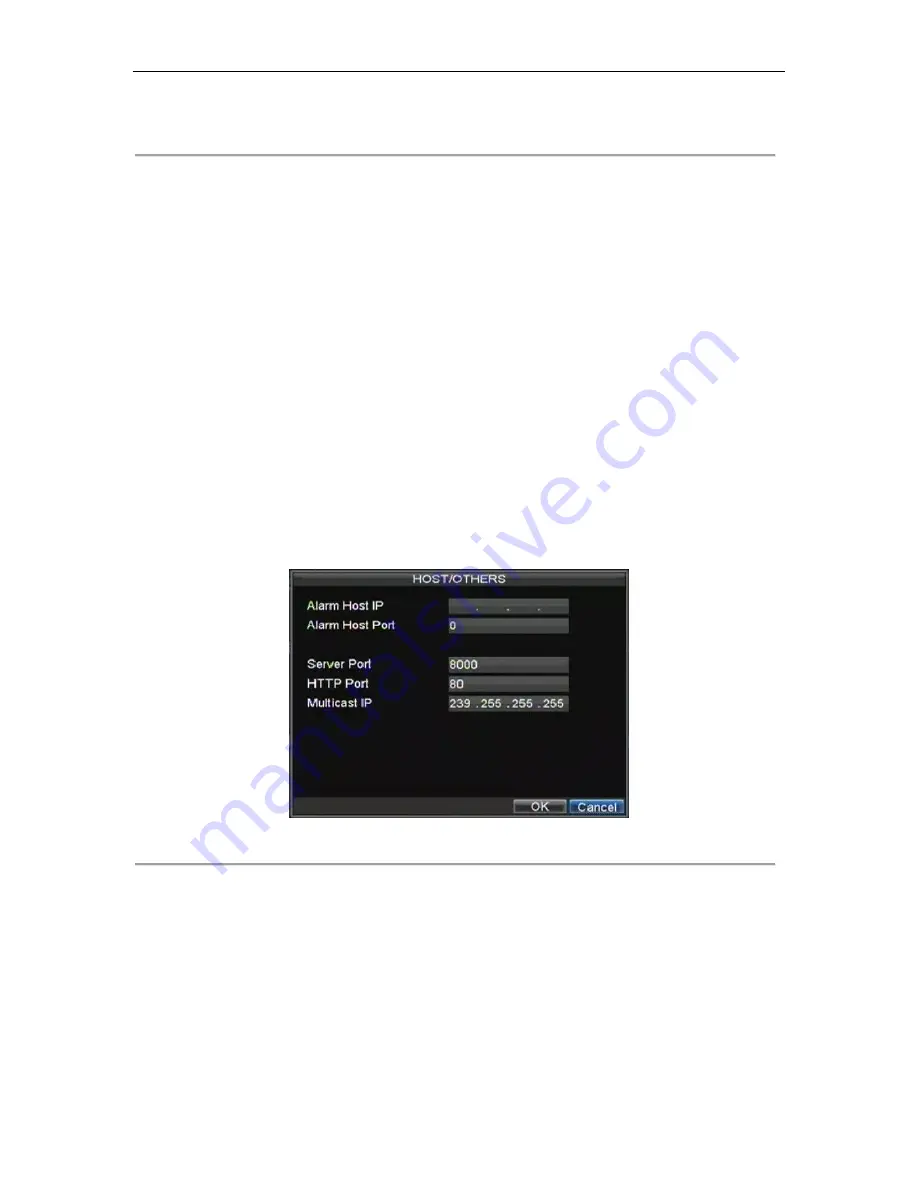
Figure 9. Host/Others Menu
4.
Enter
Alarm Host IP
and
Alarm Host Port
. Alarm Host IP is the IP of the remote PC which has the
Network Video Surveillance software installed. The Alarm Host Port must be the same as software‟s
alarm monitor port (default port is 7200).
Configuring Multicast
Setting up multicasting solves limitation issues when streaming videos through a network access device. A multicast
address spans the Class-D IP range of 224.0.0.0 to 239.255.255.255. It is suggested that the IP address range of
239.252.0.0 to 239.255.255.255 be used.
Summary of Contents for DS-8100-S Series
Page 1: ...HIKVISION DS 8100 S User s Manual 1 DS 8100 S Series DVR USER S MANUAL ...
Page 7: ...HIKVISION DS 8100 S User s Manual 7 C H A P T E R 1 Introduction ...
Page 17: ...HIKVISION DS 8100 S User s Manual 17 C H A P T E R 2 Getting Started ...
Page 24: ...HIKVISION DS 8100 S User s Manual 24 C H A P T E R 3 Live Preview ...
Page 29: ...HIKVISION DS 8100 S User s Manual 29 C H A P T E R 4 Record Settings ...
Page 38: ...HIKVISION DS 8100 S User s Manual 38 C H A P T E R 5 Playback ...
Page 43: ...HIKVISION DS 8100 S User s Manual 43 Figure 7 Digital Zoom Area Selection ...
Page 44: ...HIKVISION DS 8100 S User s Manual 44 C H A P T E R 6 Backup ...
Page 49: ...HIKVISION DS 8100 S User s Manual 49 C H A P T E R 7 Alarm Settings ...
Page 59: ...HIKVISION DS 8100 S User s Manual 59 C H A P T E R 8 Network Settings ...
Page 67: ...HIKVISION DS 8100 S User s Manual 67 C H A P T E R 9 PTZ Controls ...
Page 73: ...HIKVISION DS 8100 S User s Manual 73 6 Click OK to save and exit from menu ...
Page 74: ...HIKVISION DS 8100 S User s Manual 74 C H A P T E R 1 0 Camera Management ...
Page 78: ...HIKVISION DS 8100 S User s Manual 78 C H A P T E R 1 1 HDD Management ...
Page 84: ...HIKVISION DS 8100 S User s Manual 84 C H A P T E R 1 2 DVR Management ...
Page 96: ...HIKVISION DS 8100 S User s Manual 96 C H A P T E R 1 3 Appendix ...


